소개
This guide will show you how to replace the Wi-Fi card in a MSI MS-1782 laptop. If you are having trouble connecting to the Wi-Fi after exhausting all software fixes, use this guide to replace the Wi-Fi card. There are also steps you should do before the disassembly, like unplugging the battery.
필요한 것
-
-
Remove five 6.6 mm screws from the edges of the bottom cover using a JIS #1 screwdriver.
-
Remove one 5.6 mm screw from the center of the bottom cover using a JIS #1 screwdriver.
-
-
-
-
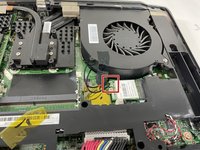
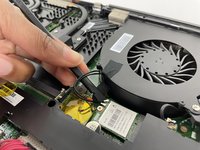
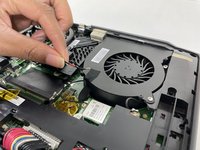
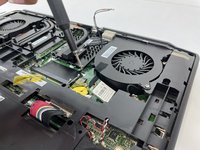
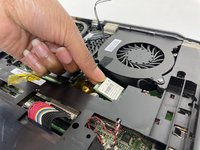
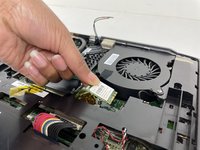
Use the flat end of a spudger to detach the two antenna cables from the Wi-Fi card.
-


To reassemble your device, follow these instructions in reverse order and make sure you put the antenna wires back in the correct order.

팀

University of New Orleans, Team 4-4, McDonald Spring 2023 University of New Orleans, Team 4-4, McDonald Spring 2023 회원
UNO-MCDONALD-S23S4G4
3 회원들
안내서 7개를 작성함