주요 콘텐츠로 건너뛰기

Mac Pro Late 2013 Fan Assembly Replacement

단지 전제 조건
이 안내서는 다른 가이드의 선행 작업으로 사용하기 위한 것입니다. 그 자체로는 불완전합니다.

필요한 것

  1. Mac Pro Late 2013 Fan Assembly Replacement, Fan Assembly: 1 단계, 이미지 1/3 Mac Pro Late 2013 Fan Assembly Replacement, Fan Assembly: 1 단계, 이미지 2/3 Mac Pro Late 2013 Fan Assembly Replacement, Fan Assembly: 1 단계, 이미지 3/3
    • Remove five 5.1 mm T10 Torx screws from around the outer perimeter of the fan assembly.

  2. Mac Pro Late 2013 Fan Assembly Replacement: 2 단계, 이미지 1/2 Mac Pro Late 2013 Fan Assembly Replacement: 2 단계, 이미지 2/2
    • The fan assembly is attached to the rest of the computer by two cables on the IO board side.

    • Tilt the assembly up away from the IO board.

    • Do not try to remove the fan assembly yet, as it is still attached by two cables.

  3. Mac Pro Late 2013 Fan Assembly Replacement: 3 단계, 이미지 1/1
    • While supporting the fan assembly with one hand, loosen the two T7 captive screws in the fan cable bracket.

    • These screws are captive in the Mac Pro. Do not try to remove these screws from your Mac Pro.

  4. Mac Pro Late 2013 Fan Assembly Replacement: 4 단계, 이미지 1/1
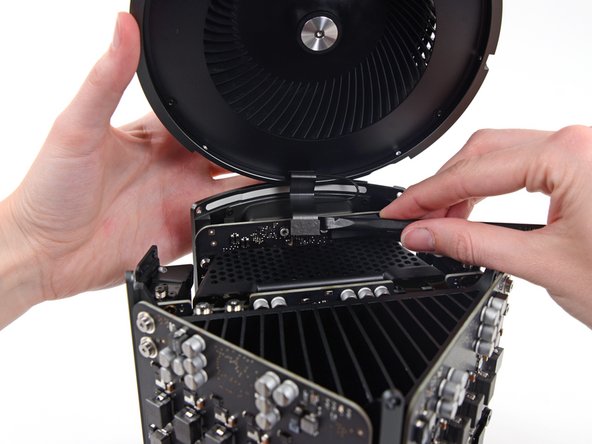
    • Use a pair of tweezers to pull the fan cable bracket away from the fan assembly.

  5. Mac Pro Late 2013 Fan Assembly Replacement: 5 단계, 이미지 1/2 Mac Pro Late 2013 Fan Assembly Replacement: 5 단계, 이미지 2/2
    • Use the flat end of a spudger to disconnect the fan assembly ribbon cable from the IO board.

  6. Mac Pro Late 2013 Fan Assembly Replacement: 6 단계, 이미지 1/1
    • Disconnect the fan assembly antenna cable from the IO board.

    • Remove the fan assembly from the Mac Pro.

결론

To reassemble your device, follow these instructions in reverse order.

Andrew Optimus Goldheart

회원 가입일: 10/17/09

502,807 평판

안내서 407개 작성하였습니다

iFixit iFixit 회원

Staff

135 회원들

안내서 16,816개 작성하였습니다

댓글 0개

댓글 쓰기

조회 통계:

24 시간 전: 0

7일 전: 0

30일 전: 0

전체 시간: 92