주요 콘텐츠로 건너뛰기

Mac Pro Late 2013 Power Supply Assembly Replacement

단지 전제 조건
이 안내서는 다른 가이드의 선행 작업으로 사용하기 위한 것입니다. 그 자체로는 불완전합니다.

필요한 것

  1. Mac Pro Late 2013 Power Supply Assembly Replacement, Power Supply Assembly: 1 단계, 이미지 1/1
    • Flip the Mac Pro back over and set it gently on a flat surface.

    • We recommend laying the Mac Pro on the corner of the heat sink and the two standoff screw posts that attach to the interconnect board.

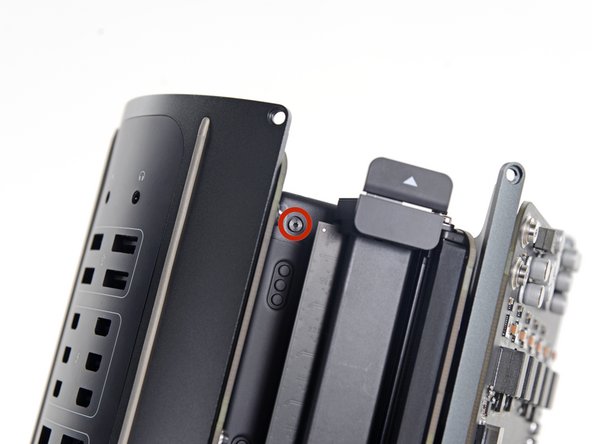
  2. Mac Pro Late 2013 Power Supply Assembly Replacement: 2 단계, 이미지 1/2 Mac Pro Late 2013 Power Supply Assembly Replacement: 2 단계, 이미지 2/2
    • Remove the two 3.6 mm T5 Torx screws from the sides of the power supply cage (one on each side).

  3. Mac Pro Late 2013 Power Supply Assembly Replacement: 3 단계, 이미지 1/1
    • Remove the power supply cage from the top of the power supply.

    • By removing this cage, you are exposing internal components of the power supply. Be very careful not to touch any of the power supply components or circuitry.

    • Be careful not to drop any screws or tools into the power supply, as this may damage the power supply.

  4. Mac Pro Late 2013 Power Supply Assembly Replacement: 4 단계, 이미지 1/1
    • Remove the four 5.5 mm T8 Torx screws securing the power supply assembly to the Mac Pro.

  5. Mac Pro Late 2013 Power Supply Assembly Replacement: 5 단계, 이미지 1/1
    • Remove the power supply assembly from the Mac Pro.

결론

To reassemble your device, follow these instructions in reverse order.

Andrew Optimus Goldheart

회원 가입일: 10/17/09

502,807 평판

안내서 407개 작성하였습니다

iFixit iFixit 회원

Staff

135 회원들

안내서 16,767개 작성하였습니다

댓글 0개

댓글 쓰기

조회 통계:

24 시간 전: 0

7일 전: 0

30일 전: 0

전체 시간: 92