주요 콘텐츠로 건너뛰기

Mac mini Late 2014 Fan Replacement

필요한 것

  1. Mac mini Late 2014 Fan Replacement, Bottom Cover: 1 단계, 이미지 1/1
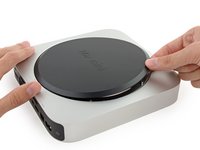
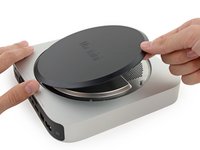
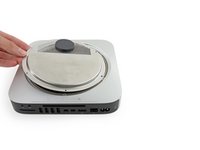
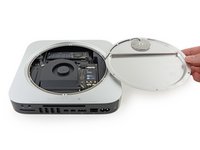
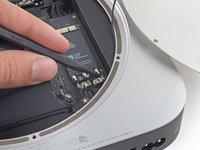
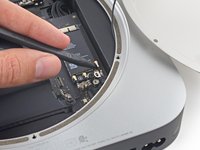
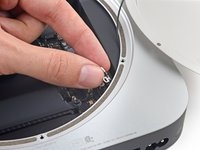
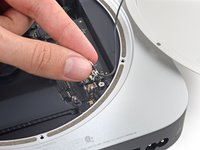
    • The bottom cover is clipped onto three screw posts.

    • Pry near, but not right on the screw posts.

  2. Mac mini Late 2014 Fan Replacement: 2 단계, 이미지 1/3 Mac mini Late 2014 Fan Replacement: 2 단계, 이미지 2/3 Mac mini Late 2014 Fan Replacement: 2 단계, 이미지 3/3
    • Use the plastic opening tool to pry the bottom cover up off of the Mac mini.

  3. Mac mini Late 2014 Fan Replacement: 3 단계, 이미지 1/2 Mac mini Late 2014 Fan Replacement: 3 단계, 이미지 2/2
    • Lift and remove the bottom cover.

  4. Mac mini Late 2014 Fan Replacement, Antenna Plate: 4 단계, 이미지 1/1
    • Remove the following TR6 screws from the antenna plate:

    • Three 4.1 mm screws

    • Three 1.9 mm screws

  5. Mac mini Late 2014 Fan Replacement: 5 단계, 이미지 1/2 Mac mini Late 2014 Fan Replacement: 5 단계, 이미지 2/2
    • Do not completely remove the antenna plate; it is still connected to the Mac mini by an antenna cable.

    • With the I/O ports facing you, flip the antenna plate to the right to allow access to the antenna cable connector.

  6. Mac mini Late 2014 Fan Replacement: 6 단계, 이미지 1/1
    • Remove the single 3.4 mm T6 screw and washer from the antenna cable.

    • Be careful not to lose the washer when removing the screw.

  7. Mac mini Late 2014 Fan Replacement: 7 단계, 이미지 1/2 Mac mini Late 2014 Fan Replacement: 7 단계, 이미지 2/2
    • Use the point of a spudger to lift the antenna connector straight up off its socket on the airport card.

  8. Mac mini Late 2014 Fan Replacement: 8 단계, 이미지 1/2 Mac mini Late 2014 Fan Replacement: 8 단계, 이미지 2/2
    • Carefully pull the antenna cable out from the gap between the power supply and case.

  9. Mac mini Late 2014 Fan Replacement: 9 단계, 이미지 1/1
    • Remove the antenna plate from the Mac mini.

  10. Mac mini Late 2014 Fan Replacement, Fan Assembly: 10 단계, 이미지 1/1
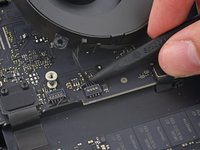
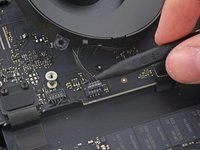
    • Remove the two 12 mm T6 screws from the fan.

    • Loosen the 27 mm T6 captive screw–it will get removed with the fan assembly.

  11. Mac mini Late 2014 Fan Replacement: 11 단계, 이미지 1/3 Mac mini Late 2014 Fan Replacement: 11 단계, 이미지 2/3 Mac mini Late 2014 Fan Replacement: 11 단계, 이미지 3/3
    • The fan connector is trapped under the edge of the fan and cannot be disconnected until the fan is moved.

    • Do not attempt to remove the fan entirely.

    • Lift the fan straight up to free the captive screw from its hole in the logic board.

    • Pull the fan away from the SSD until you can easily access the fan connector.

  12. Mac mini Late 2014 Fan Replacement: 12 단계, 이미지 1/2 Mac mini Late 2014 Fan Replacement: 12 단계, 이미지 2/2
    • Use the point of a spudger to lift the fan connector straight up out of its socket on the logic board.

  13. Mac mini Late 2014 Fan Replacement: 13 단계, 이미지 1/1
    • Remove the fan from the Mac mini.

  14. Mac mini Late 2014 Fan Replacement, Fan: 14 단계, 이미지 1/2 Mac mini Late 2014 Fan Replacement, Fan: 14 단계, 이미지 2/2
    • Remove the captive screw from the rubber grommet in the fan screw hole.

결론

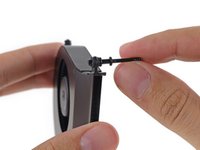
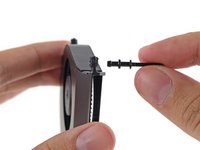
To reassemble your device, follow these instructions in reverse order.

다른 23명이 해당 안내서를 완성하였습니다.

Sam Goldheart

회원 가입일: 10/18/12

465,647 평판

안내서 538개 작성하였습니다

iFixit iFixit 회원

Staff

135 회원들

안내서 16,732개 작성하였습니다

댓글 3개

Had a problem with a noisy fan. Apparently the blades were scratching its housing, so i just bend the aluminium housing a bit and spin the fan to see if its still had a contact. It works like a charm.

Syahmie Ramley - 답글

Just got my first ever Mac yesterday, used it all day without realizing the fan wasn't working. Opened it up this morning to find the fan completely unplugged from the board. Plugged it back in and now it's working great! Thanks so much!

Jacob Begley - 답글

good instruction, thanks. But: the replacement fan from iFixit is lots more louder than the orig from Apple - sad.

M. Hanke - 답글

댓글 쓰기

조회 통계:

24 시간 전: 4

7일 전: 35

30일 전: 146

전체 시간: 16,461