소개
Use this guide to replace your MacBook Air's upper case. The upper case includes the keyboard and trackpad.
필요한 것
-
-
Remove the following ten screws:
-
Two 8 mm 5-point Pentalobe screws
-
Eight 2.5 mm 5-point Pentalobe screws
-
-
-
Use the flat end of a spudger to pry both short sides of the battery connector upward to disconnect it from its socket on the logic board.
-
Bend the battery cable slightly away from the logic board so the connector will not accidentally contact its socket.
-
-
-
Remove the single 2.9 mm T5 Torx screw securing the SSD to the logic board.
-
-
-
Use the flat end of a spudger to pry the I/O board cable up from its socket on the I/O board.
-
-
-
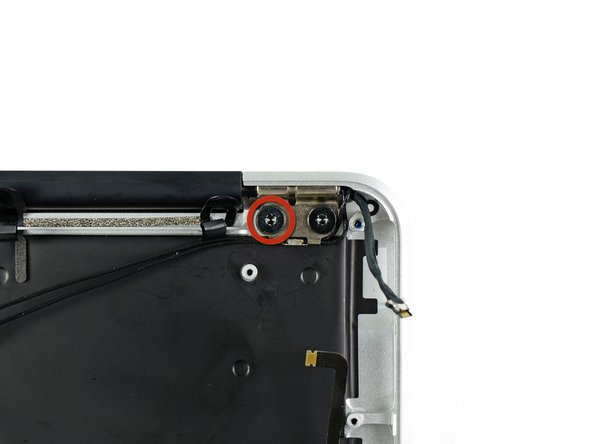
Remove the following five screws securing the battery to the upper case:
-
Two 5.2 mm T5 Torx screws
-
One 6 mm T5 Torx screw
-
Two 2.6 mm T5 Torx screws
-
-
-
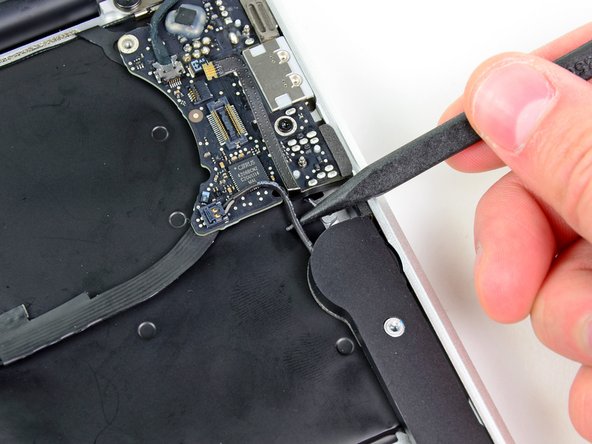
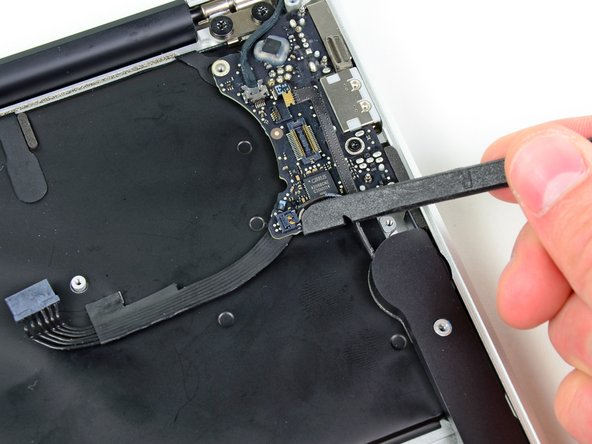
Use the flat end of a spudger to free the adhesive loop securing the I/O board power cable to the upper case.
-
Disconnect the I/O board by pulling the power cable away from its socket on the logic board.
-
-
-
-
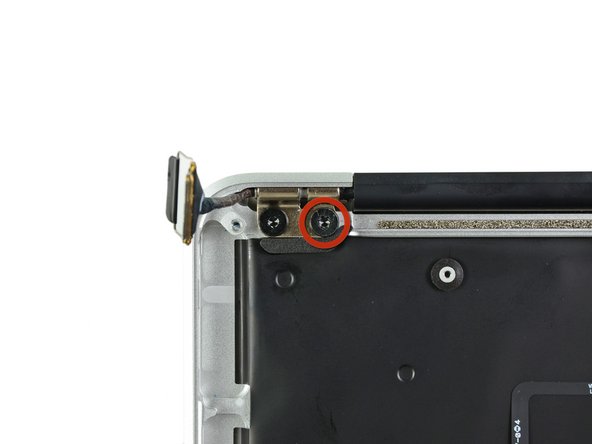
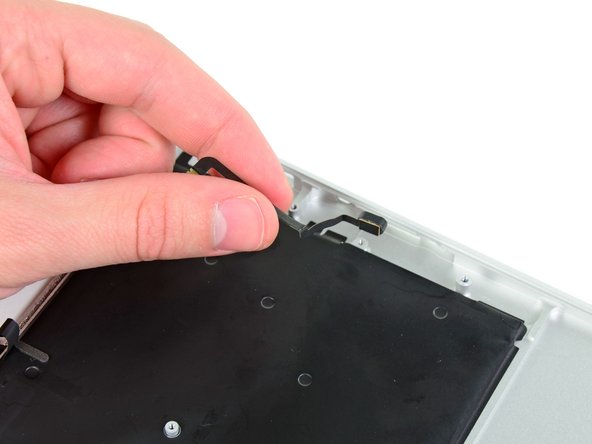
Remove the small rubber gasket from the corner of the upper case nearest the I/O board.
-
-
-
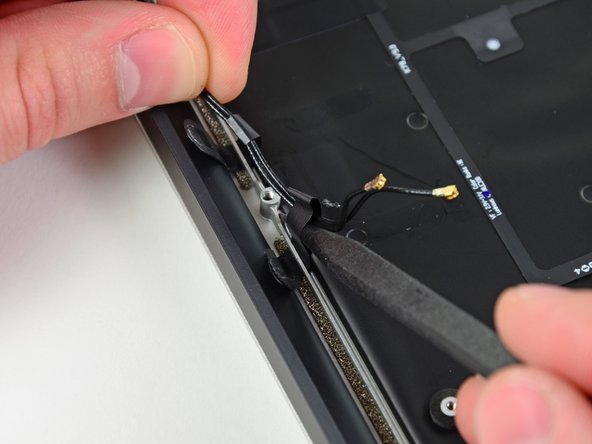
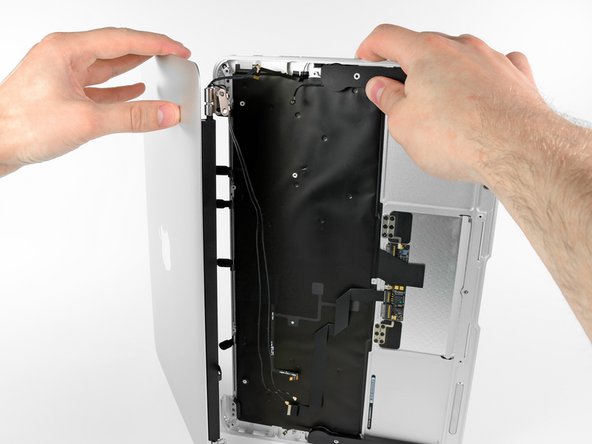
Peel up the six cable loops securing the antenna cables to the upper case.
-
Gently pull the cable loops slightly out of the channel cut into the upper case one at a time.
-
Use your spudger to open up the plastic loops as you de-route the antenna cables through them.
-
Repeat this for all of the retaining loops.
-
-
-
Use the flat end of a spudger to pry the right speaker off the adhesive securing it to the upper case.
-
Remove the right speaker from the upper case.
-
-
-
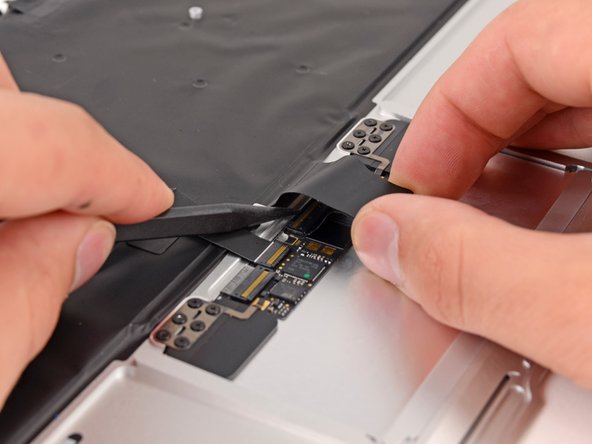
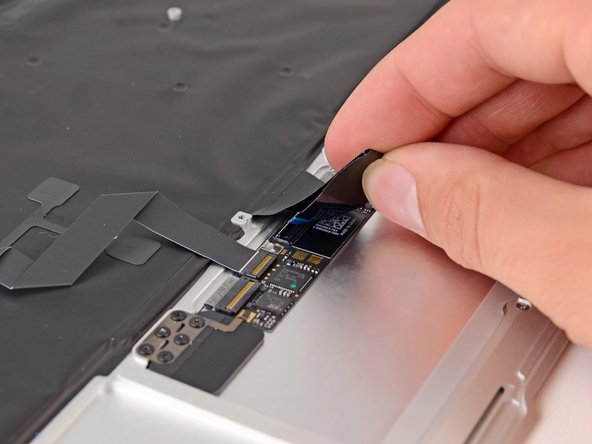
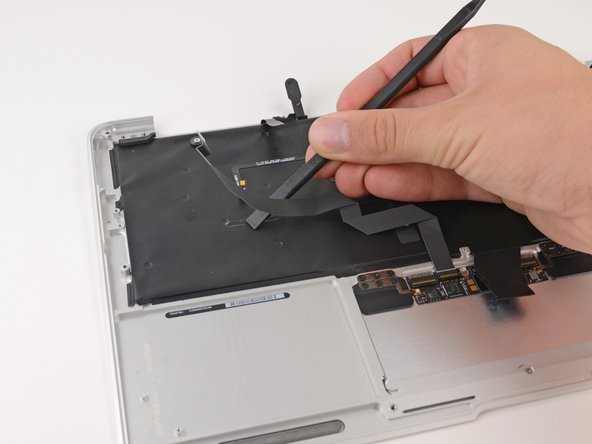
Push/lift the keyboard ribbon cable off of the upper case with one hand.
-
With the other hand, use a spudger to flip up the retaining flap on the ZIF connector.
-
Once the retaining flap has been flipped up, carefully pull the ribbon cable straight out of its socket.
-


To reassemble your device, follow these instructions in reverse order.
To reassemble your device, follow these instructions in reverse order.
다른 22명이 해당 안내서를 완성하였습니다.

댓글 8개
This is an excellent guide, thank you! I used it in combination with the procedure at http://www.insidemylaptop.com/replacing-... to replace a keyboard after water damage. The only issue I had was with that second procedure sealing the black backer film around the keyboard upon reassembly. There is a little light leakage but not terrible. Thanks again Andrew for this fantastic guide.
Great! Thank you!
A superb guide…….went like clockwork…….got it all done in about an hour and a half……I’m sure anyone could do it faster with this guide, but I double checked myself each step of the way. Thanks for posting this!
Dave
Replaced my keyboard and everything works fine except my “0” key and of course I need that to log in. I purchased the keyboard from Ifixit.com