주요 콘텐츠로 건너뛰기

이 안내서에는 최근 변경 사항이 더 있습니다. 최신 비검증 버전으로 전환하십시오.

MacBook Air 13" Early 2015 Display Assembly Replacement

단지 전제 조건
이 안내서는 다른 가이드의 선행 작업으로 사용하기 위한 것입니다. 그 자체로는 불완전합니다.

필요한 것

  1. MacBook Air 13" Early 2015 Display Assembly Replacement, Display Assembly: 1 단계, 이미지 1/1
    • Remove the inner two 5.6 mm T8 Torx screws securing the right display hinge to the upper case.

    • Leaving the third screw in place for now will aid in rest of the procedure.

  2. MacBook Air 13" Early 2015 Display Assembly Replacement: 2 단계, 이미지 1/1
    • Open the display so that it is perpendicular to the upper case and place it on a table as shown.

  3. MacBook Air 13" Early 2015 Display Assembly Replacement: 3 단계, 이미지 1/1
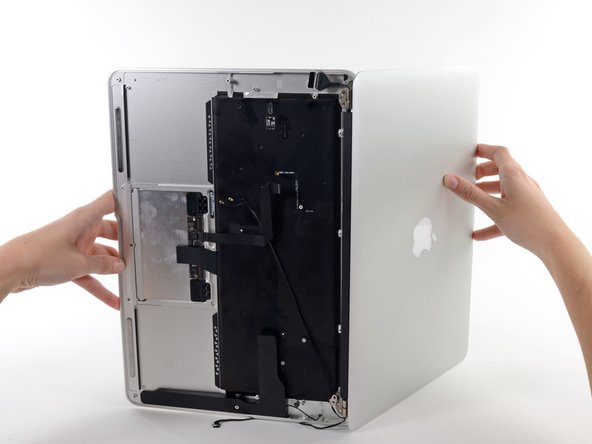
    • While holding the Air steady, remove the remaining 5.6 mm T8 Torx screw from the display bracket.

  4. MacBook Air 13" Early 2015 Display Assembly Replacement: 4 단계, 이미지 1/1
    • Flip the computer over so the last display screw is more easily accesible.

    • Before removing the final display screw, be sure to hold the display and upper case steady with your other hand. Failure to do so may allow the components to fall onto the table, causing potentially expensive damage.

    • Remove the last 5.6 mm T8 Torx screw securing the display to the upper case.

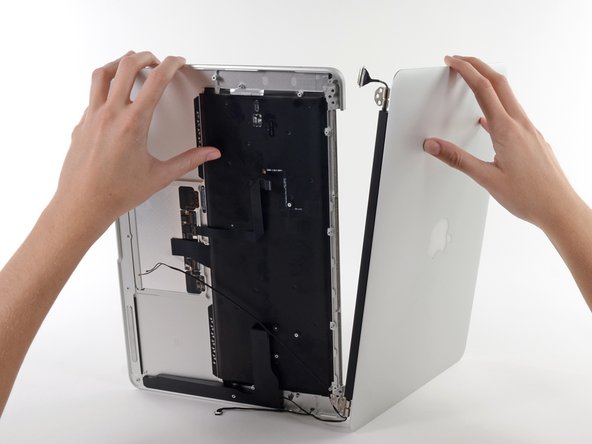
  5. MacBook Air 13" Early 2015 Display Assembly Replacement: 5 단계, 이미지 1/3 MacBook Air 13" Early 2015 Display Assembly Replacement: 5 단계, 이미지 2/3 MacBook Air 13" Early 2015 Display Assembly Replacement: 5 단계, 이미지 3/3
    • Open the Air slowly until the hinges slide out of their notches.

    • The antenna cables may still be routed through a channel in the upper case. Make sure the cables don't get snagged as you remove the display.

    • Once the two display hinges have cleared the upper case, remove the display and set it aside.

결론

To reassemble your device, follow these instructions in reverse order.

iRobot

회원 가입일: 09/24/09

1 평판

안내서 636개 작성하였습니다

댓글 0개

댓글 쓰기

조회 통계:

24 시간 전: 0

7일 전: 0

30일 전: 0

전체 시간: 79