주요 콘텐츠로 건너뛰기

MacBook Air 13" Retina Display 2020 Display Assembly Replacement

보관된 가이드
해당 안내서는 단지 역사적인 목적으로 보관됩니다. 최신 버전 안내서를 사용하여 수리 하십시오.

필요한 것

  1. MacBook Air 13" Retina Display 2020 Display Assembly Replacement, Remove the screws securing the lower case: 1 단계, 이미지 1/2 MacBook Air 13" Retina Display 2020 Display Assembly Replacement, Remove the screws securing the lower case: 1 단계, 이미지 2/2
    • Before starting this procedure, you must disable your Mac's Auto Boot feature. Auto Boot powers on your Mac when you open the lid, and may be accidentally triggered during disassembly. Use this guide or follow the abbreviated instructions below to disable Auto Boot.

    • Completely power off and unplug your MacBook Air before you start. Close the display and flip the entire laptop upside-down.

    • Use a P5 driver to remove the following screws:

    • Two 7.6 mm screws (with a 2.7mm collar)

    • Two 7.1 mm screws

    • Six 2.3 mm screws

  2. MacBook Air 13" Retina Display 2020 Display Assembly Replacement, Remove the lower case: 2 단계, 이미지 1/1
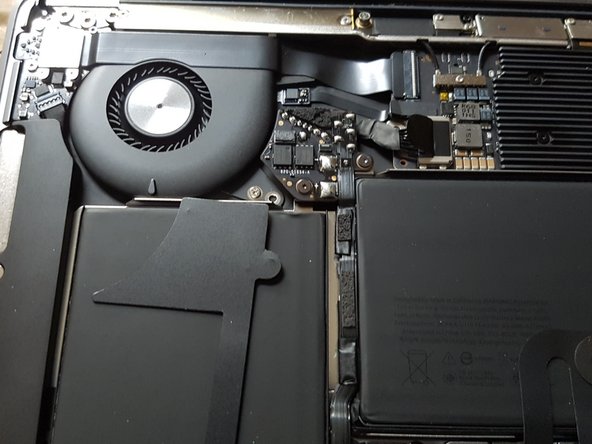
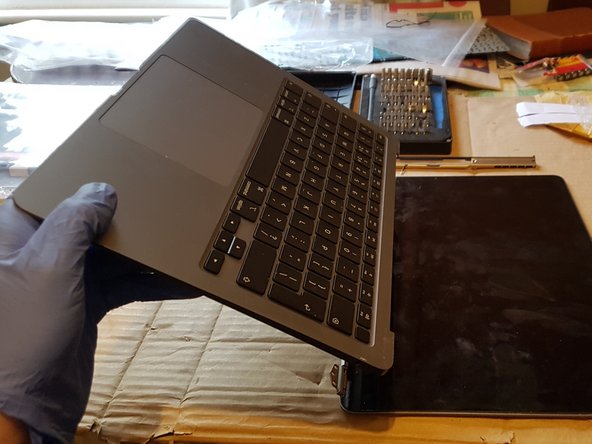
    • Wedge your fingers between the display and the lower case and pull upward to pop the lower case off the Air.

    • Remove the lower case.

  3. MacBook Air 13" Retina Display 2020 Display Assembly Replacement, Disconnect the battery: 3 단계, 이미지 1/2 MacBook Air 13" Retina Display 2020 Display Assembly Replacement, Disconnect the battery: 3 단계, 이미지 2/2
    • Remove the plastic shield covering the battery PCB.

  4. MacBook Air 13" Retina Display 2020 Display Assembly Replacement, Disconnect the battery: 4 단계, 이미지 1/2 MacBook Air 13" Retina Display 2020 Display Assembly Replacement, Disconnect the battery: 4 단계, 이미지 2/2
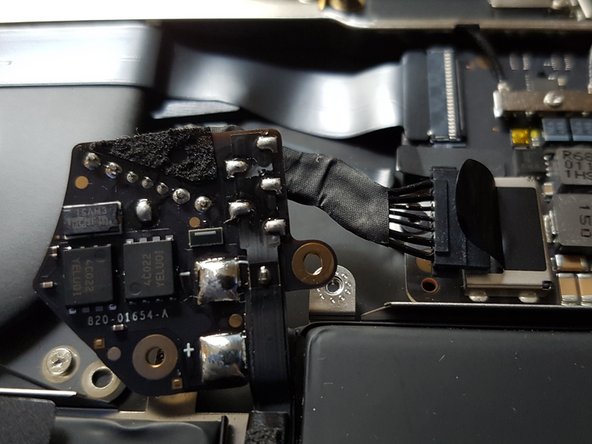
    • Use a T3 torx driver to remove two 2.3mm screws from the battery PCB:

  5. MacBook Air 13" Retina Display 2020 Display Assembly Replacement: 5 단계, 이미지 1/2 MacBook Air 13" Retina Display 2020 Display Assembly Replacement: 5 단계, 이미지 2/2
    • Use a spudger to slide the battery connector parallel to the logic board and out of its socket on the logic board.

  6. MacBook Air 13" Retina Display 2020 Display Assembly Replacement, Disconnect the antenna bar: 6 단계, 이미지 1/2 MacBook Air 13" Retina Display 2020 Display Assembly Replacement, Disconnect the antenna bar: 6 단계, 이미지 2/2
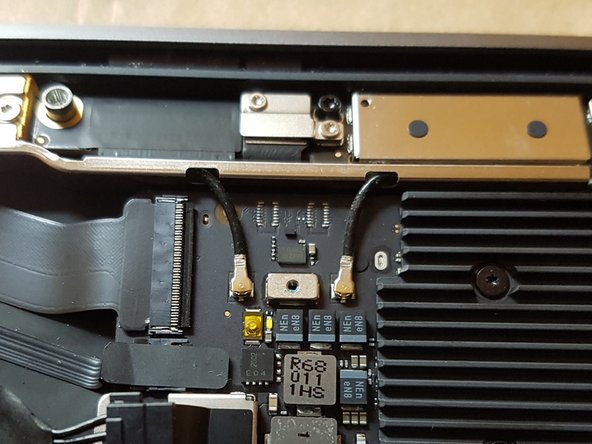
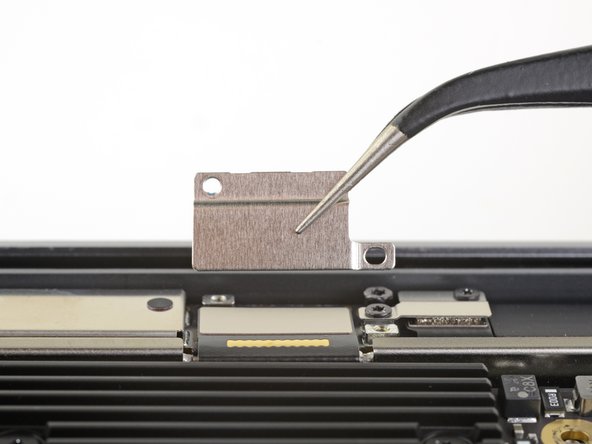
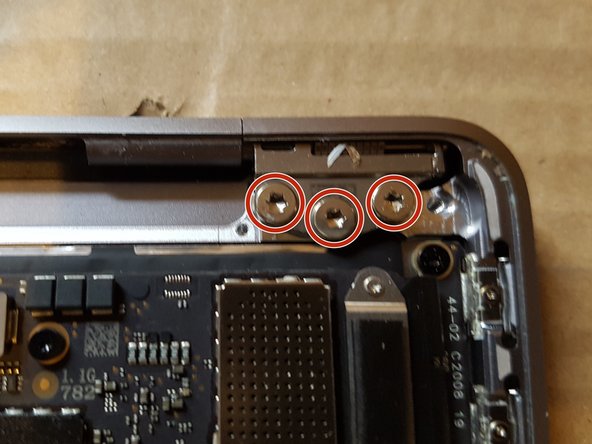
    • Use a T3 Torx driver to remove the one 1.1 mm screw securing the antenna cable bracket.

    • Remove the antenna cable bracket.

  7. MacBook Air 13" Retina Display 2020 Display Assembly Replacement: 7 단계, 이미지 1/1
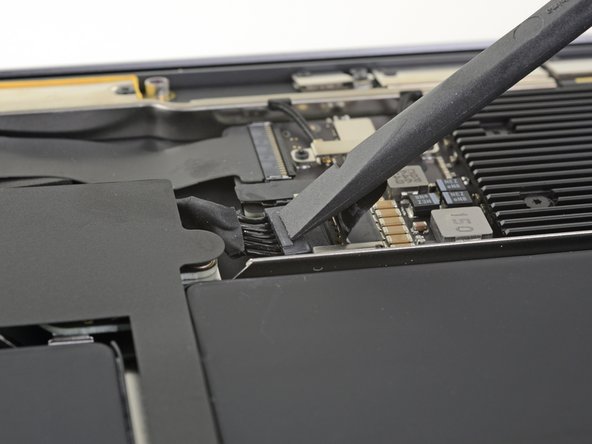
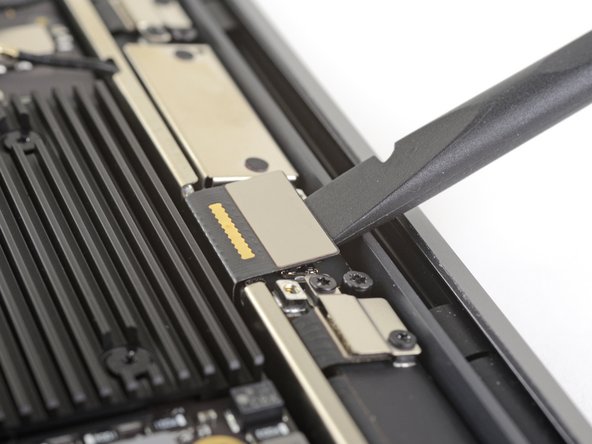
    • Insert the point of a spudger under one of the antenna cables close to the connector.

    • Pry straight up to disconnect the cable.

    • Repeat for the other antenna cable.

    I have had the board side connector come right off when removing the antenna cable. Use something like the spudger or a fine screwdriver tip to put some pressure on the board connector to keep it in place during removal of antenna cable.

    Ross Elkins - 답글

  8. MacBook Air 13" Retina Display 2020 Display Assembly Replacement: 8 단계, 이미지 1/2 MacBook Air 13" Retina Display 2020 Display Assembly Replacement: 8 단계, 이미지 2/2
    • Use a T3 Torx driver to remove the two 1.3 mm screws securing the display cable connector bracket.

    • Remove the display cable connector bracket.

  9. MacBook Air 13" Retina Display 2020 Display Assembly Replacement: 9 단계, 이미지 1/2 MacBook Air 13" Retina Display 2020 Display Assembly Replacement: 9 단계, 이미지 2/2
    • Use the flat end of a spudger to pry up the display cable connector.

  10. MacBook Air 13" Retina Display 2020 Display Assembly Replacement: 10 단계, 이미지 1/2 MacBook Air 13" Retina Display 2020 Display Assembly Replacement: 10 단계, 이미지 2/2
    • You can skip this step if your replacement display assembly comes with these two brackets preinstalled.

    • Use a T3 Torx driver to remove the two 1.1 mm screws securing the flex cable brackets.

    • Remove the two brackets.

  11. MacBook Air 13" Retina Display 2020 Display Assembly Replacement: 11 단계, 이미지 1/1
    • Use a T5 Torx driver to remove the following screws:

    • Four 7.1 mm screws

    • Two 4.2 mm (Black) screws

  12. MacBook Air 13" Retina Display 2020 Display Assembly Replacement, Remove the antenna bar: 12 단계, 이미지 1/3 MacBook Air 13" Retina Display 2020 Display Assembly Replacement, Remove the antenna bar: 12 단계, 이미지 2/3 MacBook Air 13" Retina Display 2020 Display Assembly Replacement, Remove the antenna bar: 12 단계, 이미지 3/3
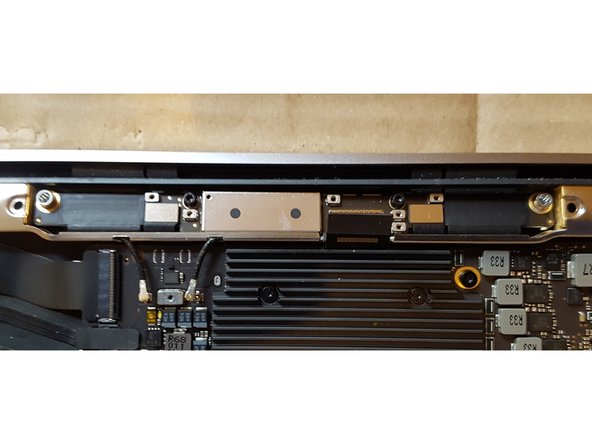
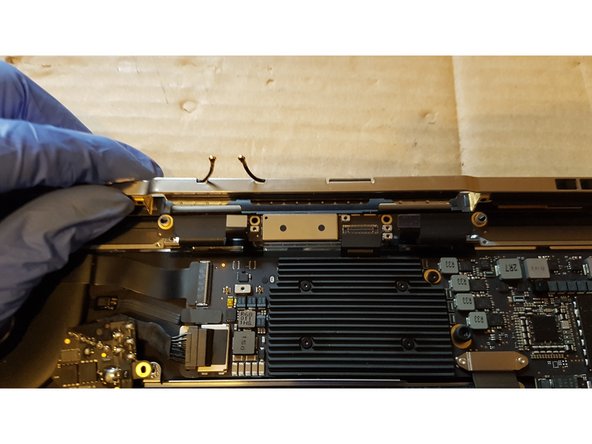
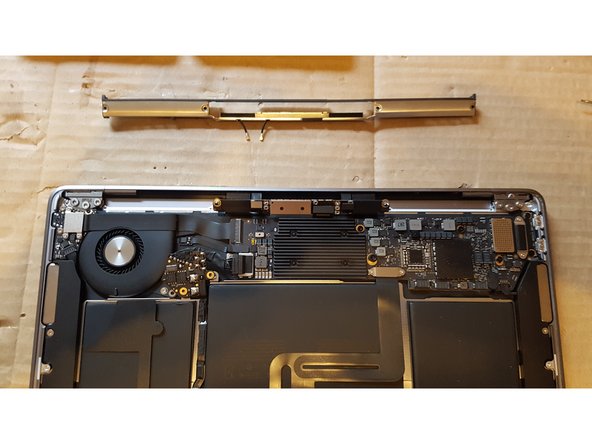
    • Lift the antenna bar straight up and out of the case. Take care not to snag the antenna bar on any cables or connectors.

    • You may encounter resistance from the clips in the middle of the antenna bar holding it in the case. You may pull hard without damaging anything as long as you pull straight up, perpendicular to the case.

    • Remove the antenna bar.

  13. MacBook Air 13" Retina Display 2020 Display Assembly Replacement, Remove the display: 13 단계, 이미지 1/2 MacBook Air 13" Retina Display 2020 Display Assembly Replacement, Remove the display: 13 단계, 이미지 2/2
    • Use a T9 Torx driver to remove the six 4.7 mm screws securing the display hinges to the upper case.

  14. MacBook Air 13" Retina Display 2020 Display Assembly Replacement: 14 단계, 이미지 1/2 MacBook Air 13" Retina Display 2020 Display Assembly Replacement: 14 단계, 이미지 2/2
    • With the MacBook still screen-side down, carefully lift the upper case to open the MacBook as far as possible.

  15. MacBook Air 13" Retina Display 2020 Display Assembly Replacement: 15 단계, 이미지 1/2 MacBook Air 13" Retina Display 2020 Display Assembly Replacement: 15 단계, 이미지 2/2
    • Carefully rotate the upper case to a 90 degree angle with the display.

    • The hinges should not move in relation to the display, and should rotate out of the case slightly.

    • Keeping the display flat, tilt the upper approx 5-10 degrees to the left. Move the upper case to the right, the hinges should easily slide out of the upper case.

  16. MacBook Air 13" Retina Display 2020 Display Assembly Replacement: 16 단계, 이미지 1/1
    • Display should now be separate from the upper case.

결론

To reassemble your device, follow these instructions in reverse order.

다른 2명이 해당 안내서를 완성하였습니다.

David Fear

회원 가입일: 09/08/11

4,457 평판

안내서 8개 작성하였습니다

Pickle IT - Gadget Repair Pickle IT - Gadget Repair 회원

Business

2 회원들

안내서 14개 작성하였습니다

댓글 2개

Great guide! Did you encounter any tamper-proof seals? Anything that would make it obvious that the MacBook was disassembled?

Yann Landry - 답글

No tamper proof seals encountered. Didn’t find anything that would “make it obvious that the MacBook was disassembled”.

David Fear -

댓글 쓰기

조회 통계:

24 시간 전: 0

7일 전: 0

30일 전: 2

전체 시간: 540