주요 콘텐츠로 건너뛰기

이 안내서에는 최근 변경 사항이 더 있습니다. 최신 비검증 버전으로 전환하십시오.

MacBook Pro 13" Retina Display Late 2012 AirPort Board Assembly Replacement

단지 전제 조건
이 안내서는 다른 가이드의 선행 작업으로 사용하기 위한 것입니다. 그 자체로는 불완전합니다.

필요한 것

  1. MacBook Pro 13" Retina Display Late 2012 AirPort Board Assembly Replacement, AirPort Board Assembly: 1 단계, 이미지 1/1
    • Remove the single 2.7 mm T5 Torx screw securing the AirPort board to the I/O board.

  2. MacBook Pro 13" Retina Display Late 2012 AirPort Board Assembly Replacement: 2 단계, 이미지 1/3 MacBook Pro 13" Retina Display Late 2012 AirPort Board Assembly Replacement: 2 단계, 이미지 2/3 MacBook Pro 13" Retina Display Late 2012 AirPort Board Assembly Replacement: 2 단계, 이미지 3/3
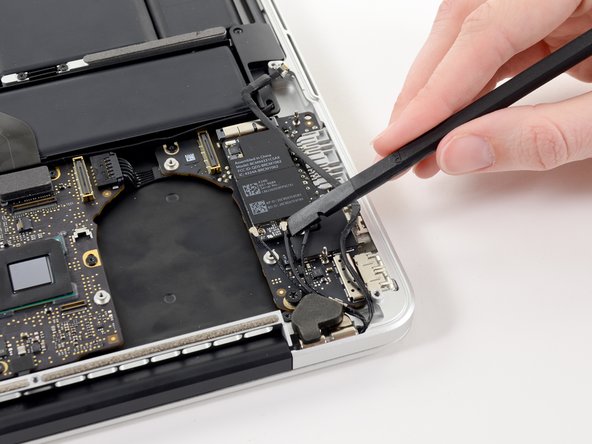
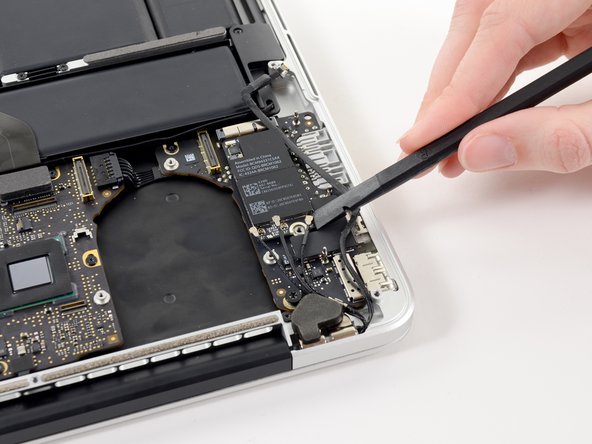
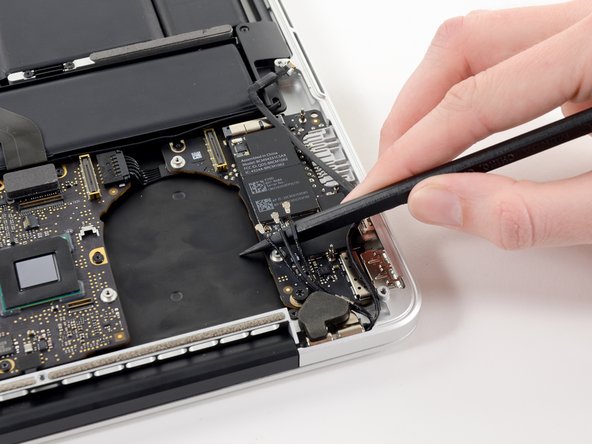
    • Use the flat end of a spudger to pry and disconnect the three antenna cable connectors from the AirPort board.

    • The three cables are coded with black sleeves of different lengths. During reassembly:

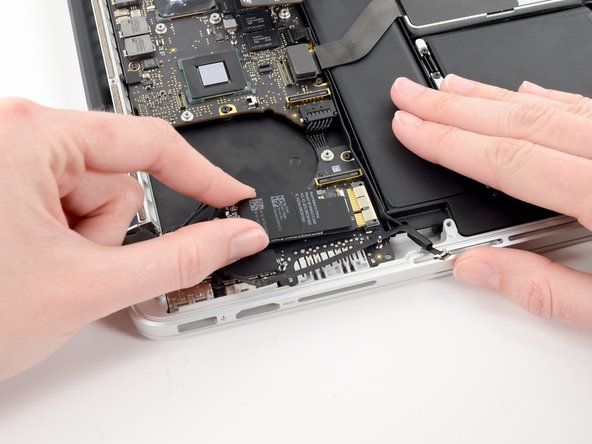
    • Connect the long-sleeved cable to the center socket.

    • The short-sleeved cable connects next to the screw.

    • The remaining cable has no sleeve, and connects in the last empty socket, next to the fan.

  3. MacBook Pro 13" Retina Display Late 2012 AirPort Board Assembly Replacement: 3 단계, 이미지 1/2 MacBook Pro 13" Retina Display Late 2012 AirPort Board Assembly Replacement: 3 단계, 이미지 2/2
    • Move the antenna cables aside, clear of the AirPort board.

  4. MacBook Pro 13" Retina Display Late 2012 AirPort Board Assembly Replacement: 4 단계, 이미지 1/2 MacBook Pro 13" Retina Display Late 2012 AirPort Board Assembly Replacement: 4 단계, 이미지 2/2
    • Pull the AirPort board straight out of its socket on the I/O board.

결론

To reassemble your device, follow these instructions in reverse order.

Walter Galan

694,676 평판

안내서 1,203개 작성하였습니다

댓글 0개

댓글 쓰기

조회 통계:

24 시간 전: 0

7일 전: 0

30일 전: 0

전체 시간: 41