이 번역은 원본 안내서의 최신 업데이트를 반영하지 않을 수 있습니다. 번역 업데이트를 돕거나 아니면 원본 안내서 보기를 참조하세요.
소개
iFixit 배터리 교체 키트와 이 안내서를 사용하여 MacBook Pro의 접착된 배터리를 안전하게 분리하세요. 키트의 접착제 제거제는 배터리를 고정하는 접착제를 녹여서 배터리를 수월하게 분리할 수 있습니다. 배터리는 개별 셀 여섯 개로 구성되어 있으며 그 중 네 개는 상단 케이스에 부착되어 있습니다.
‘’’iFixit 접착제 제거제는 가연성이 매우 높습니다.’’’ 통풍이 잘되는 곳에서 이 절차를 수행하세요. 이 과정에서 담배를 피우거나 불 근처에서 작업하지 마세요.
손상 위험을 최소화하려면 이 절차를 시작하기 전에 MacBook을 켜고 배터리를 완전히 방전하세요. 충전된 리튬-이온 배터리에 실수로 구멍이 나면 위험하고 통제할 수 없는 화재를 일으킬 수 있습니다. 배터리가 부풀어 올랐다면, 추가 예방 조치를 취하세요.
참고: 배터리 접착제를 녹이는데 사용하는 용액은 MacBook Pro 플라스틱 스피커 인클로저와 같은 특정 플라스틱을 손상할 수 있습니다. 용액을 바를 때 주의하세요.
(더 이상 판매하지 않는) 별도의 병과 주사기가 있는 옛날 iFixit 접착제 제거제를 사용하는 경우 이곳을 클릭하여 약간 수정한 지침을 보세요.
필요한 것
-
-
하단 케이스를 상단 케이스에 고정하는 다음 나사 열 개를 풀어주세요:
-
2.3mm P5 Pentalobe/펜타로브/별나사 두 개
-
3.0mm P5 Pentalobe/펜타로브/별나사 여덟 개
-
-
-
배터리 접촉 보드에 붙어있는 플라스틱 커버를 분리하세요.
-
-
-
핀셋을 사용하여 배터리 커넥터 보드의 오른쪽 하단 근처의 작은 플라스틱 덮개를 분리하세요.
when doing this with metal tweezers as instructed in the video, it was difficult to get off and apparently while i was trying to do it, the tweezers went too far under and i believe made contact with the screw underneath? there was a zzz noise, an orange flicker and a little stream of smoke that came out. i freaked out and put everything back together to see if the laptop even still worked, it turned on and everything but died right away (i drained it before doing the repair anyway, so i was surprised it turned on at all).
i finished the battery repair and did several other things while in there. i have charged it all the way as recommended and will use it later on to see how everything is, im hoping that it’s a okay, but could someone explain to me what happened and the possible consequences?
-
-
-
핀셋으로 인터포저를 잡으세요.
-
인터포저를 로직 보드에서 들어 올려 분리하세요.
you must lift it absolutely vertically, or it fouls against the locator pin in the corner- you can easily get the impression that it won’t come over the end of this pin- almost like it’s rivetted in. it isn’t. get a good grip on it with the tweezers in the centre hole & one of the sides, & lift it STRAIGHT up.
I would recommend to use plastic tweezers in order to reduce risk of damage.
Second that. If you have thin heat shrink tubing, form some over the tweezer tips. If the tubing is thin and small enough in diameter you’ll see the serrations of the tweezer tips.
wat is the model this SSD
-
-
-
Spudger/스퍼저의 평평한 끝을 사용하여 I/O 보드 데이터 케이블 커넥터의 오른편을 I/O 보드 소켓에서 들어올리세요.
-
-
-
I/O 보드 데이터 케이블 커넥터 왼편 밑으로 spudger/스퍼저의 평평한 끝을 쐐기로 고정하세요.
-
Spudger/스퍼저를 살짝 비틀어 로직 보드 소켓에서 I/O 보드 데이터 케이블 커넥터를 분리하세요.
I also skipped this step as this data cable is not compromising the exchange of battery and less interaction with connectors is less risk of damage..
Diesen Schritt habe ich ebenfalls weggelassen, da das Datenkabel den Austausch der Batterie nicht behindert und weniger Manipulationen an Steckverbindern bedeutet ein geringeres Risiko für Beschädigungen
-
-
-
-
Spudger/스퍼저의 평평한 끝을 사용하여 로직 보드 소켓에서 SSD 케이블 커넥터를 들어 올리세요.
-
SSD 케이블 커넥터를 치우세요.
As per my comment on step 10, this is also not required. When you remove the SSD in step 22, you can just fold it over out of the way.
This step is easy enough that I’d just remove it to be out of the way. I 100% agree with your other comments though. While you’re here, might as well do step 21 and remove the drive, just takes a sec.
I also strongly recommend not to unmount the speaker plugs, just flip them out of the way, same as with the SSD drive. Makes it much less complicated and less risky. It worked perfect for me.
Ich empfehle ebenfalls, die Platinenstecker der Lautsprecher nicht zu lösen sondern die Lautsprecher einfach, so wie das SSD-Laufwerk, einfach aus dem Weg zu legen. Das macht die Sache weniger kompliziert und weniger risikoreich. Es hat bei mir super funktioniert!
-
-
-
오른편 스피커 케이블 커넥터 아래에 spudger/스퍼저의 뾰족한 끝을 쐐기로 고정하세요.
-
로직 보드 소켓에서 오른편 스피커 케이블 커넥터를 살살 들어 올리세요.
-
-
-
T5 Torx/톡스 드라이버를 사용하여 오른편 스피커를 상단 케이스에 고정하는 다음 나사들을 풀어주세요:
-
검정색 6.8mm 나사 한 개
-
은색 6.3mm 나사 한 개
-
검정색 4.9mm 나사 한 개
If you manage to misplace any screws, particularly one of the speaker retaining screws, look under the speakers - they are magnetic and great at hiding missing screws :)
-
-
-
상단 케이스에서 오른편 스피커를 들어 올려 분리하세요.
For those who don’t realize it, the speakers you are removing really are the plastic corner pieces that look like they’re just there to fill the space.
-
-
-
Spudger/스퍼저의 평평한 끝을 사용하여 로직 보드 소켓에서 드폰 잭 케이블을 똑바로 들어 올리세요.
For an easier, lower-risk repair, skip this step and step 18 - go straight to step 19 and fold the speaker out of the way.
Agreed, this is the way
-
-
-
왼편 스피커 케이블 커넥터 아래에 spudger/스퍼저의 뾰족한 끝을 쐐기로 고정하세요.
-
로직 보드 소켓에서 왼편 스피커 케이블 커넥터를 살살 들어 올리세요.
It's easier to follow Step 19 & 20 first and then come to Step 18 (this step). Doing so will make it easier to remove that speaker connector easily holding the cable of speaker without having to use a pry tool.
-
-
-
T5 Torx/톡스 드라이버를 사용하여 왼편 스피커를 상단 케이스에 고정하는 다음 나사들을 풀어주세요:
-
검정색 6.8mm 나사 한 개
-
은색 6.3mm 나사 한 개
-
검정색 4.9mm 나사 한 개
Be very careful on this step. If you aren’t you can snap the plastic on the corners where the screws go in. Remember to go slowly when spinning the screws back in, it doesn’t take gorilla torque to tighten them, just take it easy!
-
-
-
엄지 또는 손가락을 사용하여 SSD 트레이의 플라스틱 스프링 바를 구부려 기기 전면의 클립 두 개를 해제하세요.
-
스프링 바를 누르며 SSD 어셈블리를 기울여 공간에서 꺼내세요.
-
-
-
배터리의 각 측면에서 2.2mm T5 Torx/톡스 나사 세 개를 풀어주세요 (나사 총 여섯 개).
If I were to do this again, I think I would leave unbolting the transverse battery until after ungluing the other four. That way one can tip the laptop on to one of its short sides and so run adhesive remover along the long edge of each battery and let gravity assist penetration without the transverse battery falling out.
I think this is good advice.
I just did one of these that didn’t have these screws installed from the factory. Odd
maccentric - 답글
-
-
-
디스플레이를 보호하려면 디스플레이와 키보드 사이에 알루미늄 호일 한 장을 작업하는 동안 놓아두세요.
You can use a heat gun to remove the adhesive. Remember you can always add more heat so don’t over do it. I put my heat gun on high for less than 10 seconds at a time
Using a heat gun on a lithium-ion battery is not a good idea. You can get away with it if you are careful, but a solvent is much safer. ;)
-
-
-
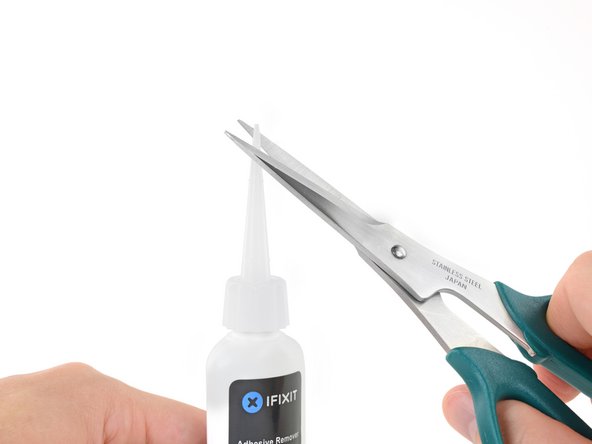
접착제 제거제 병에서 검정색 고무 마개를 당겨 빼세요.
-
가위를 사용하여 봉인된 어플리케이터 끝을 자르세요.
-
-
-
가장 왼편 배터리 셀 가장자리 아래에 접착제 제거제 몇 방울을 골고루 바르세요.
-
다음 단계로 진행하기 전에 액상 접착제 제거제가 배터리 셀 밑으로 침투할 때까지 2-3분 정도 기다리세요.
If you use a heat gun be sure to point the heat gun away from the motherboard. After heating for 10 seconds or less use the blunt end of the metal pry tool as you don’t want to puncture the battery. You don’t need much force as after you have enough heat you will hear it unsticking when you pry at it lightly with the BLUNT end of the metal pry tool. Repeat this step on the other side. You don’t need to heat the cells near the motherboard as they are secured with small screws
I replace a lot of glued in Macbook batteries and you really do not need ISO to get them out. These wide blade plastic spudgers are brilliant and cheap. https://www.aliexpress.com/item/32824615... Image here https://imgur.com/a/0Y0Yvyj
May not need it to remove the battery, but it sure helps for removing the leftover residue and black VHB that’s left behind. I found that dousing the VHB and using a metal flat spatula helped.
Some good advice:
Use a iFixit plastic card/credit card (work from the short side of the computer) and stick it under the battery towards the glue strip and hold the card approx 45° (or whatever angle is appropriate) and drip the glue remover on the card so it slides/runs down the card underneath the battery. In this way the glue remover is aimed straight to the glue under the battery to ‘eat its way’ onto the glue. Let it do its job for a minute or two. Then you can dig in the card even more underneath (the angle of the card will obviously be less and less as you get further in; the idea is just to somehow slide the liquid under), add a bit more remover, dig a bit more, etc…
Otherwise the glue remover can get a bit all over the place but this way it is more easily directed towards the glue.
Goo Gone, applied with a pipette, is a non-flammable alternative solution for releasing the adhesive that won’t harm plastics if it seeps past the battery cavities. It does take a bit longer, 30-45 mins, but is much safer. An additional benefit is that the adhesive will be completely separated from the top-case, so cleanup is super quick.
Hi John,
We don’t recommend using Goo Gone because it’s a petroleum distillate based remover, which leaves an oily residue. The residue can prevent replacement adhesive from fully bonding with the surface. Be sure to clean any Goo Gone surface with a detergent-based cleaner.
Isopropyl alcohol and iFixit’s adhesive remover are formulated to evaporate quickly and leave little residue, which allows replacement adhesive to bond properly to the surface.
Note, per my later cleanup, I found that 2-3 drops may not be enough, or else, 2-3 minutes is too long to wait before trying to pry. Once the remover starts to dry, it is not as easy to work the adhesive. I ended up using maybe 1/10 of the bottle overall and most of that was liberally dousing the residue a few times to fully clean the case.
-
-
-
Spudger/스퍼저 또는 플라스틱 카드의 평평한 가장자리를 제일 왼편의 배터리 셀 밑으로 넣으세요.
-
귀하의 도구를 배터리 셀 하단 둘레를 따라서 움직이고 들어 올려 접착제를 분리하세요.
This is the most difficult step. The tip of my spudger got bended and the aluminum case damaged it.
I also broke a spudger trying to do this. Eventually I figured out it is easier to go in diagonally from the corner, just to one side of the screw hole, and lever until you hear the adhesive pad tear and give way.
we use a hair dryer and gently blow hot air in between the battery for a good minute before trying to lift it with a spunger. It worked wonderfully! When lifting, just give it constant force upward and you'll hear the battery slowly breaking away from the macbook, and we don't even see glue residues on our macbook at all. Just be patient. :)
Just a note to say that the above comments were written before the liquid adhesive remover was added to the guide—you should definitely NOT be breaking any spudgers using the current procedure, which requires very little force. I recommend using plastic cards rather than spudgers—it's pretty easy to slide them under each battery cell and separate the adhesive once the solvent has done its work.
This is much easier to do using a plastic card. Just slide the card under the side of the battery and rock it back and forth. The battery will separate pretty quickly with minimal residue.
by a plastic card, do you mean a credit card type thing? thanks in advance.
Exactly—one of these or an old credit card should work fine.
I second this, I also used an old credit card and it totally worked! I did not use any heat or liquid
Some good advice:
Use a iFixit plastic card/credit card (work from the short side of the computer) and stick it under the battery towards the glue strip and hold the card approx 45° (or whatever angle is appropriate) and drip the glue remover on the card so it slides/runs down the card underneath the battery. In this way the glue remover is aimed straight to the glue under the battery to ‘eat its way’ onto the glue. Let it do its job for a minute or two. Then you can dig in the card even more underneath (the angle of the card will obviously be less and less as you get further in; the idea is just to somehow slide the liquid under), add a bit more remover, dig a bit more, etc…
Otherwise the glue remover can get a bit all over the place but this way it is more easily directed towards the glue.
My MBP identifies as late 2012/early 2013, and don’t know where you come up with a separate identity.
Looking at both disassembly procedures, neither shows the aftermarket (probably NewerTech or OWC) battery I found in this MBP.
That’s disconcerting; finds one asking myself - “Am I using the right procedure??”
if you know this might be the case, please add note to this step if the user finds only 4 physical cased batteries.
Tnx!
Use the plastic credit-card shaped card.
-
-
-
자리를 바꿔서 MacBook Pro 오른편에 위치한 배터리 셀 두 개에 위의 절차를 반복하세요.
-
각 배터리 셀 아래에 소량의 액상 접착제 제거제를 적용하고 셀을 들어 올리기 전에 접착제 제거제가 침투할 때까지 2-3분 정도 기다리세요.
Puncturing the battery’s protective covering can lead to release of caustic fumes or fire.
-
-
-
상단 케이스에서 배터리 전체를 들어 올리고 배터리를 분리하세요.
-
운이 좋으면 손가락으로 접착제 조각을 천천히 당겨 빼낼 수 있습니다.
-
그렇지 않으면 각 접착 부분을 약간의 접착제 제거제로 2-3분 동안 적신 다음 여는 픽 또는 키트의 다른 도구 중 하나로 긁어내야 합니다. 이는 꽤 많은 노력이 필요로 합니다. 인내심을 가지세요.
-
남아있는 모든 접착제 제거제를 닦아내고 MacBook Pro를 자연 건조할 때까지 몇 분 정도 기다리세요.
-
새로 설치한 배터리를 보정하세요: 배터리를 100% 충전한 다음 최소 두 시간 더 충전하세요. 그런 다음 플러그는 뽑고 정상적으로 사용하여 배터리를 방전하세요. 배터리 부족 경고가 나타나면 작업을 저장하고 배터리 부족으로 인해 절전 모드가 활성화될 때까지 노트북을 켜놓으세요. 최소한 5시간 이상을 기다리고 나서 노트북을 중단없이 100% 충전하세요.
During battery replacement take care to position the two left and right battery packs inwards and upwards towards the macbook center such, that there is sufficient space for reinstallation of the two speakers!
I second Fred’s suggestion. I had to “smoosh” the right speaker in since my battery replacement was a little bit too far over. It was fine, but the “heads up” note is warranted.
If you're replacing the top case that includes a new battery, can't you skip removal of the battery?
Yes!! If uppercase Assembly(Includes Trackpad, keyboard, Palmrest & BATTERY) is being replaced, there is no need to remove battery from old uppercase assembly.
When you are at this step and before you put the new battery in, take the time to clean your computer really well. You will be surprised how much dust/dirt and even pet hairs have gotten into your computer. After I removed the battery, I use a little more of the acetone to clean the bays up and after it dried, I used a tiny bit of Isopropyl Alcohol to make sure there was a good clean area for the new bonding. Make sure you clean the fans. Don’t use a toothbrush or anything like that. If your have a Lowes or Home Depot, you can buy a shop vac attachment kit for about $20, it’s well worth it. Don’t use that air in a can crap, it will put moisture on circuits. Take your time, it’s not a hard task to do everything, just use a little patience.
Hi all,
After installing the new batteries, my mac is not powering up… Do i need to charge the battery first and then check again? Have anyone faced similar issue before?
My 1st battery from ifixit came out to be defective and it caused fire at the centre of the long battery. I have got a replacement for the defective piece which i have installed now. However, now i am worried that connecting to power could lead to any potential fire / harm to my mac???
Already i have spent lot of time in this and it would be very upsetting if this battery spoils my mac!!!
Any suggestion people???? thanks in advance!
BR,
Vijay
Hi Vijay!
Uh-oh, we’re sorry to hear about the battery trouble!
Our batteries come with a 1-year warranty, so this would definitely be something we can assist with. Please feel welcome to reach out via help.ifixit.com and provide our Support team with your order number so that they can look into these battery troubles with you.
Thanks!
Hi All,
Just replaced battery, and am typing this on the live MacBook. The unit fired up as soon as I plugged in the power adapter. Nice. The battery percentage indicator said the battery had approximately 85% power charge. Is this normal? If not, what steps should I take to ensure that this battery is properly calibrated?
Cheers,
James
Hi James,
Follow these steps to calibrate your new battery: https://help.ifixit.com/article/265-batt...
ご指摘ありがとうございました!訂正済みです。
Can someone tell me which model is written in the battery? I saw that is written the model a1437. Is this model compatible with the a1425? Thanks
Hi Mizuno,
The battery model is A1437, and it is compatible with the MacBook Pro model A1425.
These instructions are brilliantly concise! Thank you. And thank you everyone for your comments. As a final comment from me, it is much easier to assess the final position of the batteries if you place them gently in position, reinstall the speakers, adjust the battery position if needed and then press them firmly into place.
I did everything in the kit, but my computer won’t acknowledge the battery and is only running on my power adapter. Once I take off the power adapter it shuts down. I also tried resetting the snc, but unsure if it did anything. I reopened up the back to see if I missed anything. The batteries are warm, which means they were running. I’m very confused, anybody else run into similar issues?
My OEM adhesive was particularly persnickety and did not want to come up. I found a pick to be more useful than the flat spudger or the card. I also used several applications of remover and found that working with it wet was much more effective than letting it dry to dissolve the glue. A final few wipes with more remover and the cloth wipe that came with the kit did a good cleanup job.
So I just replaced the battery and reassembled everything and when plugging it into the power supply, the LED is not lighting up and computer is not turning on. Not sure what I did incorrectly as I basically followed the steps in reverse for reassembly after installing the battery. Any advice would be appreciated.
Bibihabibi - 답글
-


기기를 재조립하려면 이 지침을 역순으로 따르세요.
최적의 성능을 위해 새로 설치한 배터리를 보정하세요. 배터리를 100% 충전한 다음 최소 2 시간 더 충전하세요. 그런 다음 기기가 배터리 부족으로 인해 꺼질 때까지 사용하세요. 마지막으로 중단없이 100% 충전하세요.
전자 폐기물을 R2 또는 e-Stewards 인증 재활용 센터로 가져가세요.
수리가 계획대로 진행되지 않았습니까?
기본 문제 해결, 또는 자사의 MacBook Pro 13” 답변 커뮤니티에서 도움을 받으세요.
기기를 재조립하려면 이 지침을 역순으로 따르세요.
최적의 성능을 위해 새로 설치한 배터리를 보정하세요. 배터리를 100% 충전한 다음 최소 2 시간 더 충전하세요. 그런 다음 기기가 배터리 부족으로 인해 꺼질 때까지 사용하세요. 마지막으로 중단없이 100% 충전하세요.
전자 폐기물을 R2 또는 e-Stewards 인증 재활용 센터로 가져가세요.
수리가 계획대로 진행되지 않았습니까?
기본 문제 해결, 또는 자사의 MacBook Pro 13” 답변 커뮤니티에서 도움을 받으세요.
다른 246명이 해당 안내서를 완성하였습니다.
다음 번역가들에게 특별히 감사 드립니다:
93%

Christian Kim님은 저희가 세상을 수리하는데 동참하신 분입니다! 기여하시겠습니까?
번역 시작하기 ›

댓글 63개
There is a much easier way to get the batteries out. If you look at the 2 cells on either side (left and right), you will notice that they put them in an area that is slightly lowered. This is by design. To remove the batteries, pour a small amount of 90% isopropyl alcohol on both sides and let it sit for about 30 to 45 mins. It will dissolve the glue and you can gently then lift out the batteries without any prying. After you remove the batteries, simply wipe up any remaining alcohol, let it dry, buff it clean, and insert the new battery. Considerably easier and safer than potentially damaging the battery packs. If you are putting the same battery pack back, just use double sided tape. IMPORTANT NOTE: ALWAYS BE SAFE USING ISOPROPYL ALCOHOL AROUND FLAMES OR ANYTHING THAT MIGHT MAKE IT BURN. ALSO, NEVER ATTEMPT TO PRY THE BATTERIES IN ANY WAY IF ANY ALCOHOL IS STILL POTENTIALLY PRESENT!! WAIT UNTIL IT IS EVAPORATED!!
jimhoffa69 - 답글
Thank You for the hint with the alcohol, but where can I buy a spare battery?
Uli -
I poured isopropanol into those lowered areas but unfortunately it soaked up along the battery leads and got all the way under the keyboard and elsewhere where it shouldn’t. It made some other plastic parts of the computer swell which isn’t good so I would not recommend pouring any solvent in there. Add a very small amount of solvent (0.25 ml) just enough to soften the adhesive, and let it sit for about 30 min and then pry carefully and add a little more, making sure it doesn’t get soaked up by the battery leads.
Another important thing: when you buy a battery, make sure it’s new, up to 1 year from date of manufacture because they have a limited shelf life and get permanently damaged when sitting uncharged.
Prying the battery out is HARD! and VERY dangerous. I tried using a flat head screwdriver, put it under the battery and twisting the thing out. DO NOT DO THAT!! as it can punch a hole in the battery if you twist it too hard. I had a small smoke coming off by doing that and was lucky enough it didn't burn. Using isopropyl would be an ideal solution. But to bad I can't find that around here :(.
[DO THIS ON YOUR OWN RISK] What I ended up doing is using the screwdriver to gouge the underlying glue out as much as I can on the side (about 10%) and use fingers to pry it up. Good luck!
Perfect! not as difficult as it looked first, especially with the proper tools. To take the batteries out the alcohol (I used ethanol used for cleaning purposes) works like charm. I put a few ml in nearby the batteries, waited maybe 20min and was able to pry them out easily. Tried before without the alocohol and nothing moved. I ordered the battery on ebay for 70€ and it has the same numbers and text as the original it says apple japan as well. My old battery had more than a thousand cycles after 3 years and did not last vey long. Now the software shows 0 cycles and it is charging starting at 15% and will be fully charged in 2:45h. I think apple charges 249€ for the job here in Gernany. It took me about 1 hour to replace it (with waiting).
Thanks for the excellent instructions. They were easy to follow and the new battery is working. I purchased my battery on Amazon from Brtong for $49.99. I just installed it so I don't know how long it will last but it was new and the cheapest price. It came with two tools to remove all the screws.
This is a great resource. Thanks to all that contributed to this. I was able to replace my battery today and all went well. I had a very hard time removing the old battery. The spudger broke on me and I was afraid to use alcohol so I used a screw driver and sure enough, sparks flew removing the old battery. But got it done.
Thanks again to all and ifixit.com
Thanks for the guide! Perfectly presented. Took me about an hour following the steps.
t's very important to keep organized during this replacement for ease of reassembly as there may be different size/length screws in the same step.
Someone else had mentioned using isopropyl alcohol to remove the adhesive from the batteries which is truly a great idea.
In my specific case, isopropyl alcohol was not something I had on hand. As a substitute, I used my wife's nail polish remover since Acetone evaporates fairly well (yay high school science class FTW) and sure enough, they came loose no problem. This method is NOT guaranteed, but to the careful DIYer can work great in a pinch.
Followed this point to point description and it worked like a charm (Isopropyl alcohol also helped)! (Isopropyl alcohol is sold under different brand names.)
Screws described in points 15 and 19 are not exactly as my MacBook. You describe 2 long and 1 short. I have 1 short black screw and 2 long screws (1 black and 1 silver) - the silver one in the corner and is hidden and covered by "metal wool" (peel it of).
Sadly this was a disaster for me.
All went well at first. I was able to follow all the instructions, and I used some alcohol, since the batteries were very hard to remove. Make sure the force you apply is aimed downward, to scrape through into the adhesive. And don't use much. When the battery is ready to come up free, it will. Don't rush it and pry upward until it's really starting to lift, meaning the glue is giving way.
The rest of the instructions are easy, so I thought. I actually managed to break the left speaker connector from the board. I wasn't too worried, as I don't use the computer speakers much anyway. On reassembly, I tried to glue the connector back. Doubt that worked.
I was able to reassemble the whole machine. When I powered it on (with cable), the battery was recognized (system report) but WOULD NOT charge. The system then started to degrade. Mouse and keyboard started malfunctioning. It's dead. Will return the battery, and go shopping.
Just performed this today suing the same brtong battery from Amazon that someone else mentioned. $50 on Amazon. The instructions were perfect. All worked like a charm. I was scared off at first due to the stated difficulty. It is possible the glue on mine wasnt very good maybe. But seriously, anyone considering doing this, do it. It is not hard. And well worth it.
Aaron West - 답글
Worked like a charm. Except my batteries were harder to pry off than the guide would lead me to believe. Other than that, perfect, and now I've got a brand new battery. Tip: the batteries for late 2012 AND early 2013 13" MacBook Pros are the same, so you can get a battery that's listed as either.
Really useful and unbelievably specific instruction. All crystal clear on every step.
The battery removal part was really tricky, and I ended up making a wedger of my own - about 4 cm wide plywood piece that I cut at an angle (so there would be a wedge) and sanded smooth (to not damage the batteries). I found that the wide tool provided much more lifting force, while distributing the pressure equally along the whole length of battery sides.
It's definitely not as hard as it first seems. Go for it!
Just finished replacing my battery. 30 minutes start to finish. There's nothing difficult or too risky if you keep organized and follow these excellent step-by-step instructions. Couple of tips: absolutely agree with using isopropyl alcohol to loosen old adhesive, also – I printed out the instructions and just taped the screws/parts to the appropriate step/picture with a bit of masking tape and stacked them on top of each other as I went (in order), this way going back was a breeze! Go for it!
Fantastic instructions!I had no issues completing the battery change in a little over an hour, at a leisurely pace. Took my time to make sure I did every step just right. Acetone worked for me (Thanks for the tip Daniel). Slightly different screws from those in the instructions, as with Einar. Had the instructions on my desktop while doing the battery change on the laptop. Now the new battery is in full charge, and the MacBook works as before. The battery is not an OEM part, so we'll see how long it will last... Thank you Walter + all who chipped in!
Thank you- is there any place where I can buy the correct tools to remove the battery?
I bought all tools on Aliexpress, it costs there just few dollars.
micer -
Really helpful guide, I just installed a new battery and seems like it works great! It took me about 2 hours, the tricky part was to remove the old battery as others said. I used some liquid for glue removal, I think it should be available in every shop with paints and lacquers etc. I took a piece of fabric, put it into the liquid and pushed it under the battery until I could easily remove it. Finally not so difficult, but I can't imagine removing the battery without the liquid to melt the glue. Btw I bought a battery on Aliexpress for $45, hope it'll live for a while.
I just installed a new Egoway Macbook Pro 13 inch Retina Display battery (the instructions were great!). Powered it up and got nothing. Plugged it in and it worked but my battery icon has a 'X' through it and it says 'No Battery Available'.
Can someone please help????
Thank you!
Try resetting the SMC. (This is in the guide, but it's the very last step so folks sometimes overlook it. It pays to read to the end!)
I suppose it's possible you got a defective battery. I would try reconnecting the old battery and see whether that solves the problem. You may not have to re-do the entire procedure—instead, see if you can disconnect the new battery you already installed, lay the old battery directly on top of it, plug it in, and tape it down temporarily so you can flip the laptop over and boot it up. If this resolves this issue, you probably have a bad battery. And if it doesn't, drop your question into a post in our Answers forum for more detailed troubleshooting. Good luck!
Great Guide - Thanks!
My repair went off without a hitch. I used iFixit's part-only new replacement battery (which showed full capacity after installation) and my wife's nail polish remover as a solvent to loosen the adhesive. I poured a few ml's into each slight depression (i.e. under each battery pair), left that for around 20 mins to evaporate, then poured a tiny bit in again and gently pried each battery out with a spudger.
PS - I see the guide lists a T7 Torx as one of the needed tools, but I can't see where that would be needed in this repair. T5, T6 and P5 were all I needed.
The instructions were phenomenal!!! Congratulations to the author. I installed a SIKER11.21V 74WH that I bought from Amazon for $62.99. The only challenge I had is that the adhesive strips that came with the new battery were completely useless as I wasn’t able to remove the plastic layers that were covering them. I ended up removing the adhesives and used double-adhesive tape instead. The thickness was about right and there is little space for the battery cells to move once installed. The battery seems to be functioning well and is charging. Good luck to those adventurers willing to try.
Took about one hour. Pictures and directions and others comments were OUTSTANDING!
Turned on and speakers worked without a problem. Now letting the new battery drain.
Thanks for the great instructions and including everything I needed in the kit.
The operation seems to have worked fine for me, but afterwards I notice that the backlight for the bottom-center part of the keyboard is not lighting. The rest of the keyboard lights up just fine, so it’s really no trouble finding the keyboard in the dark.
I suspect that I was a little too liberal with the acetone and some of the overflow damaged one (or a few) of the keyboard LEDs. Another reason to be careful with how much solvent you apply.
Adam Smith - 답글
This is an absolutely wonderful guide. Thanks very much for providing it.
Don Abrams - 답글
Very nice guide, and the plastic alignment jig in the replacement battery was great!
I did find I was missing some of the bits promised in the repair kit. I pulled out my generic Apple toolkit I’d bought a few years back, but was missing the driver for the six tiny screws holding down the main battery. A tiny flat blade fit and I was able to get them out. I then pulled out the syringe for the acetone….why is it clinking? Syringes don’t clink….and there were the missing bits, slipped inside the handle of the syringe during shipment!
This is a very easy operation. Yes, you can do it in a few less steps, but I chose to do it EXACTLY like the instructions, that way I had the least amount of opportunity to break anything. Yes, potentially removing so many items you have an opportunity to break something, but in my opinion, it’s worth it. At least you learn where the components are and what they look like that way. Very good guide. I’m not sure of their other guides, but if they are like this one, it definitely saves $100 bucks in labor plus $199 for the battery at an Apple Store!
Great guide. The only thing I’d recommend is that when you put the new battery in, don’t stick it down until you’re happy with where it’s going, and that the position leaves a slight gap between the battery packs, and that there’s also room for the speakers.
In my case I had one issue - the interposer wasn’t sitting properly so although the magsafe showed an orange light for charging, when booted up into the OS it showed that it wasn’t charging. I had to go back in and re-seat the interposer. Now working fine!
Do not be scared by the ‘Difficult’ label! If you ever assembled legos as a kid, this should be no problem for you. Just follow the instructions and you’ll be set. Some things I wish I knew that the guide does not mention:
1. The additional screwdriver bits are inside of it. Pull the cap off the end to find them. Took me about 20 mins to realize this.
2. The kit no longer comes with the syringe so no need to mix anything/draw it up. Just use the tip dispenser for the acetone remover.
3. When you put the battery in and are ready to take the plastic cover off, don’t pull up on the blue tipped pull tabs. You have to pull them outwards horizontally and they will come out. I kept pulling them up and away and they were just tearing. Led to me literally needing to snap/break the plastic card attached to battery to get it off.
Good luck and great replacement kit!
Muchas gracias, la compra y el envío sin problemas. Hoy la recibí y en un rato coloqué la batería. Un éxito, gracias a todos los que contribuyeron a que esto sucediera
Absolutely amazing! It was the first time I ever opened a Macbook Pro, but it took me less than 60 minutes to reboot with the new battery. All rolled out smoothly. with a minor hindrance when reattaching the battery connector. The wiring was a bit stiff so I had to proceed with even more caution. As for the rest, awesome 90€ investment in my MBP to have it juiced up again. Just reset the SMC and I am 69% with 5H6M remaining. Thank you, Walter and ifixit!
I decided not to use the adhesive on the new battery- why make life difficult for the next time the battery needs swapping out? the cells will rattle if you don’t fix them somehow, though, so after I was sure everything was working (coconut battery app can read make & s/n of new battery, & states capacity as 110% of original, which is nice), I tucked a couple of iphone screen cloths in there instead.
I managed to lift the smaller cells away from the case just with the ifixit card & patient force. I used a few drops of goo-gone under the larger cells & to clean up the residual glue. I could definitely do this a lot quicker next time.
thanks all at ifixit!
duncan rmi - 답글
I successfully replaced batteries in two 2012/2013 MBP retinas this week, thanks to this guide! A few things that I noticed are worth mentioning.
First, the screws on the speaker diagrams seem to be mislabeled. The screw closest to the touchpad was clearly the shortest of the three, and the other two were the same length (although one is silver and one is black).
On three of the four speakers I removed, the plastic bracket nearest the touchpad disintegrated, so I stuck some adhesive backed neoprene on the back of the speaker to hold it firmly against the back plate and prevent vibration.
It makes much more sense to remove the SSD tray immediately after disconnecting the SSD. Even though I read through the guide before starting, I did not realize this until I got to step 22.
I also did not find it particularly useful to bend cables in order to move components out of the way, so I skipped this on the second replacement that I did and just held components back slightly when necessary.
I just finished replacing the battery using this guide and I just want to say thank you. By far the “hardest” part was just getting the old adhesive off once the old battery was removed. That being said, this thing was a breeze.
It’s worth to mention, that speakers lower corners with 6.8 T5 screw could be cracked. Many MacBooks got it cracked by the Apple factory itself. Do not bother. Good to know, not to screw that T5 too much, becouse you can damage unibody uppercase .
matlosz pl - 답글
Bin leider sehr enttäuscht, hätte mir mehr von ifixit erwartet.
Habe den Akku genau wie in der Anleitung eingebaut und anschließend kalibriert.
Bis 51% Akkustatus läuft alles normal, aber bei 50% Akku springt die Akkuanzeige in einer Sekunde auf 7%!
Ich habe extra den Akku bei ifixit bestellt, weil ich dachte, dass er besser performen würde als die billigen Akkus von Amazon usw.
Leider verhält der Akku sich genauso wie alle anderen Nachbau-Akkus.
Hätte ich das gewusst, hätte ich mir gleich einen günstigeren Akku bei Amazon bestellen können.
Außerdem ist es nicht mein erster Akku den ich eingebaut habe und mir ist klar, dass man diesen Kalibrieren muss.
Armin Robb - 답글
Hallo Armin, es tut mir sehr leid zu hören, dass du Grund zur Beanstandung hattest. Bitte wende dich doch direkt an unseren Kunden-Support, da wird dir ganz sicher weitergeholfen: eustore@ifixit.com wenn du im EU Store bestellt hast oder support@ifixit.com, wenn du im US Store bestellt hast.
Fantastic guide very well written thank you very much and MacBook now fixed !
Vielen Dank für die Anleitung und die hervorragende Übersetzung! Der Akku-Tausch hat einwandfrei geklappt. Ich habe die neue Batterie inklusive Repair-Kit bestellt. Das Lösen der verklebten Akkus benötigt viel Geduld - die 2-3 Minuten Wartezeit sind nicht untertrieben.
Der iFixIt-Akku hat mehr Kapazität als angegeben und wird vom MacBook einwandfrei erkannt. Jetzt noch ein wenig Training und das alte MacBook ist wieder fit für unterwegs!
Not that difficult! I took my time and followed these instructions precisely. I could not be more pleased. The ifixit battery and tool kit were exactly what I needed. A very pleasant experience, and flawless results.
Thank you a lot. Great detailed manual. You saved my Mac!!!
Thank you for this kit. Replaced my defunct Macbook Pro battery (13” 2012 model) with the aftermarket battery and the instructions listed in this guide. Everything worked out great, and as was noted, the hardest part with removing the old adhesive off of the batteries was the hardest part, but with the images provided, the instructions definitely provided more confidence that I was doing the right thing. Well done, and I would highly recommend this solution to anyone who has older hardware that they’re not quite ready to get rid of yet! I had gone to an after market Apple technical support store who indicated that they could replace the battery for me for about $650 - I spent just over $100 on the kit here at Ifixit!
Also, successful thanks to this wonderful guide. Replaced my defunct MacBook Pro battery (13” 2012 model) with an aftermarket battery. But I used teeth floss wire to remove the battery adhesive.
Followed the instructions to the T, it was very clear.
Upon finishing, I put it to charge — the maglev light is on amber. I was curious about how much this battery’s capacity will be, so I tried to turn the MBP on (despite the battery not being fully charged yet/maglev light still on amber). Nothing happened.
So, I tried doing the SMC thing too. When I release after the 10 seconds, the maglev light changes to green for a second or two, then reverts back to amber. Then, if I press the power button, still nothing happens.
What’s the issue? My Macbook Pro is now not switching on… is it to do with me having to wait until the maglev light reaches green?
Or maybe because I didn’t shut down properly before I started this? (I am so used to just shutting the lid, I completely forgot to shut the computer down. Would this have an effect?)
Grateful for any advice.
Edit: I googled a bit. I ended up just playing around with my keyboard doing different NVRAM/PRAM/SMC combos. I ended up with shift + ctrl + option + command + power for 10 seconds. Screen’s now come on. The fan is really noisy?? And coconutBattery can’t detect my battery… but it’s also saying that the power adapter isn’t connected… oh and also the maglev light is now green….??
I’m afraid if I take out the power lead the macbook will just shut down on me..
Edit^2: So after a night’s rest I realised that it must be the MBP cannot detect the battery. I opened it up again (this time actually using my brain a bit!) and learned about the bit that connects the battery to the rest of the computer (interposer). Undid the screws to the connector, realigned, and put back the screw closest to the interposer first, as that’s the most important. Then put the other two screws in, not minding that they weren’t exactly 100% aligned (maybe 99.5%), but so long as the interposer is aligned and secured right that’s the most important thing. Result? I’m now updating my issue on my MBP, without an adapter, on a new battery! The freedom it brings without having to rely on the adapter! Magnifique! Thank you iFixit, this was an enjoyable and manmaking process :) PS. the haribo’s you guys include aren’t vegetarian friendly ;) , but no matter at all — I’m more than happy with this outcome!
&&^& this, I’ll just buy a whole new laptop before I go &&^&^$^ with alcohol and all this other bullshit… Glue and what not. WTF?!?
James Hall - 답글
Tutoriel très bien fait !! Bravo!!! Ce fut assez facile vraiment…
Merci bcp
Used this guide, worked perfectly. Appreciate the level of detail and the awesome fix kit.
Manav Shah - 답글
Be very careful prying the speaker wires off - destroyed left speaker wire, now waiting on a replacement used left speaker - UGH!
Merci beaucoup l’opération s’est parfaitement déroulée.
J’ai décollé les vieilles batteries en déposant sur le capot en alu une poche de gel pour le sport que j’avais chauffé au micro-onde et j’ai soulevé doucement les batteries en faisant levier qui se sont lentement décollées entraînant la colle.
Puis remontage en marche arrière.
Bravo tuto vraiment parfait.
Late 2012 13” retina - replaced the battery about 5 years ago with another kit - had to replace that one - the iFixit kit, tools, directions worked great - much better quality than the previous replacement battery. Had to do a SMC reset, but it’s working fine now.
Sanitizer also works as a great glue solvent after soaking for 30 minutes and use credit card to pry it up. The sanitizer I used was with 70% alcohol purchased from costco.
Thanks very much for the fantastic guide. Worked without using alcohol to get the batteries out. Was easy possible just carefully prying out!!!
Fantastic, I am totally an IFixit convert. My MB Pro has now had a new screen, new speakers and new batteries. Hoping to get many more years from this device. Thank you for being the hero service that we so need!
Instructions and kit works great. Hardest part was just staying patient and letting the alcohol do the work of loosening the batteries. Patiently prying with almost no pressure to release the battery. After a bit of the glue releases - put some more alcohol in, and wait for it to release a bit more.
Shipping was fast.
Relativement facile. Aucune difficulté particulières.
Le tuto est vraiment bien fait et tout se déroule comme décrit.
If don’t have one of those neat project mats, then you can use small pieces of flattened blu-tack to hold the screws. If you arrange them in the shape of your mac book cover, and put the screws down methodically, you can get a one-to-one mapping of the screws to the correct screw holes.
Toby Thurston - 답글
Or you can use an ice tray where you put the screws and the parts in separate bays in the same order as they come in the instructions.
timofej.se -
This is great! I used a small magnetic white board, and wrote on it to identify the parts as I went. This whole process, from the fast shipment to the great instructions to the complete, high quality, tool kit has been great. I’m typing this comment on my resurrected laptop. Thank you! Sue
Susan Greer - 답글
It would be a good idea if people recorded in the comments which screws go where so that, if someone lost their screw positions, they could recover them from the comments.
Raymond Shpeley - 답글