주요 콘텐츠로 건너뛰기

MacBook Pro 13" Retina Display Late 2012 Display Assembly Replacement

단지 전제 조건
이 안내서는 다른 가이드의 선행 작업으로 사용하기 위한 것입니다. 그 자체로는 불완전합니다.

필요한 것

  1. MacBook Pro 13" Retina Display Late 2012 Display Assembly Replacement, Display Assembly: 1 단계, 이미지 1/2 MacBook Pro 13" Retina Display Late 2012 Display Assembly Replacement, Display Assembly: 1 단계, 이미지 2/2
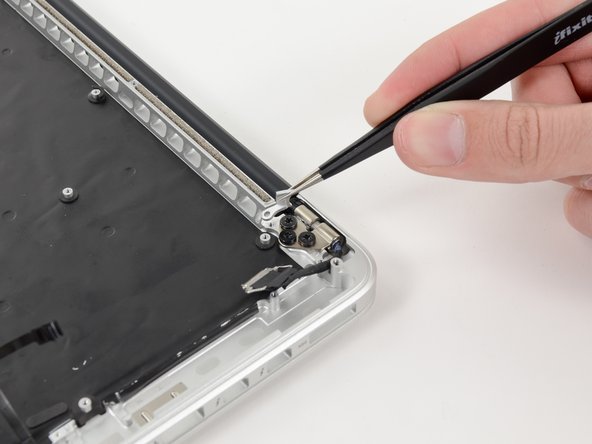
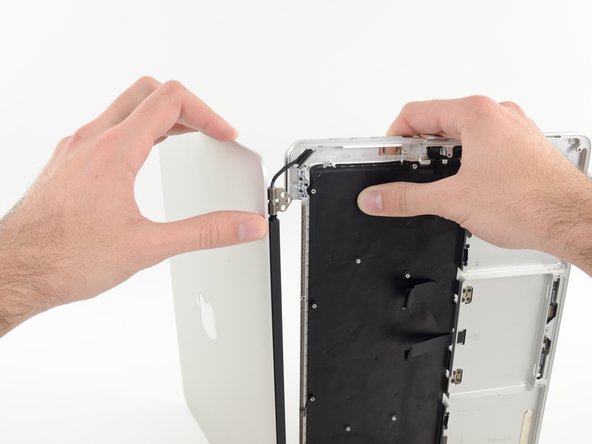
    • Use a pair of tweezers to lift the rubber hinge covers up off the right and left display hinges.

  2. MacBook Pro 13" Retina Display Late 2012 Display Assembly Replacement: 2 단계, 이미지 1/2 MacBook Pro 13" Retina Display Late 2012 Display Assembly Replacement: 2 단계, 이미지 2/2
    • Remove the 3.2 mm T5 Torx screws (one on each side) securing the aluminum hinge brackets to the upper case.

  3. MacBook Pro 13" Retina Display Late 2012 Display Assembly Replacement: 3 단계, 이미지 1/2 MacBook Pro 13" Retina Display Late 2012 Display Assembly Replacement: 3 단계, 이미지 2/2
    • Use a pair of tweezers to lift aluminum hinge brackets off the right and left display hinges.

  4. MacBook Pro 13" Retina Display Late 2012 Display Assembly Replacement: 4 단계, 이미지 1/2 MacBook Pro 13" Retina Display Late 2012 Display Assembly Replacement: 4 단계, 이미지 2/2
    • Remove the four inner 5.3 mm T8 Torx screws (two on each side) securing the display to the upper case.

  5. MacBook Pro 13" Retina Display Late 2012 Display Assembly Replacement: 5 단계, 이미지 1/2 MacBook Pro 13" Retina Display Late 2012 Display Assembly Replacement: 5 단계, 이미지 2/2
    • Open the MacBook Pro approximately 110 degrees, and place it sideways on the table, as shown.

    • While holding the display and upper case together with your left hand, remove the remaining T8 Torx screw from the lower display bracket.

    • Be sure to hold the display and upper case together with your left hand. Failure to do so may cause the freed display/upper case to fall, potentially damaging each component.

    • Remove the last remaining T8 Torx screw securing the display to the upper case.

  6. MacBook Pro 13" Retina Display Late 2012 Display Assembly Replacement: 6 단계, 이미지 1/3 MacBook Pro 13" Retina Display Late 2012 Display Assembly Replacement: 6 단계, 이미지 2/3 MacBook Pro 13" Retina Display Late 2012 Display Assembly Replacement: 6 단계, 이미지 3/3
    • Grip both halves of the device, one in each hand.

    • Gently push forward on the bottom half of the device to detach it from the display assembly.

    • Carefully set each component aside, making sure to set down the lower half keyboard-side down.

결론

To reassemble your device, follow these instructions in reverse order.

Walter Galan

694,676 평판

안내서 1,203개 작성하였습니다

댓글 0개

댓글 쓰기

조회 통계:

24 시간 전: 0

7일 전: 0

30일 전: 0

전체 시간: 57