주요 콘텐츠로 건너뛰기

MacBook Pro 13" Retina Display Late 2012 I/O Board Replacement

단지 전제 조건
이 안내서는 다른 가이드의 선행 작업으로 사용하기 위한 것입니다. 그 자체로는 불완전합니다.

필요한 것

  1. MacBook Pro 13" Retina Display Late 2012 I/O Board Replacement, I/O Board: 1 단계, 이미지 1/3 MacBook Pro 13" Retina Display Late 2012 I/O Board Replacement, I/O Board: 1 단계, 이미지 2/3 MacBook Pro 13" Retina Display Late 2012 I/O Board Replacement, I/O Board: 1 단계, 이미지 3/3
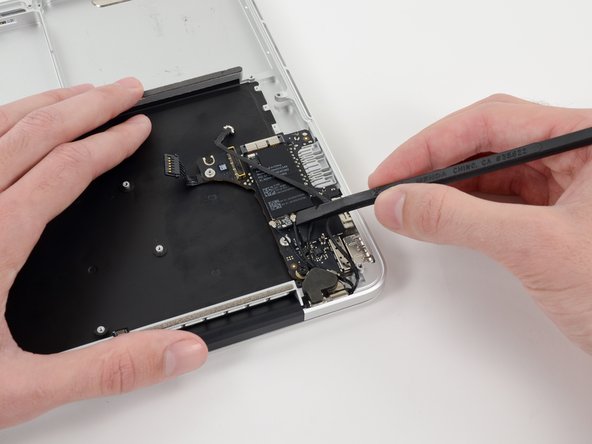
    • Use the flat end of a spudger to pry and disconnect the three antenna cable connectors from the AirPort board.

    • The three cables are coded with black sleeves of different lengths. During reassembly:

    • Connect the long-sleeved cable to the center socket.

    • The short-sleeved cable connects next to the screw.

    • The remaining cable has no sleeve, and connects in the last empty socket, next to the fan.

  2. MacBook Pro 13" Retina Display Late 2012 I/O Board Replacement: 2 단계, 이미지 1/1
    • Remove the following two screws securing the I/O board to the upper case:

    • One 3.53 mm T5 Torx screw

    • One 4.89 mm T8 Torx standoff screw

  3. MacBook Pro 13" Retina Display Late 2012 I/O Board Replacement: 3 단계, 이미지 1/2 MacBook Pro 13" Retina Display Late 2012 I/O Board Replacement: 3 단계, 이미지 2/2
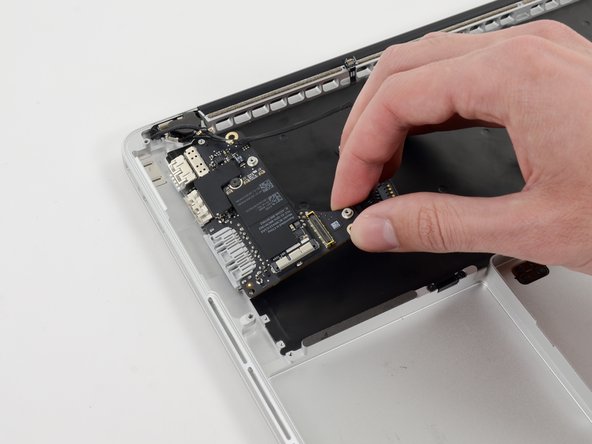
    • Carefully pull and remove the I/O board away from its recess in the upper case.

결론

To reassemble your device, follow these instructions in reverse order.

Walter Galan

694,676 평판

안내서 1,203개 작성하였습니다

댓글 0개

댓글 쓰기

조회 통계:

24 시간 전: 0

7일 전: 0

30일 전: 0

전체 시간: 41