소개
Use this guide to replace the Retina display, display glass, and iSight camera assembly.
필요한 것
-
이 단계에 사용된 도구:Magnetic Project Mat$19.95
-
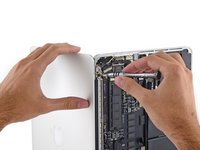
Remove the following ten screws securing the lower case to the upper case:
-
Two 2.3 mm P5 Pentalobe screws
-
Eight 3.0 mm P5 Pentalobe screws
-
-
-
-
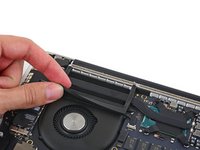
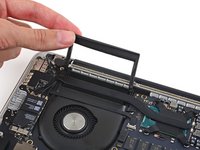
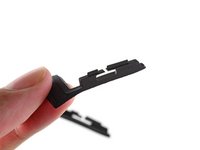
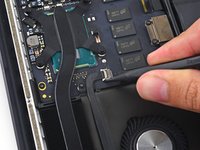
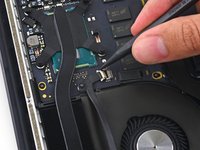
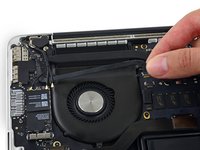
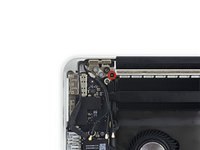
Carefully peel the rubber fan bumper from the edge of the heat sink to expose the iSight camera cable adhered to the fan.
-
-
-
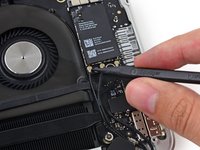
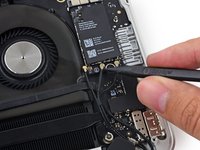
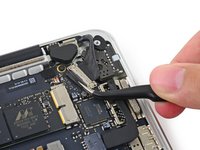
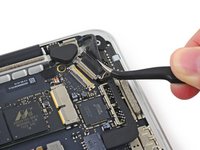
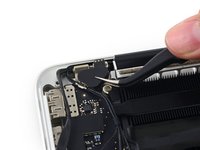
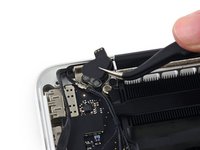
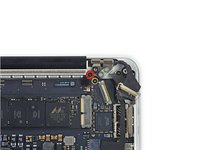
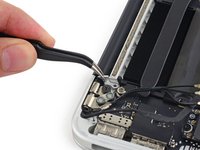
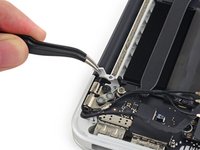
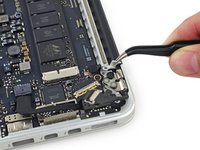
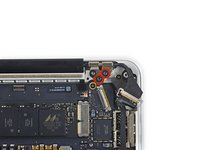
Insert the tip of a spudger under each of the antenna cables near their connectors and pry up to disconnect them from the AirPort board.
-
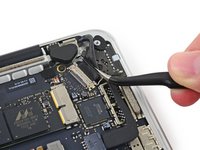
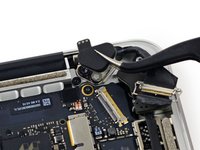
Connect the long-sleeved cable to the center socket.
-
The short-sleeved cable connects next to the screw.
-
The remaining cable has no sleeve, and connects in the last empty socket, next to the fan.
-
-
-
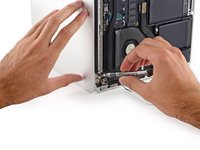
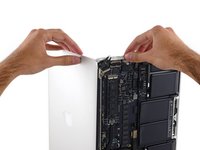
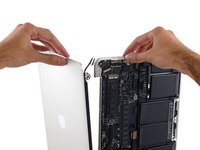
Grab the upper case with your right hand and rotate it slightly clockwise, toward the top of the display, so the display brackets clear the edge of the upper case.
-
Rotate the display slightly away from the upper case.
-
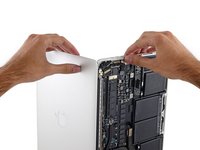
Pull the display away from the upper case, minding any brackets or cables that may get caught.
-


To reassemble your device, follow these instructions in reverse order.
다른 169명이 해당 안내서를 완성하였습니다.


35가이드 댓글
I've been browsing guides to this model and I don't get how in this one on Youtube the laptop looks completely different, although it also claims to be A1502. Either one of them is a different model or I'm really missing something?
Unfortunately the A1502 number isn't an exclusive model number, several devices share it, the internal differences between them vary. The more telling number is the EMC number, which tends to me more exclusive to unique devices.
After a closer look they actually seem to be the same, I just got confused by the video being a lot less detailed than this walkthrough. I just replaced the screen of my macbook following this guide (yay!) without any previous experience of fixing macbooks, though I must admit I assembled a few desktops at the dawn of the millennium. The only slight problem I encountered was that the main display cable wouldn't lie flat enough in that corner, it kept sticking out, and even after screwing the lid on the gap at that corner seems to be a tiny bit wider. But the laptop is working anyway.
Thank you Sam for posting this guide! It saved me a lot of time and money. Being in China I bought the display assembly on Taobao for $250US whereas the shop repair estimate that I got was around $400.
If anyone is still having doubts - you can do it!
Can you replace just the LCD without the clamshell bezel and cables?
rickcostel - 답글 공유