소개
이 안내서를 사용하여 고장난 디스플레이 어셈블리를 교체하세요.
필요한 것
-
-
다음 나사 열 개를 풀어주세요:
-
14.4mm Phillips/십자 #00 나사 세 개
-
3.5mm Phillips/십자 #00 나사 세 개
-
3.5mm shouldered Phillips/어깨 십자 #00 나사 네 개
-
-
-
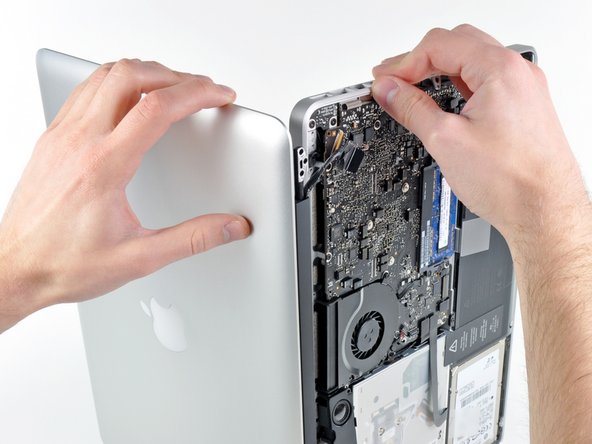
Spudger/스퍼저의 평평한 끝을 사용하여 AirPort/Bluetooth 리본 케이블 커넥터를 로직 보드 소켓에서 들어 올리세요.
-
-


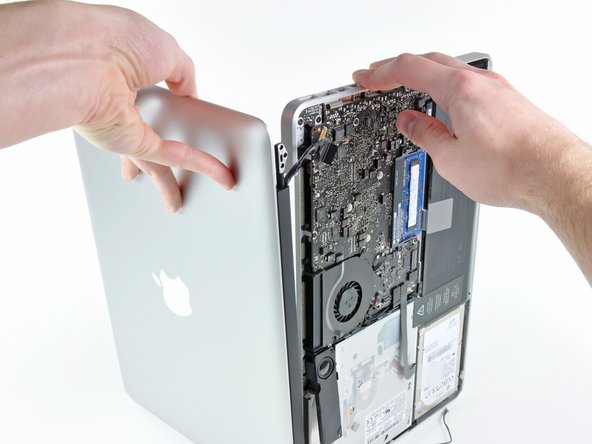
기기를 재조립하려면 이 지침을 역순으로 따르세요.
기기를 재조립하려면 이 지침을 역순으로 따르세요.
다른 84명이 해당 안내서를 완성하였습니다.
다음 번역가들에게 특별히 감사 드립니다:
100%

Christian Kim님은 저희가 세상을 수리하는데 동참하신 분입니다! 기여하시겠습니까?
번역 시작하기 ›

댓글 8개
Step 18 and 19 is easier if you place the bottom keyboard down, with the display hanging over the edge of a table. This stabilizes the bottom assembly, making teardown and reassembly easier for one person
Fantastic tip - I placed it in front of me so the display rested on my thighs while the base was flat on the table - very safe, no fear of dropping/slipping.
Annette -
Thank you Phillip for providing this Guide. I used it to replace a bad LCD assembly after a water spill damaged it. The last Step 20 is very difficult. I had the worst time trying to separate the two parts after I removed the final Torex screw. It took a while, trying different angles, but I finally got it. Putting in the new one was a trivial exercise...
Phillip, thank you so much for this excellent guide. I have no technical background at all but I found it very easy to use - and it saved me hundreds of dollars on a professional repair job. Keep up the good work!
Thank you so much for going to the effort to explain the steps. It worked out perfect. I work as a Lean Engineer developing Standard Work, which is exactly what you have done. I couldnt have done it any better. Thank you if you ever come to Ireland I owe you a pint :)
Noel Kelly - 답글