이 버전에는 잘못된 편집 사항이 있을 수 있습니다. 최신 확인된 스냅샷으로 전환하십시오.
필요한 것
-
이 단계는 번역되지 않았습니다. 번역을 도와주십시오
-
Remove the pieces of yellow kapton tape from the bottom left corner of the display.
-
Peel the three green antenna ground straps off the copper tape along the bottom edge of the LCD.
-
Remove the piece of tape securing the camera cable to the LCD.
-
-
이 단계는 번역되지 않았습니다. 번역을 도와주십시오
-
Remove the pieces of tape covering the display data cable and camera cable connectors.
-
Carefully peel the camera cable off the foam tape along the top edge of the LCD.
-
-
이 단계는 번역되지 않았습니다. 번역을 도와주십시오
-
Gently pull the camera cable away from its socket on the camera board.
-
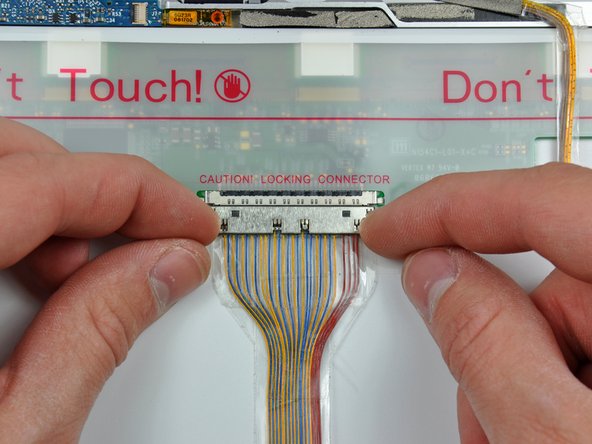
Pull the display data cable connector away from its socket on the LCD.
-
Pull both cables parallel to the face of the logic board.
-
-
-
이 단계는 번역되지 않았습니다. 번역을 도와주십시오
-
If you have a Core Duo machine, refer to picture 1 and remove three Phillips screws connecting the clutch assembly to the lower edge of the front display bezel near the display data cable.
-
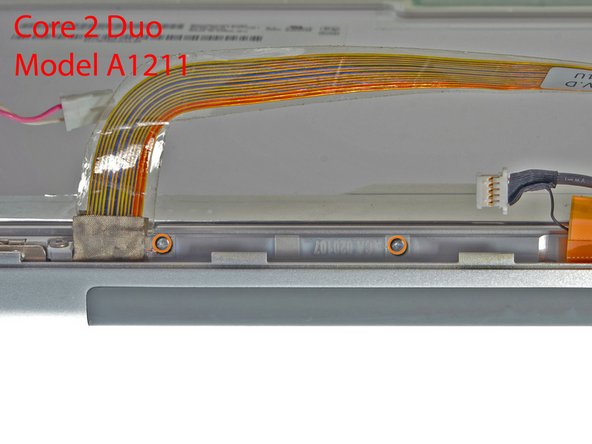
If you have a Core 2 Duo Model A1211 machine, refer to picture 2 and remove two Phillips screws connecting the clutch assembly to the lower edge of the front display bezel near the display data cable.
-
-
이 단계는 번역되지 않았습니다. 번역을 도와주십시오
-
Remove the small Phillips screw from behind the display data cable.
-
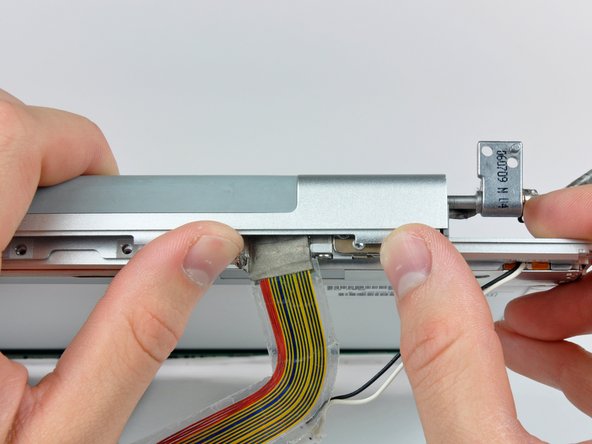
Remove the small rectangular steel bracket by sliding it away from the right clutch hinge.
-
-
이 단계는 번역되지 않았습니다. 번역을 도와주십시오
-
Remove three Phillips screws attaching the clutch assembly to the lower edge of the front display bezel.
-
-
이 단계는 번역되지 않았습니다. 번역을 도와주십시오
-
Push the open edge of the clutch cover away from the left clutch hinge to pop it off the clips attaching the two parts.
-
Remove the clutch assembly from the front display bezel.
-