소개
Replace a broken clutch hinge to keep your display opening silky-smooth.
필요한 것
-
-
Use your fingers to push both battery release tabs away from the battery, and lift the battery out of the computer.
-
-
-
Lift up at the rear of the case and work your fingers along the sides, freeing the case as you go. Once you have freed the sides, you may need to rock the case up and down to free the front of the upper case. This stage can be quite tricky. Over the DVD reader are 4 tabs set back which pull out vertically.
-
Note that the two small tongues on the left hand front of the upper case may bend while you remove the upper case. When re-installing, you may need to bend them back to fit in the grooves in the lower case.
-
-
-
-
Remove the two 5 mm Phillips screws from the lower left and right corners of the display (two screws total).
-
-
-
Insert the flat end of a spudger perpendicular to the face of the display between the plastic strip attached to the rear bezel and the front bezel.
-
With the spudger still inserted, rotate it away from the display to separate the front and rear bezels.
-
Work along the left edge of the display until the rear bezel is evenly separated from the front bezel.
-
-
-
Insert the flat end of a spudger perpendicular to the face of the display between the plastic strip attached to the rear bezel and the front bezel.
-
With the spudger still inserted, rotate it away from the display to separate the front and rear bezels.
-
Work along the right edge of the display until the rear bezel is evenly separated from the front bezel.
-
-
-
Insert the flat end of a spudger between the front bezel and the plastic strip attached to the rear bezel near the screw holes at the bottom corners of the display.
-
Rotate your spudger toward the rear bezel to separate it from the front bezel.
-
If necessary, enlarge the gap between the lower edge of the rear bezel and the clutch cover until the two components are completely separated.
-
-
-
Remove the pieces of yellow kapton tape from the bottom left corner of the display.
-
Peel the three green antenna ground straps off the copper tape along the bottom edge of the LCD.
-
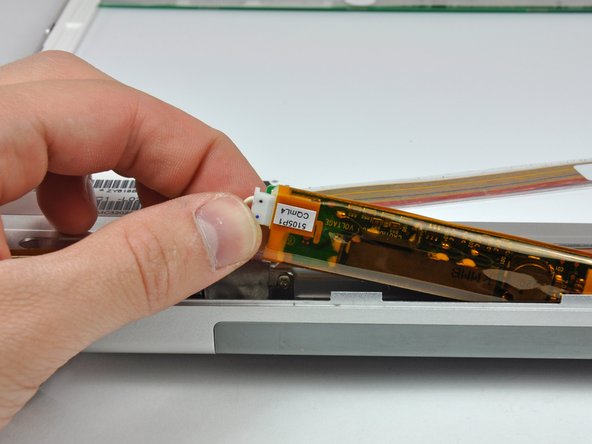
Remove the piece of tape securing the camera cable to the LCD.
-
-
-
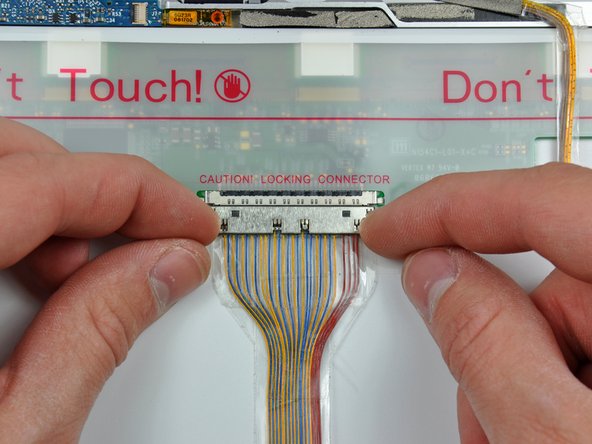
If you have a Core Duo machine, refer to picture 1 and remove three Phillips screws connecting the clutch assembly to the lower edge of the front display bezel near the display data cable.
-
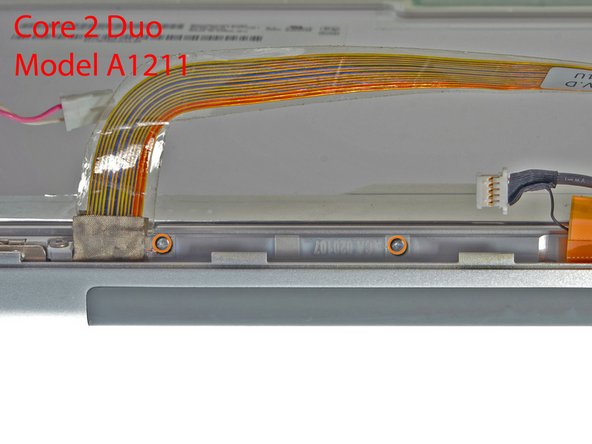
If you have a Core 2 Duo Model A1211 machine, refer to picture 2 and remove two Phillips screws connecting the clutch assembly to the lower edge of the front display bezel near the display data cable.
-
-
-
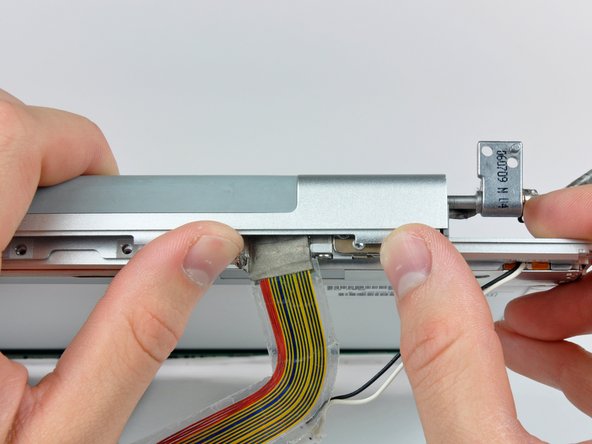
De-route the display data cable from around the right clutch hinge and remove it from the front bezel.
-
-
-
Remove the four T6 Torx screws securing the right clutch hinge to the front display bezel.
-


To reassemble your device, follow these instructions in reverse order.
To reassemble your device, follow these instructions in reverse order.
다른 3명이 해당 안내서를 완성하였습니다.

댓글 한 개
Wow! this was definitely difficult and tedious. But alas!!! my screen is no longer loose. The screws inside the display simply needed to be tightened.
I wrote down which screws went where as line items. I recommend working on a large white area. I dropped a #00 Phillips and spent 15 minutes trying to find it on the dark hardwood floor. But thanks so much!!!!