이 버전에는 잘못된 편집 사항이 있을 수 있습니다. 최신 확인된 스냅샷으로 전환하십시오.
필요한 것
-
이 단계는 번역되지 않았습니다. 번역을 도와주십시오
-
Use the flat end of a spudger to pry the rubber hinge covers up off the left and right hinges.
-
-
이 단계는 번역되지 않았습니다. 번역을 도와주십시오
-
Remove the two 3.1 mm T5 Torx screws securing the aluminum hinge covers to the upper case.
-
Remove the two aluminum hinge brackets from the MacBook Pro.
-
-
-
스퍼저의 납작한 끝을 사용하여 로직 보드의 소켓에서 I/O 보드 커넥터를 똑바로 들어 올립니다.
-
비슷한 방법으로 I/O 보드의 소켓에서 I/O 보드 케이블 커넥터를 분리하세요.
-
MacBook Pro에서 I/O 보드 케이블을 분리하세요.
-
-
-
-
스퍼저의 끝을 사용하여 I/O 보드 데이터 케이블 잠금 장치를 뒤집어 컴퓨터의 배터리 쪽을 향해 돌리세요.
-
스퍼저의 납작한 끝을 사용하여 I/O 보드 데이터 케이블을 로직 보드의 소켓에서 똑바로 밀어내세요.
-
-
-
스퍼저의 납작한 끝을 사용하여 왼쪽 스피커 커넥터를 들어 올려 로직 보드의 소켓에서 빼내세요.
-
스퍼저의 끝을 사용하여 오른쪽 스피커 커넥터를 로직 보드의 소켓에서 위로 들어 올려 빼내세요.
-
-
이 단계는 번역되지 않았습니다. 번역을 도와주십시오
-
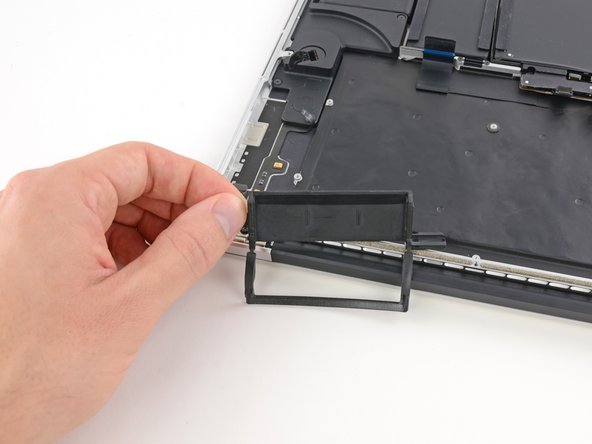
Remove the single 2.6 mm T5 Torx screw securing the left rubber hinge cover in place.
-
Slide the hinge cover out of its bezel, then lift it up and out of the device.
-
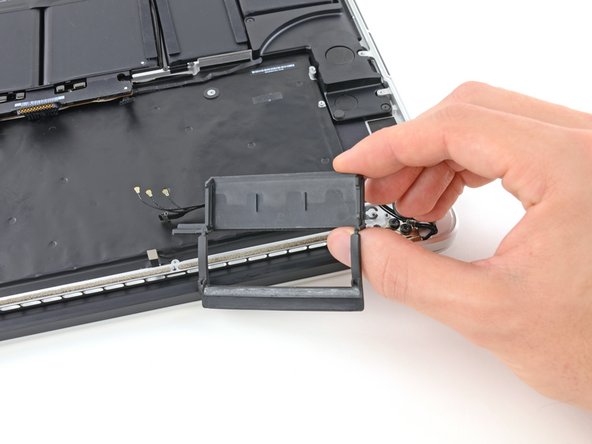
Slide the right cover out of its bezel, then lift it out of the device.
-
-
이 단계는 번역되지 않았습니다. 번역을 도와주십시오
-
Insert the edge of a plastic opening tool underneath the upper microphone.
-
Slide the blade of a plastic opening tool along the bottom of the upper microphone, releasing the adhesive.
-
In a similar manner, release the adhesive underneath the lower microphone.
-
Lift the cable out of the device.
-
-
이 단계는 번역되지 않았습니다. 번역을 도와주십시오
-
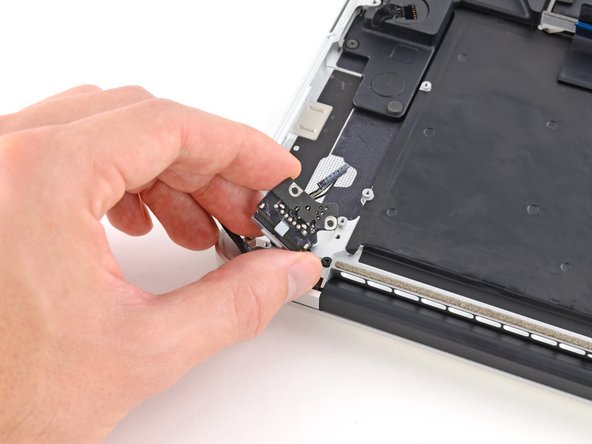
Remove the two 4.0 mm T5 Torx screws securing the MagSafe DC-In board to the upper case.
-
Slide the MagSafe DC-In board towards the right to free it from its recess within the upper case.
-
Lift and remove the MagSafe DC-In board out of the upper case assembly.
-
-
이 단계는 번역되지 않았습니다. 번역을 도와주십시오
-
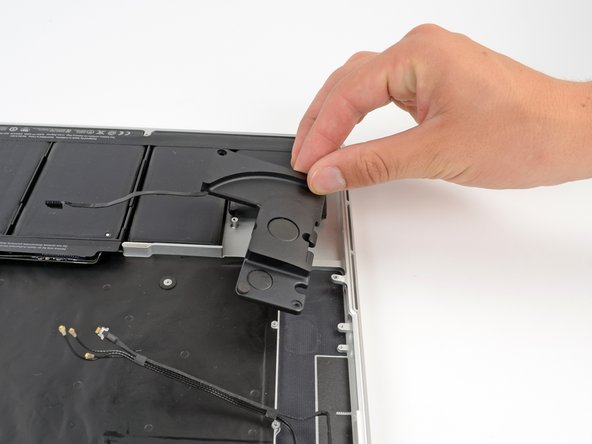
Remove the following three screws securing the left speaker to the upper case:
-
One 5.6 mm T5 Torx screw
-
One 6.9 mm T5 Torx screw
-
One 2.6 mm T5 Torx screw
-
Lift the left speaker out of the upper case and set it aside.
-
-
이 단계는 번역되지 않았습니다. 번역을 도와주십시오
-
Remove the following three screws securing the right speaker to the upper case:
-
One 5.6 mm T5 Torx screw
-
One 6.9 mm T5 Torx screw
-
One 2.6 mm T5 Torx screw
-
Remove the right speaker from the MacBook Pro.
-
-
이 단계는 번역되지 않았습니다. 번역을 도와주십시오
-
Remove four out of the six 5.3 mm T8 Torx screws securing the display to the upper case.
-
-
이 단계는 번역되지 않았습니다. 번역을 도와주십시오
-
While supporting both halves of the device with one hand, unscrew the upper 5.3 mm T8 Torx screw.
-
-
이 단계는 번역되지 않았습니다. 번역을 도와주십시오
-
Grip both halves of the device. Firmly put one hand on the top center of the upper case (left) and one in the same place on the display assembly (right).
-
While holding the display assembly in place, slowly push forward on the upper case, releasing it from the display assembly.
-


다른 36명이 해당 안내서를 완성하였습니다.

댓글 5개
Is there anyway to fix a track pad that is sticking Not clicking and selecting things at randon
Un gros coup d’air comprimé m’a suffit à résoudre le problème. A big blow of compressed air was enough to solve the problem ( insists on the lower left level and gap)
If this needs to be done in order to replace a faulty battery pack... some nylon string, sprinkled with a generous amount of caution, will do the trick.
Once I removed the right speaker, it only took me 10 minutes to cut the glue holding the batteries.
It is very doable if one proceeds with caution.
what changes from the 2012-early 2013 upper case to the late 2013-2014?
Just make sure to remove the headphone jack from the body as well. It is fastened with two T5 screws. The connector is disconnected part of this guide already.