이 버전에는 잘못된 편집 사항이 있을 수 있습니다. 최신 확인된 스냅샷으로 전환하십시오.
필요한 것
-
-
스퍼저의 납작한 끝을 사용하여 로직 보드의 소켓에서 I/O 보드 커넥터를 똑바로 들어 올립니다.
-
비슷한 방법으로 I/O 보드의 소켓에서 I/O 보드 케이블 커넥터를 분리하세요.
-
MacBook Pro에서 I/O 보드 케이블을 분리하세요.
-
-
-
-
스퍼저의 끝을 사용하여 I/O 보드 데이터 케이블 잠금 장치를 뒤집어 컴퓨터의 배터리 쪽을 향해 돌리세요.
-
스퍼저의 납작한 끝을 사용하여 I/O 보드 데이터 케이블을 로직 보드의 소켓에서 똑바로 밀어내세요.
-
-
이 단계는 번역되지 않았습니다. 번역을 도와주십시오
-
To protect your display, place a sheet of aluminum foil between the display and keyboard and leave it there while you work.
-
-
이 단계는 번역되지 않았습니다. 번역을 도와주십시오
-
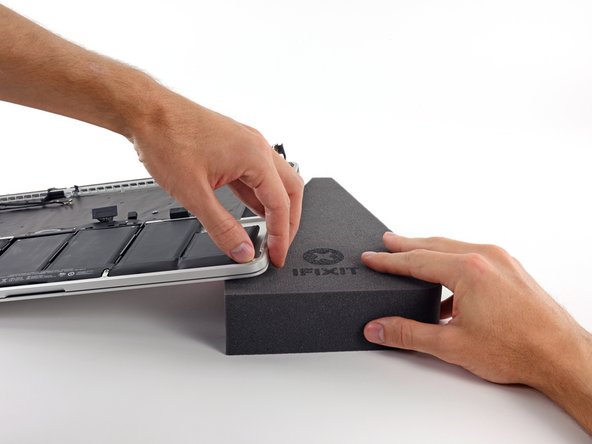
With the front edge of the MacBook Pro facing you, lift the right side and prop it up at a slight angle, using a sturdy foam block or book.
-
-
이 단계는 번역되지 않았습니다. 번역을 도와주십시오
-
Now that your MacBook Pro is fully prepped, it's time to prep yourself.
-
Wear eye protection when handling and applying the adhesive remover. (Eye protection is included in your kit.)
-
Do not wear contact lenses without eye protection.
-
Protective gloves are also included in your kit. If you are concerned about possible skin irritation, put your gloves on now.
-
-
이 단계는 번역되지 않았습니다. 번역을 도와주십시오
-
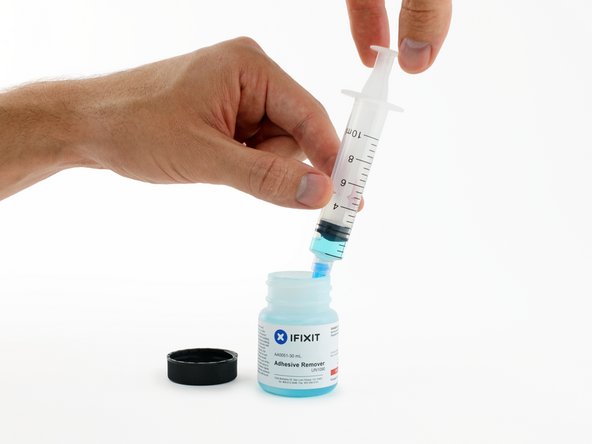
Open your container of adhesive remover.
-
Fill the syringe included in your kit with a small amount (approximately 1-2 milliliters) of adhesive remover.
-
Refill your syringe as needed throughout the rest of this procedure.
-
-
이 단계는 번역되지 않았습니다. 번역을 도와주십시오
-
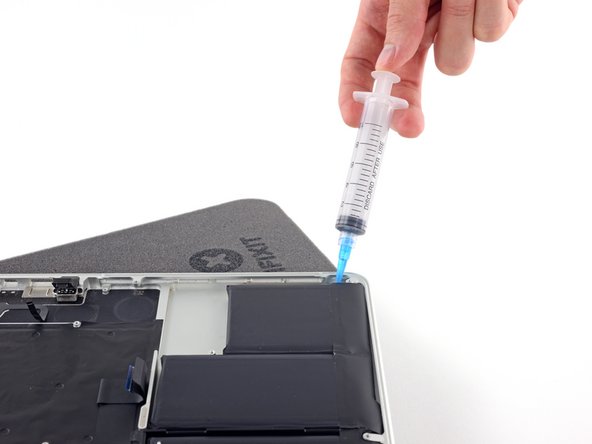
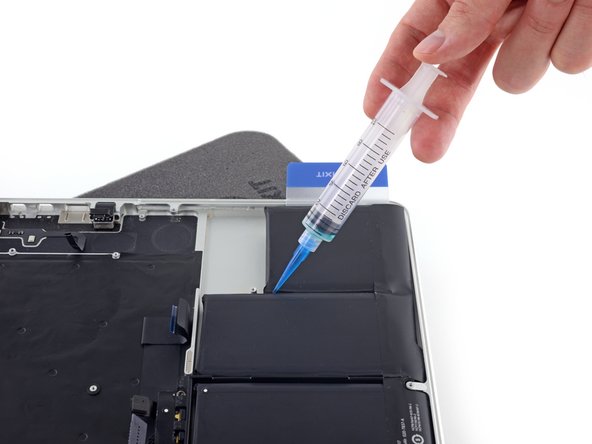
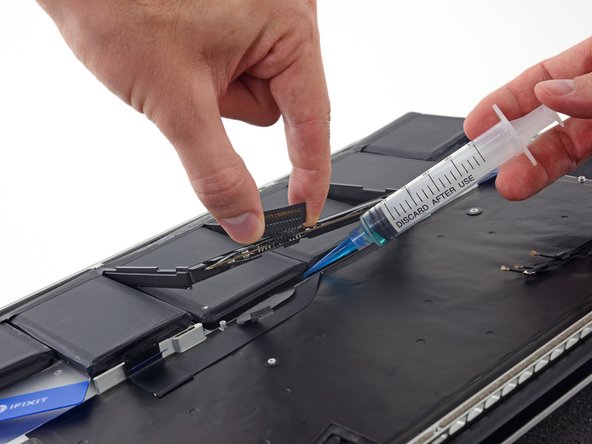
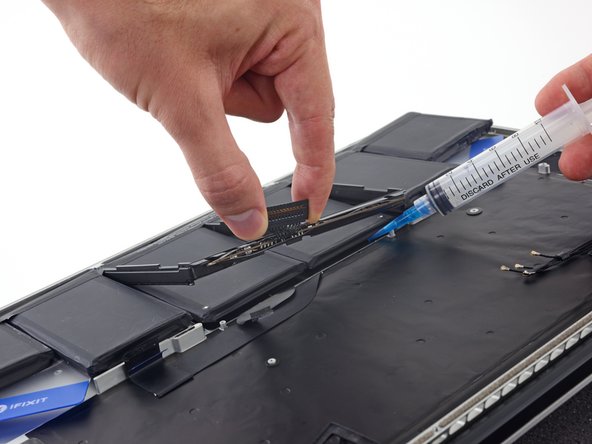
Apply a small amount of adhesive remover (approximately 1 ml) evenly along the elevated edge of the outer right battery cell.
-
Wait 2-3 minutes for the liquid adhesive remover to penetrate underneath the battery cell before you proceed to the next step.
-
-
이 단계는 번역되지 않았습니다. 번역을 도와주십시오
-
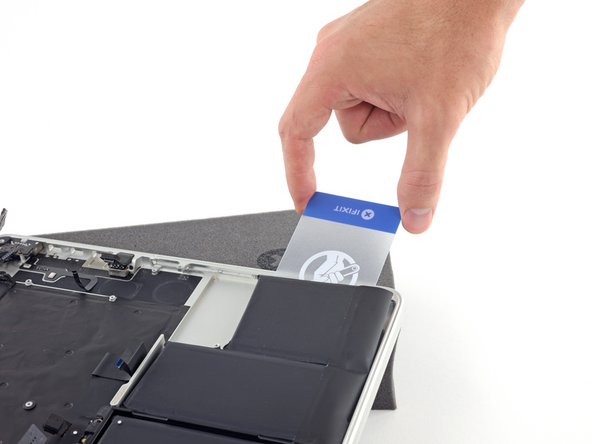
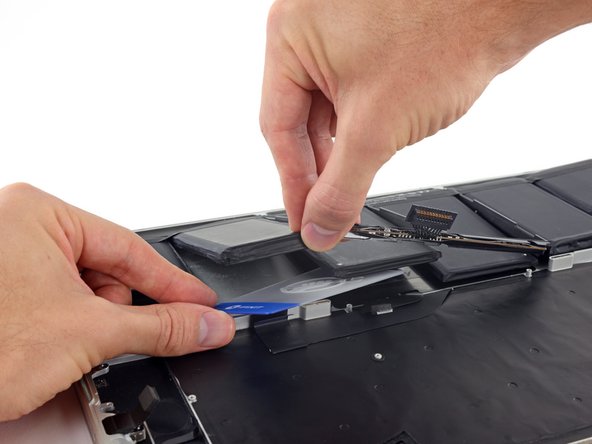
Slide one corner of a plastic card under the outer edge of the battery cell.
-
Slide the card farther underneath the battery cell to separate it from the adhesive securing it to the MacBook Pro's upper case.
-
-
이 단계는 번역되지 않았습니다. 번역을 도와주십시오
-
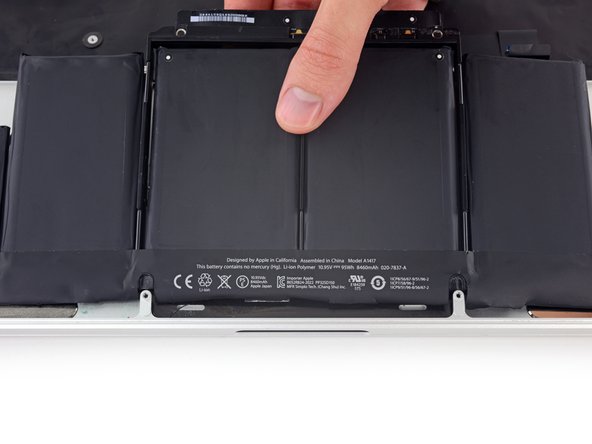
Lift the battery cell to separate it from the MacBook Pro's upper case, but don't try to remove it.
-
Leave the plastic card underneath the battery cell to prevent it from re-adhering as you proceed to the next step.
-
-
이 단계는 번역되지 않았습니다. 번역을 도와주십시오
-
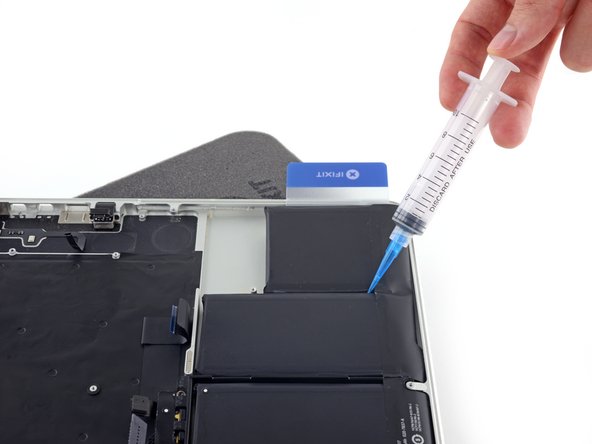
Apply a small amount of adhesive remover (approximately 1 ml) evenly along the elevated edge of the next battery cell.
-
Wait 2-3 minutes for the liquid adhesive remover to penetrate underneath the battery cell before you proceed to the next step.
-
-
이 단계는 번역되지 않았습니다. 번역을 도와주십시오
-
Slide one corner of your plastic card underneath the second battery cell.
-
Push the card underneath the second battery cell, and slide it side to side to separate the adhesive underneath.
-
Leave the plastic card underneath both battery cells (or flip them over) to prevent them from re-adhering as you proceed to the next step.
-
-
이 단계는 번역되지 않았습니다. 번역을 도와주십시오
-
It's time to switch sides. Remove your book or foam block and place it under the opposite side of your MacBook Pro.
-
Repeat the procedure from the prior steps to separate the two battery cells on this side:
-
Apply your adhesive remover to the elevated edge of the outer battery cell, and wait 2-3 minutes for it to penetrate.
-
Work one corner of a plastic card underneath the battery cell, and slide the card fully underneath the battery cell to separate it.
-
Do the same for the adjacent cell.
-
Leave your plastic card in place or flip the battery cells over to prevent them from re-adhering during the following steps.
-
-
이 단계는 번역되지 않았습니다. 번역을 도와주십시오
-
Remove your book or foam block and place it under the rear edge of your MacBook Pro, near the display hinges.
-
-
이 단계는 번역되지 않았습니다. 번역을 도와주십시오
-
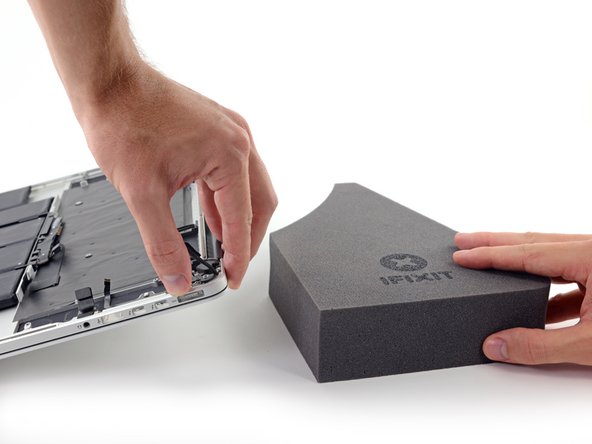
Grab the battery connector or the top edge of the plastic battery frame and lift it slightly, exposing the top edge of the two center battery cells.
-
-
이 단계는 번역되지 않았습니다. 번역을 도와주십시오
-
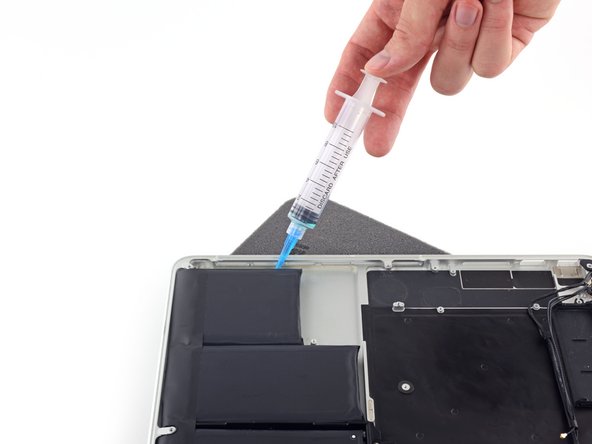
While lifting the plastic battery frame out of the way, apply a small amount (about 1-2 ml) of adhesive remover underneath the top edge of the two remaining battery cells.
-
Wait 2-3 minutes for the adhesive remover to penetrate before you continue.
-
-
이 단계는 번역되지 않았습니다. 번역을 도와주십시오
-
While lifting the plastic frame out of the way, push one corner of your plastic card underneath the outside edge of the first center battery cell.
-
Slide your card all the way under the battery cell, and leave it to prevent the battery cell from re-adhering.
-
-
이 단계는 번역되지 않았습니다. 번역을 도와주십시오
-
Repeat the above procedure to separate the last remaining battery cell from the MacBook Pro's upper case.
-
-
이 단계는 번역되지 않았습니다. 번역을 도와주십시오
-
Lift the battery with the plastic frame and slide it back toward the MacBook Pro’s hinge until it clears the screw posts holding it to the upper case.
-
-
이 단계는 번역되지 않았습니다. 번역을 도와주십시오
-
Lift and remove the battery.
-
With a little luck, you can slowly pull out each strip of adhesive with your fingers.
-
Otherwise, soak each strip of adhesive with a bit of adhesive remover for 2-3 minutes, and then scrape it out with a plastic tool. This can take quite a bit of work, so be patient.
-
Mop up any remaining adhesive remover and give your MacBook Pro a few minutes to air dry.
-
Calibrate your battery before using it: allow it to drain overnight, then charge it to 100% and drain it again until your MacBook Pro shuts down automatically. Charge it again and use it normally.
-


다른 2명이 해당 안내서를 완성하였습니다.


댓글 한 개
Superb guide. Got my battery replaced with minimal fuss with your kit and this guide. Well done guys and thanks :-)