소개
이 안내서를 사용하여 손상, 고장 또는 결함이 있는 오른쪽 팬을 교체하세요.
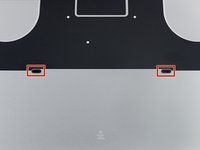
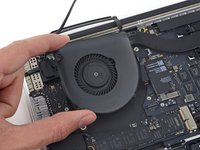
오른쪽 팬은 사용 중에는 기계의 오른쪽에, 작업 중에는 왼쪽에 있다는 점에 유의하세요.
필요한 것
-
이 단계에 사용된 도구:Tweezers$4.99
-
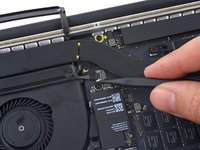
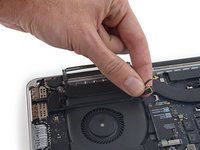
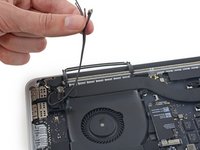
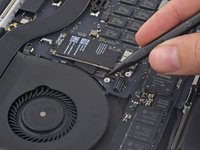
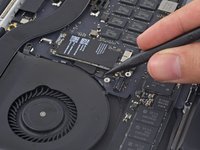
스퍼저 또는 핀셋을 사용하여 AirPort 안테나 케이블 세 개를 AirPort 보드의 소켓에서 똑바로 들어 올려 구부려서 방해가 되지 않도록 하세요.
-
-
-
-
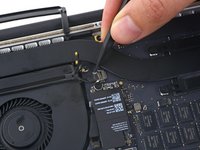
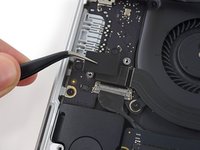
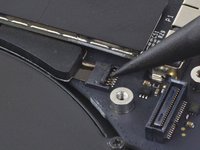
T5 Torx 드라이버를 사용하여 오른쪽 팬을 로직 보드에 고정하는 다음 나사 세 개를 풀어주세요:
-
숄더 길이가 2.0mm인 5.0mm 나사 한 개
-
머리가 넓은 4.0mm 나사 한 개
-
4.4mm 나사 한 개
-


기기를 재조립하려면, 이 지침을 역순으로 따르세요.
기기를 재조립하려면, 이 지침을 역순으로 따르세요.
다른 47명이 해당 안내서를 완성하였습니다.
다음 번역가들에게 특별히 감사 드립니다:
100%

Christian Kim님은 저희가 세상을 수리하는데 동참하신 분입니다! 기여하시겠습니까?
번역 시작하기 ›

댓글 7개
Great tutorial. I did not notice the screw length in the beginning. Thanks. :)
Strange noise came out of my mac. I found a screw on my right fan fell off and got stuck in the right fan.
James Bond - 답글
Complimenti davvero, una guida veramente ben fatta. Il mio mac ringrazia :)
completed my first mac repair ever, so excited.
I was hearing a strange buzzing / grinding noise coming from my right speaker. After ensuring it wasn’t the speakers, I realized it was the fan (would only start making the noise when the fans were kicking into high gear). I opened it up and found that one of the screws on the right fan wasn’t attached to the logic board: Step 14, top right screw (orange) attaches to a silver nut (?) which should be attached to the logic board. The adhesive that attaches the nut to the logic board had detached! Gotta find what type of adhesive I need to get for this, but putting this here for anyone with a similar problem.