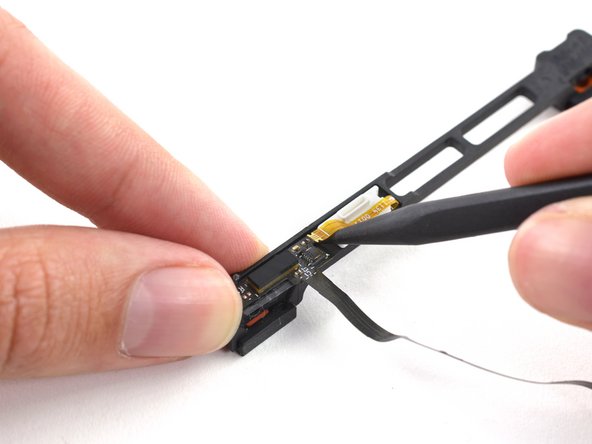
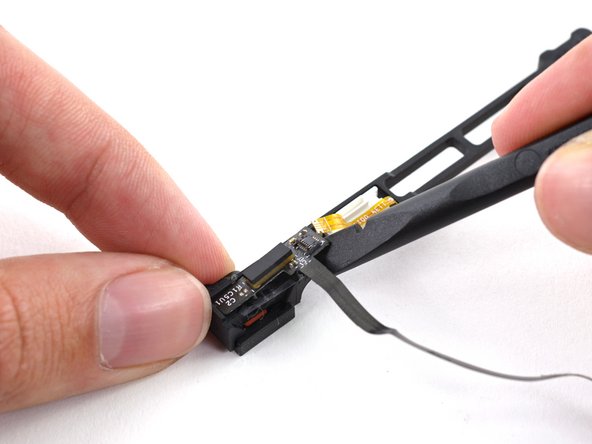
주요 콘텐츠로 건너뛰기

MacBook Pro 15" Unibody Mid 2012 Hard Drive/IR Sensor Cable Replacement

필요한 것

  1. MacBook Pro 15" Unibody Mid 2012 Hard Drive/IR Sensor Cable Replacement, Lower Case: 1 단계, 이미지 1/1
    • Remove the following ten screws securing the lower case to the upper case:

    • Three 13.5 mm (14.1 mm) Phillips screws.

    • Seven 3 mm Phillips screws.

    • When removing these screws, note how they come out at a slight angle. They must be reinstalled the same way.

  2. MacBook Pro 15" Unibody Mid 2012 Hard Drive/IR Sensor Cable Replacement: 2 단계, 이미지 1/1
    • Using both hands, lift the lower case near the vent to pop it off two clips securing it to the upper case.

    • Remove the lower case and set it aside.

  3. MacBook Pro 15" Unibody Mid 2012 Hard Drive/IR Sensor Cable Replacement, Battery Connector: 3 단계, 이미지 1/2 MacBook Pro 15" Unibody Mid 2012 Hard Drive/IR Sensor Cable Replacement, Battery Connector: 3 단계, 이미지 2/2
    • For certain repairs (e.g. hard drive), disconnecting the battery connector is not necessary but is recommended as it prevents any accidental shorting of electronics on the motherboard. If you do not disconnect the battery connector, please be careful as parts of the motherboard might be electrified.

    • Use the edge of a spudger to pry the battery connector upwards from its socket on the logic board.

    • It is useful to pry upward on both short sides of the connector to "walk" it out of its socket.

  4. MacBook Pro 15" Unibody Mid 2012 Hard Drive/IR Sensor Cable Replacement: 4 단계, 이미지 1/1
    • Bend the battery cable slightly away from its socket on the logic board so it does not accidentally connect itself while you work.

  5. MacBook Pro 15" Unibody Mid 2012 Hard Drive/IR Sensor Cable Replacement, Hard Drive: 5 단계, 이미지 1/1
    • Remove two Phillips screws securing the hard drive bracket to the upper case.

    • These screws are captive to the hard drive bracket.

  6. MacBook Pro 15" Unibody Mid 2012 Hard Drive/IR Sensor Cable Replacement: 6 단계, 이미지 1/1
    • Lift the retaining bracket out of the upper case.

  7. MacBook Pro 15" Unibody Mid 2012 Hard Drive/IR Sensor Cable Replacement: 7 단계, 이미지 1/1
    • Lift the hard drive by its pull tab and pull it out of the chassis, minding the cable attaching it to the computer.

  8. MacBook Pro 15" Unibody Mid 2012 Hard Drive/IR Sensor Cable Replacement: 8 단계, 이미지 1/2 MacBook Pro 15" Unibody Mid 2012 Hard Drive/IR Sensor Cable Replacement: 8 단계, 이미지 2/2
    • Remove the hard drive cable by pulling its connector straight away from the hard drive.

  9. MacBook Pro 15" Unibody Mid 2012 Hard Drive/IR Sensor Cable Replacement, Hard Drive/IR Sensor Cable: 9 단계, 이미지 1/1
    • Use the flat end of a spudger to pry the hard drive cable connector up off the logic board.

  10. MacBook Pro 15" Unibody Mid 2012 Hard Drive/IR Sensor Cable Replacement: 10 단계, 이미지 1/1
    • Remove the following four screws securing the hard drive and IR sensor cable to the upper case:

    • Two 1.5 mm Phillips screws.

    • Two 4 mm Phillips screws.

  11. MacBook Pro 15" Unibody Mid 2012 Hard Drive/IR Sensor Cable Replacement: 11 단계, 이미지 1/3 MacBook Pro 15" Unibody Mid 2012 Hard Drive/IR Sensor Cable Replacement: 11 단계, 이미지 2/3 MacBook Pro 15" Unibody Mid 2012 Hard Drive/IR Sensor Cable Replacement: 11 단계, 이미지 3/3
    • Slide the hard drive and IR sensor bracket away from the edge of the upper case.

    • Carefully peel the hard drive and IR sensor cable from the upper case.

    • Lift the hard drive and IR sensor assembly out of the upper case.

  12. MacBook Pro 15" Unibody Mid 2012 Hard Drive/IR Sensor Cable Replacement: 12 단계, 이미지 1/3 MacBook Pro 15" Unibody Mid 2012 Hard Drive/IR Sensor Cable Replacement: 12 단계, 이미지 2/3 MacBook Pro 15" Unibody Mid 2012 Hard Drive/IR Sensor Cable Replacement: 12 단계, 이미지 3/3
    • Your replacement part may or may not come with the front (sensor) bracket. If it does not, you'll need to transfer it to your new cable.

    • Use the tip of a spudger to flip the ZIF connector on the hard drive cable.

    • Gently pull the sensor bracket cable out of the ZIF connector.

    • Use the flat end of a spudger to pry the hard drive cable up off the sensor bracket.

    • Remove the adhesive backing from your new hard drive cable, stick it onto the sensor bracket, and connect the sensor bracket cable.

결론

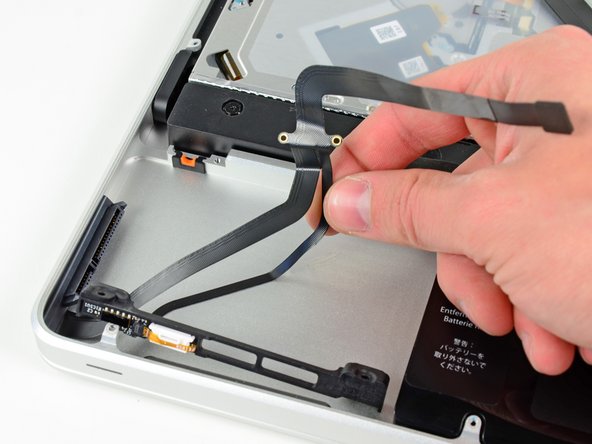
To reassemble your device, follow these instructions in reverse order.

다른 24명이 해당 안내서를 완성하였습니다.

Andrew Optimus Goldheart

회원 가입일: 10/17/09

502,275 평판

안내서 407개 작성하였습니다

iFixit iFixit 회원

Staff

136 회원들

안내서 16,573개 작성하였습니다

댓글 4개

The cable is too long for my Samsung 8500 PRO SSD, and it blends under it. Also the CRC Error count is really high. Any help?

Claudio Ceino - 답글

Great this is how I take it out. It would be great if there were some help putting it back in, as I am an idiot.

Phillip C - 답글

Hm, what step of reassembly is causing trouble, Phillip?

Marty Swartz -

My understanding is that the original Apple cable tends to fail, slowing the speed of hard drive access, but not stopping it outright. I replaced the cable, and changed to a SSD hard drive, and now my machine is SCARY FAST!! Happy, happy. :)

Marty Swartz - 답글

댓글 쓰기

조회 통계:

24 시간 전: 0

7일 전: 10

30일 전: 34

전체 시간: 20,757