이 버전에는 잘못된 편집 사항이 있을 수 있습니다. 최신 확인된 스냅샷으로 전환하십시오.
필요한 것
-
-
하단 케이스를 상단 케이스에 고정하는 다음 나사 열 개를 풀어주세요:
-
13.5mm (14.1mm) Phillips/십자 나사 세 개.
-
3mm Phillips/십자 나사 일곱 개
-
-
이 단계는 번역되지 않았습니다. 번역을 도와주십시오
-
Disconnect the camera cable connector from its socket on the logic board.
-
-
-
이 단계는 번역되지 않았습니다. 번역을 도와주십시오
-
Use the flat end of a spudger to pry the AirPort/Bluetooth connector up from its socket on the logic board.
-
-
이 단계는 번역되지 않았습니다. 번역을 도와주십시오
-
Use the flat end of a spudger to pry the optical drive connector up from its socket on the logic board.
-
-
이 단계는 번역되지 않았습니다. 번역을 도와주십시오
-
Remove following two screws:
-
One 8.6 mm Phillips screw
-
One 3.9 mm Phillips screw
-
Carefully rotate the AirPort/Bluetooth board housing (with AirPort/Antenna cables still attached) out of the lower case.
-
-
이 단계는 번역되지 않았습니다. 번역을 도와주십시오
-
Remove the three 3.5 mm T6 Torx screws securing the optical drive to the upper case.
-
-
이 단계는 번역되지 않았습니다. 번역을 도와주십시오
-
Lift the optical drive near its connector and pull it away from the upper case to remove it from the computer.
-
-
이 단계는 번역되지 않았습니다. 번역을 도와주십시오
-
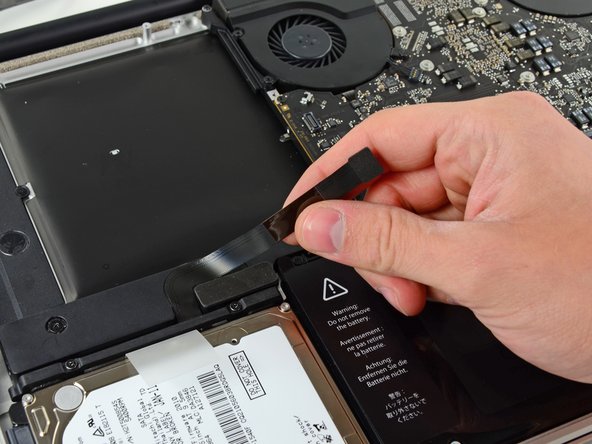
Use the flat end of a spudger to pry the hard drive/IR sensor cable connector up off the logic board.
-
Peel the hard drive cable up from the channel within the subwoofer and right speaker.
-
-
이 단계는 번역되지 않았습니다. 번역을 도와주십시오
-
Using the flat end of a spudger, pry the subwoofer connector straight up off the logic board.
-
-
이 단계는 번역되지 않았습니다. 번역을 도와주십시오
-
Remove the following six screws securing the subwoofer and right speaker to the upper case:
-
Two 3.2 mm Phillips screws.
-
Two 12.3 mm Phillips screws.
-
One 2.5 mm Phillips screw.
-
One 8.3 mm Phillips screw.
-
-
이 단계는 번역되지 않았습니다. 번역을 도와주십시오
-
Use the flat end of a spudger to dislodge the right speaker from its recess in the upper case.
-
Lift the subwoofer and right speaker assembly out of the upper case.
-


다른 13명이 해당 안내서를 완성하였습니다.

댓글 한 개
Hi, since a few day my right speaker crackles (in the bass), do you think it should be changed ? what could be the cause of the damage ? If so, is this type of piece ok ? (macbook pro Unibody 15" Mid-2102) THX
macgyver07 - 답글