이 안내서에는 최근 변경 사항이 더 있습니다. 최신 비검증 버전으로 전환하십시오.
소개
Use this guide to replace a non-functional microphone.
필요한 것
-
-
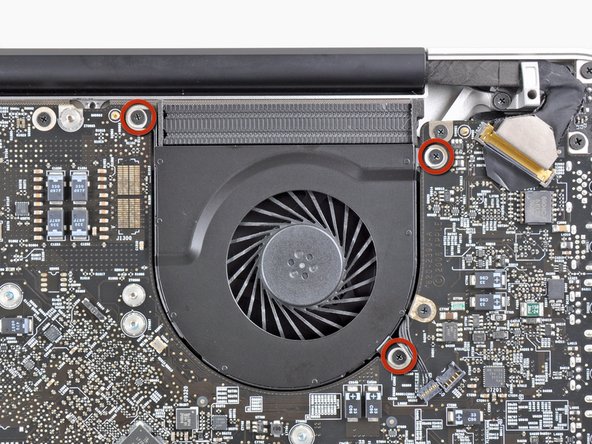
Remove the following ten screws securing the lower case to the upper case:
-
Three 13.5 mm Phillips screws.
-
Seven 3 mm Phillips screws.
-
-
-
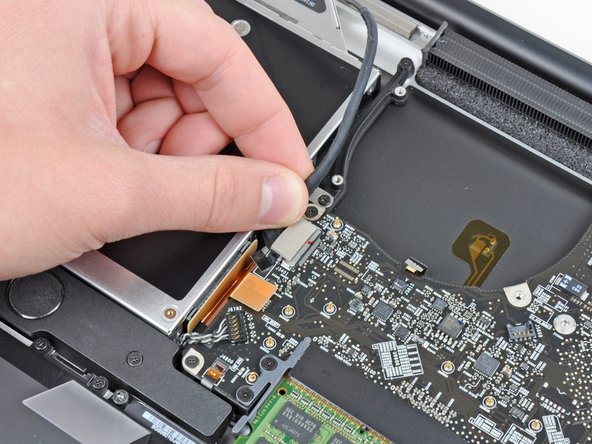
If present, grab the plastic tab attached to the battery connector and pull it toward the front edge of the device. For Late-2011 models the battery connector will not have a tab and is simply a plug that inserts straight down into the motherboard--to remove pry the plug straight up.
-
-
-
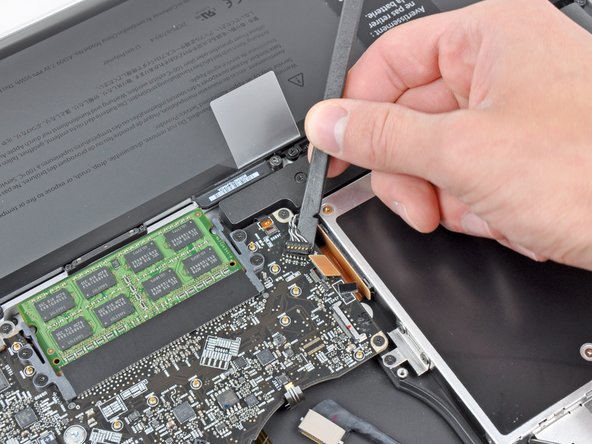
Use the flat end of a spudger to lift the right fan connector out of its socket on the logic board.
-
-
-
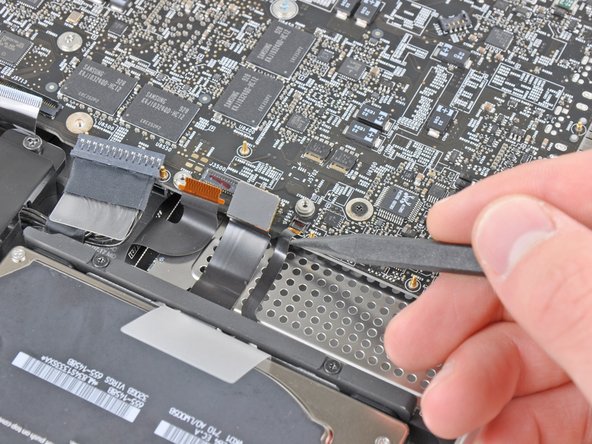
Use the flat end of a spudger to lift the left fan connector out of its socket on the logic board.
-
-
-
-
Remove the two 7.9 mm Phillips screws securing the left speaker assembly to the logic board.
-
-
-
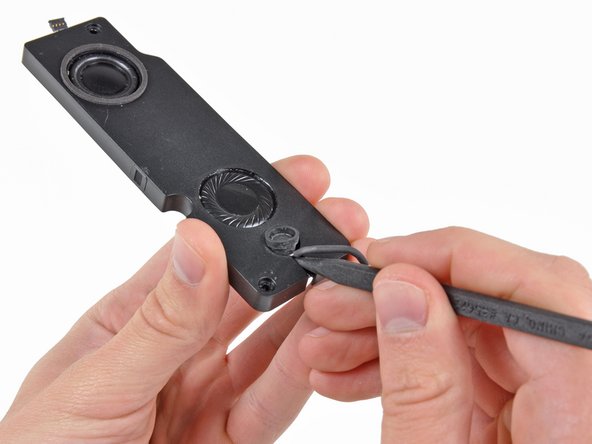
De-route the microphone cable from the channel molded into the left speaker enclosure.
-
Use the tip of a spudger to lift the microphone out of the left speaker enclosure.
-
Microphone remains.
-


To reassemble your device, follow these instructions in reverse order.
To reassemble your device, follow these instructions in reverse order.
다른 3명이 해당 안내서를 완성하였습니다.

댓글 한 개
We’re going to have to make some changes here. In Step 10 for Late 2011 models, the camera cable looks different, is located in a different place on the logic board, and detaches differently. Yes, there are 5 comments there, but no pictures.