주요 콘텐츠로 건너뛰기

Mad Catz Street Fighter IV FightPad Rear and Side Case Replacement

필요한 것

  1. Mad Catz Street Fighter IV FightPad Rear and Side Case Replacement, Rear and Side Case: 1 단계, 이미지 1/1
    • Use tweezers to completely remove the sticker from the rear of controller.

  2. Mad Catz Street Fighter IV FightPad Rear and Side Case Replacement: 2 단계, 이미지 1/1
    • Find the seven 8.3 mm Phillips screws on the rear of the controller and remove them.

  3. Mad Catz Street Fighter IV FightPad Rear and Side Case Replacement: 3 단계, 이미지 1/2 Mad Catz Street Fighter IV FightPad Rear and Side Case Replacement: 3 단계, 이미지 2/2
    • Use a plastic opening tool to separate the rear and front casing by inserting it in-between the two cases.

    • Use the plastic opening tool to pry the two cases apart.

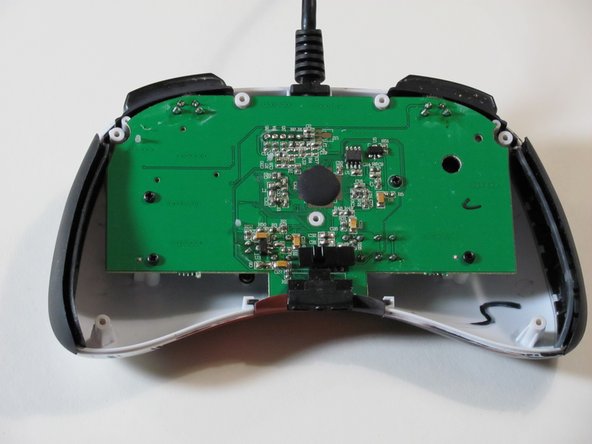
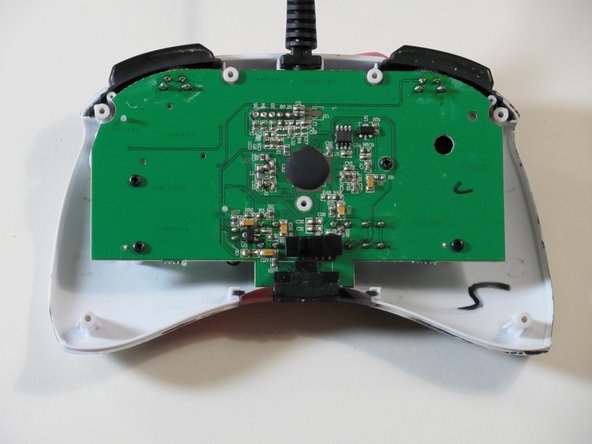
  4. Mad Catz Street Fighter IV FightPad Rear and Side Case Replacement: 4 단계, 이미지 1/2 Mad Catz Street Fighter IV FightPad Rear and Side Case Replacement: 4 단계, 이미지 2/2
    • Remove the two rubber side grips.

결론

To reassemble your device, follow these instructions in reverse order.

다른 한 분이 해당 안내서를 완성하였습니다.

Jefferson Hsu

회원 가입일: 09/18/12

411 평판

안내서 3개 작성하였습니다

Cal Poly, Team 1-7, Propen Fall 2012 Cal Poly, Team 1-7, Propen Fall 2012 회원

CPSU-PROPEN-F12S1G7

4 회원들

안내서 14개 작성하였습니다

댓글 0개

댓글 쓰기

조회 통계:

24 시간 전: 0

7일 전: 1

30일 전: 7

전체 시간: 934