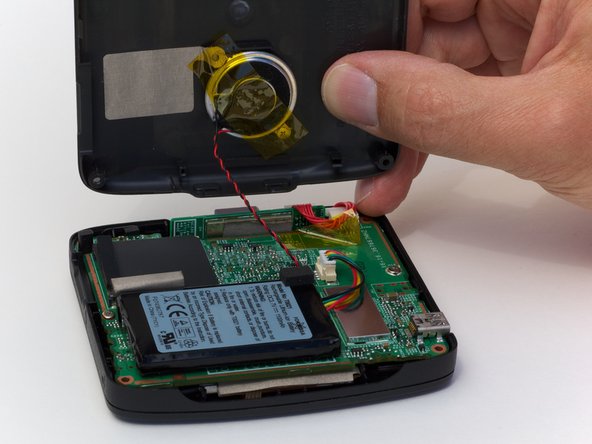
주요 콘텐츠로 건너뛰기

Magellan RoadMate 1200 Speaker Replacement

필요한 것

  1. Magellan RoadMate 1200 Speaker Replacement, Back Cover: 1 단계, 이미지 1/2 Magellan RoadMate 1200 Speaker Replacement, Back Cover: 1 단계, 이미지 2/2
    • Remove the four rubber caps from the back by using the Phillips #00 screwdriver.

  2. Magellan RoadMate 1200 Speaker Replacement: 2 단계, 이미지 1/1
    • Remove the four screws holding the cover in place by using the Phillips #00 screwdriver.

  3. Magellan RoadMate 1200 Speaker Replacement: 3 단계, 이미지 1/2 Magellan RoadMate 1200 Speaker Replacement: 3 단계, 이미지 2/2
    • Remove the back cover from the device by separating the back cover along its seam.

    • Slowly lift the cover—the speaker is screwed onto the back cover and is connected to the circuit board.

  4. Magellan RoadMate 1200 Speaker Replacement: 4 단계, 이미지 1/2 Magellan RoadMate 1200 Speaker Replacement: 4 단계, 이미지 2/2
    • Pull the speaker cord, horizontally, by its base, away from the motherboard.

    • When reassembling, make sure that you plug the terminal in the same way. The black wire should be on the side farthest from the battery.

  5. Magellan RoadMate 1200 Speaker Replacement, Speaker: 5 단계, 이미지 1/3 Magellan RoadMate 1200 Speaker Replacement, Speaker: 5 단계, 이미지 2/3 Magellan RoadMate 1200 Speaker Replacement, Speaker: 5 단계, 이미지 3/3
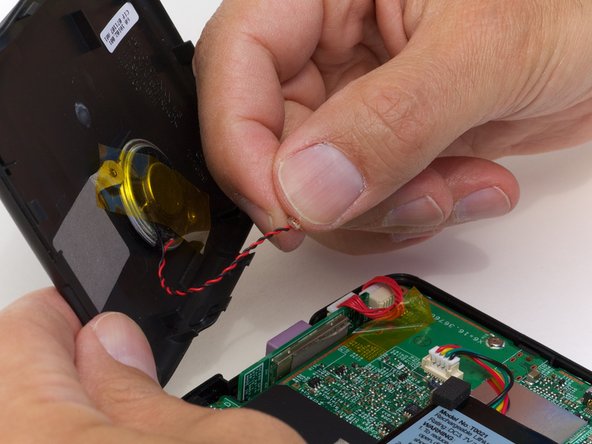
    • Once you pull off the back cover, remove the orange piece of tape on the speaker.

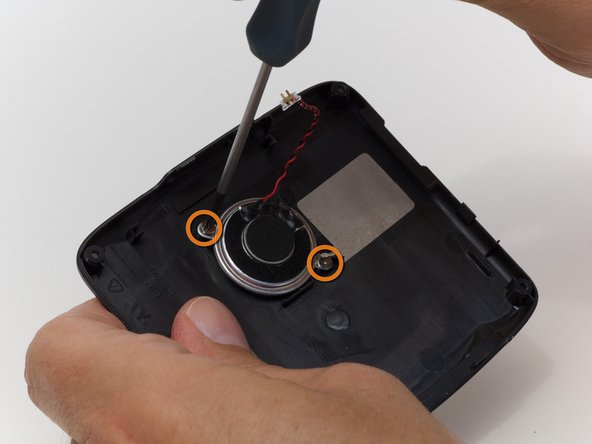
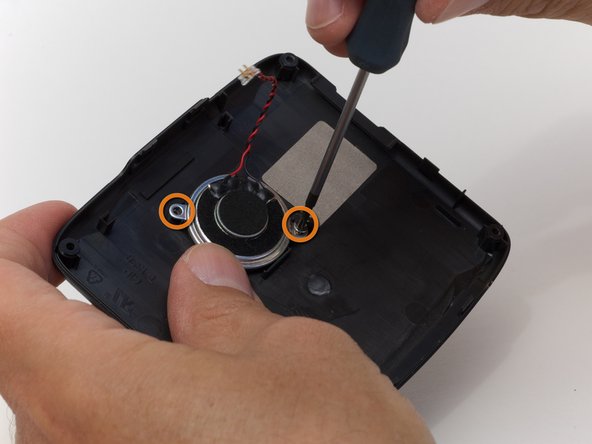
    • Use a Philips #00 screwdriver to remove the 2 screws holding the speaker to the back casing.

  6. Magellan RoadMate 1200 Speaker Replacement: 6 단계, 이미지 1/1
    • Once the speaker has been unscrewed, remove the speaker from the back casing with your fingers.

결론

To reassemble your device, follow these instructions in reverse order.

Ross Light

회원 가입일: 04/12/10

217 평판

안내서 6개 작성하였습니다

댓글 0개

댓글 쓰기

조회 통계:

24 시간 전: 0

7일 전: 0

30일 전: 0

전체 시간: 2,351