주요 콘텐츠로 건너뛰기

Makita GA4030K Electrical Cord Replacement

필요한 것

  1. Makita GA4030K Electrical Cord Replacement, Back Cover: 1 단계, 이미지 1/2 Makita GA4030K Electrical Cord Replacement, Back Cover: 1 단계, 이미지 2/2
    • Unscrew the 20 mm tapping screw using a Philips #02 screwdriver.

  2. Makita GA4030K Electrical Cord Replacement: 2 단계, 이미지 1/1
    • Slide the back cover down the power cable.

  3. Makita GA4030K Electrical Cord Replacement, Electrical Cord: 3 단계, 이미지 1/3 Makita GA4030K Electrical Cord Replacement, Electrical Cord: 3 단계, 이미지 2/3 Makita GA4030K Electrical Cord Replacement, Electrical Cord: 3 단계, 이미지 3/3
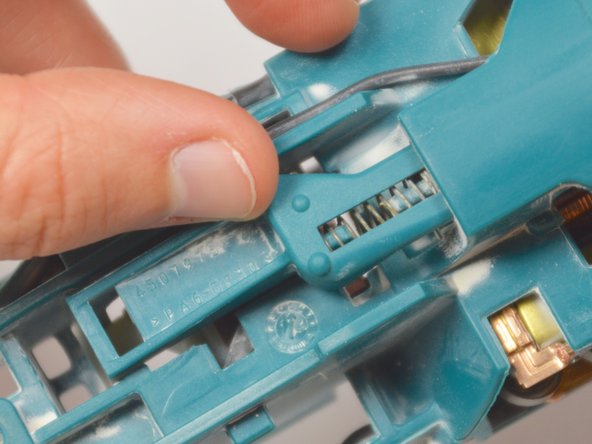
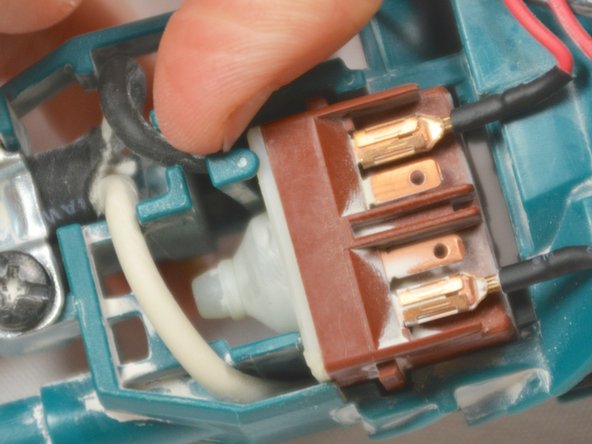
    • Place your finger in the gap in front of the switch.

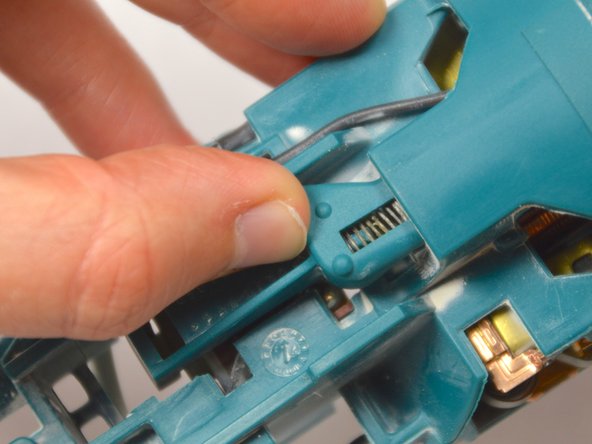
    • At the base of the device, push the switch lever into the 'on' position.

  4. Makita GA4030K Electrical Cord Replacement: 4 단계, 이미지 1/1
    • Keeping the switch lever in the 'on' position, remove the switch.

    • When reinserting the switch, place the switch in the hole without pressing the switch lever in. Holding the switch against the back edge of the hole, push the switch lever fully into the 'on' position and then let go. The switch should catch onto the switch lever and remain attached.

  5. Makita GA4030K Electrical Cord Replacement: 5 단계, 이미지 1/3 Makita GA4030K Electrical Cord Replacement: 5 단계, 이미지 2/3 Makita GA4030K Electrical Cord Replacement: 5 단계, 이미지 3/3
    • Pull the switch lever up and out of the body of the angle grinder.

  6. Makita GA4030K Electrical Cord Replacement: 6 단계, 이미지 1/3 Makita GA4030K Electrical Cord Replacement: 6 단계, 이미지 2/3 Makita GA4030K Electrical Cord Replacement: 6 단계, 이미지 3/3
    • Pull back the plastic clip and pull the internal switch up and out of the cavity.

  7. Makita GA4030K Electrical Cord Replacement: 7 단계, 이미지 1/3 Makita GA4030K Electrical Cord Replacement: 7 단계, 이미지 2/3 Makita GA4030K Electrical Cord Replacement: 7 단계, 이미지 3/3
    • Remove the two 10 mm screws holding the power cord leads in place using a Phillips #02 screwdriver.

    • When reassembling, be sure to attach the electrical cabling in the same positions.

  8. Makita GA4030K Electrical Cord Replacement: 8 단계, 이미지 1/3 Makita GA4030K Electrical Cord Replacement: 8 단계, 이미지 2/3 Makita GA4030K Electrical Cord Replacement: 8 단계, 이미지 3/3
    • Unscrew the 2 mm tapping screw using a Phillips #02 screwdriver.

    • Lift the clasp up and out to remove it.

  9. Makita GA4030K Electrical Cord Replacement: 9 단계, 이미지 1/1
    • Remove the electrical cable.

결론

To reassemble your device, follow these instructions in reverse order.

다른 한 분이 해당 안내서를 완성하였습니다.

Laura Ann Jagels

회원 가입일: 04/01/15

490 평판

안내서 3개 작성하였습니다

Cal Poly, Team 12-5, Lancaster Spring 2015 Cal Poly, Team 12-5, Lancaster Spring 2015 회원

CPSU-LANCASTER-S15S12G5

4 회원들

안내서 13개 작성하였습니다

댓글 0개

댓글 쓰기

조회 통계:

24 시간 전: 0

7일 전: 4

30일 전: 21

전체 시간: 2,986