주요 콘텐츠로 건너뛰기

Marshall Kilburn Power Switch Replacement

필요한 것

  1. Marshall Kilburn Power Switch Replacement, Battery: 1 단계, 이미지 1/2 Marshall Kilburn Power Switch Replacement, Battery: 1 단계, 이미지 2/2
    • Place the unit face down as shown in the picture, exposing the battery cover.

    • Remove the two 4.0mm long screws holding the cover on using a T10 driver.

  2. Marshall Kilburn Power Switch Replacement: 2 단계, 이미지 1/1
    • Remove the battery cover using a fingernail or nylon spudger.

  3. Marshall Kilburn Power Switch Replacement: 3 단계, 이미지 1/1
    • Remove the battery and unplug the power lead.

  4. Marshall Kilburn Power Switch Replacement, Power Switch: 4 단계, 이미지 1/3 Marshall Kilburn Power Switch Replacement, Power Switch: 4 단계, 이미지 2/3 Marshall Kilburn Power Switch Replacement, Power Switch: 4 단계, 이미지 3/3
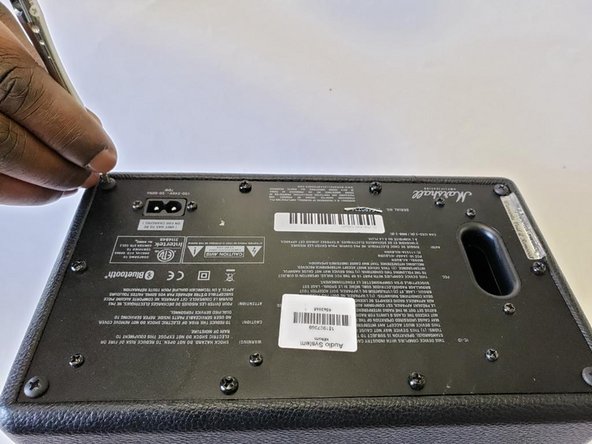
    • Place speaker as shown in image and remove the four corner 45.5mm back cover screws with a Phillips #2 driver.

    • Using a Phillips #2 driver, remove the six remaining 21.5mm outer back cover screws.

  5. Marshall Kilburn Power Switch Replacement: 5 단계, 이미지 1/2 Marshall Kilburn Power Switch Replacement: 5 단계, 이미지 2/2
    • Remove the back cover by using the vent hole as a grip.

    • Gently pull out the back cover and let it hang on the side of the speaker that has the knobs and power switch.

    • Unplug the main power lead from the control board; this allows the back to be opened more, allowing easy access to the power switch.

  6. Marshall Kilburn Power Switch Replacement: 6 단계, 이미지 1/3 Marshall Kilburn Power Switch Replacement: 6 단계, 이미지 2/3 Marshall Kilburn Power Switch Replacement: 6 단계, 이미지 3/3
    • Pull the back cover attached to the motherboard to the side as shown in first image.

    • Remove the white insulator from the stereo speaker and place it to the side.

  7. Marshall Kilburn Power Switch Replacement: 7 단계, 이미지 1/2 Marshall Kilburn Power Switch Replacement: 7 단계, 이미지 2/2
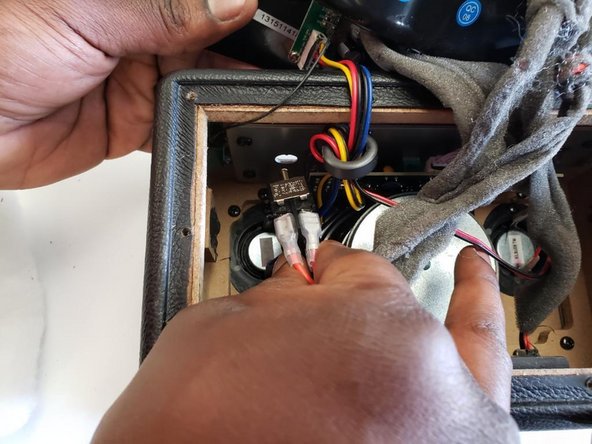
    • Place the speaker up right, and unscrew the golden bolt around the power switch with your hands, or a wrench.

    • Gently pull out the power switch as shown in the image.

  8. Marshall Kilburn Power Switch Replacement: 8 단계, 이미지 1/3 Marshall Kilburn Power Switch Replacement: 8 단계, 이미지 2/3 Marshall Kilburn Power Switch Replacement: 8 단계, 이미지 3/3
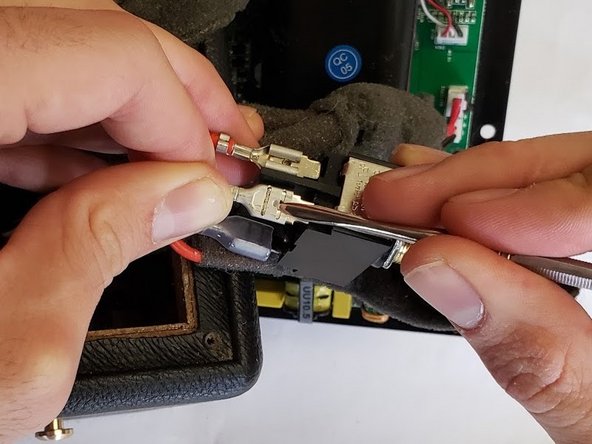
    • Use a slim spudger to wedge out the four red wires attached to the power switch.

결론

To reassemble your device, follow these instructions in reverse order.

다른 한 분이 해당 안내서를 완성하였습니다.

Jeff Feuss

회원 가입일: 01/14/19

423 평판

안내서 3개 작성하였습니다

댓글 2개

And where to purchase a new switch???

Anders Skipper - 답글

Does the old switch have any writing on it?

Andrew S -

댓글 쓰기

조회 통계:

24 시간 전: 2

7일 전: 12

30일 전: 64

전체 시간: 4,781