소개
If your W123 has automatic climate control with a horizontal row of push buttons then the odds are good you will someday need to give it some attention. Cracked or "cold" solder joints, broken buttons, burnt out bulbs, etc. may lead to your needing to remove the climate control panel for access or replacement. Learn how with this guide.
필요한 것
-
-
To assist with identification, this is what the second generation climate control push button panel looks like in the W123. If yours looks like this, this guide is for you.
-
To begin, carefully pry off the wood trim covering the front panel of the climate control unit. Use a plastic pry tool or a flat head screw driver. See the wood trim replacement guide for some additional tips.
-
-
-
-
Then pull out the panel first with a pry tool or flat head screw driver, then your fingers. Only pry until you get some light resistance from the tabs at the bottom. Then, you'll need to lift up as you continue to pull out until you get the plastic tabs to clear the bottom edge.
-
Then remove the three screws around the buttons on the panel to remove the front panel from the control unit.
-
-
-
Then pull off the two large plugs, one on each side of the control unit. Don't pull or pry too hard or you risk pulling the cover off the back of the plugs instead, potentially sending wires everywhere! Just take your time and wiggle them off gently.
-
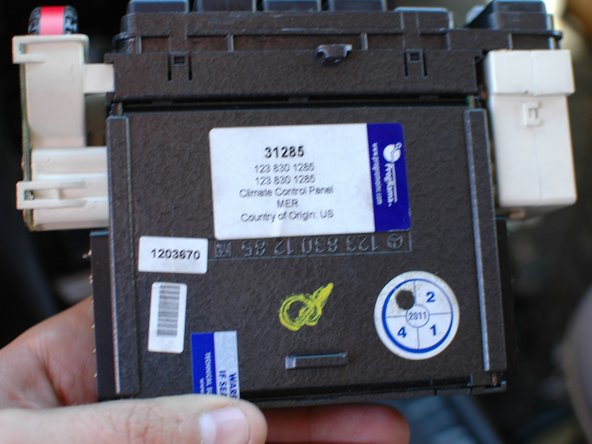
You can now remove the control unit and perform any work on it you need to (re-soldering of cold joints, for example) or you can install a refurbished unit like the Programa unit pictured.
-


To reassemble your device, follow these instructions in reverse order.
To reassemble your device, follow these instructions in reverse order.
다른 13명이 해당 안내서를 완성하였습니다.

팀

댓글 4개
Where can I see a better picture of the Programa unit and where to buy it. Will a refurbished unit assure correcting the malfunctions of the old unit being replaced?
The problem I have is whenever I need AC, sometimes just pressing cold air (center) button will either not respond (as if nothing happens next) at all or run with hot air. But if I first press the leftmost (defrost) button then ASAP pressing the cold air button will engage the AC. It is as if a push was needed to kickstart the cold air (center) button. During these steps the button is on the low or auto position and the thermostat dial is set at max (blue) position.
So, does this mean that my controls unit is defective and have to be replaced with a refurbished Programa unit to operate correctly?
I am the original owner of this '84 300D and have never repaired this unit before. Perhaps if I apply contact spray to the elect. connectors the buttons will have restored stronger contact.
You didn’t say how to open the push button unit so joints could be checked & resoldered.
You are right! That is because this guide is on how to remove and replace the unit. Not how to fix it. That would be a much much longer guide. There are other resources online that cover some of the options. Google will help.