이 버전에는 잘못된 편집 사항이 있을 수 있습니다. 최신 확인된 스냅샷으로 전환하십시오.
필요한 것
-
이 단계는 번역되지 않았습니다. 번역을 도와주십시오
-
To remove the display, first soften the adhesive by applying heat. You can use a heat pad, heat gun, or iOpener. In a pinch, a hair dryer can also work.
-
Steadily and evenly heat the perimeter of the display until it's too hot to touch, and try to maintain that temperature for several minutes.
-
-
이 단계는 번역되지 않았습니다. 번역을 도와주십시오
-
Use a suction cup or an iSclack to pull up on the glass and create a slight gap between the glass and the metal frame.
-
Carefully insert an opening pick into the gap between the screen and the device to cut the adhesive.
-
Slide the pick around the sides and bottom of the display to cut the adhesive. Apply more heat as needed.
-
-
이 단계는 번역되지 않았습니다. 번역을 도와주십시오
-
Continue to heat sections of the screen with the heat gun.
-
As you make your way around the screen with the heat gun, use the plastic opening tool and the opening picks to pry the screen loose.
-
-
-
이 단계는 번역되지 않았습니다. 번역을 도와주십시오
-
Remove the 3 mm T3 Torx screw securing the battery connector, and disconnect the battery connector.
-
-
이 단계는 번역되지 않았습니다. 번역을 도와주십시오
-
Remove the single 4 mm T3 Torx screw securing the display cable.
-
Lift the connector to disconnect the cable.
-
-
이 단계는 번역되지 않았습니다. 번역을 도와주십시오
-
Grasp the orange cable connected to the silver connecter.
-
Carefully lift the orange cable up until the connecter pops off.
-
The screen will now be completely disconnected.
-
-
이 단계는 번역되지 않았습니다. 번역을 도와주십시오
-
Remove the 4mm screw with the T3 Torx Screwdriver.
-
Remove the four 7mm screws with the T3 Torx Screwdriver.
-
-
이 단계는 번역되지 않았습니다. 번역을 도와주십시오
-
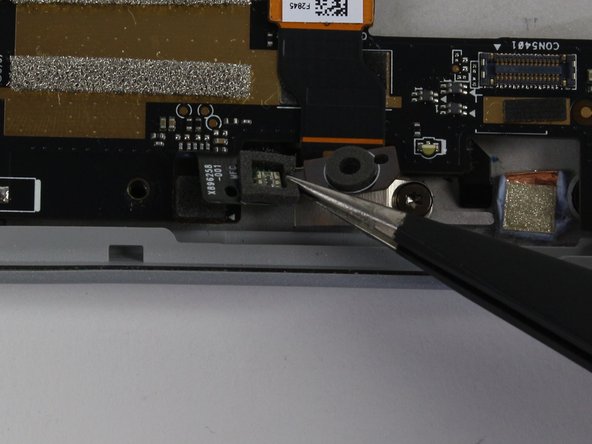
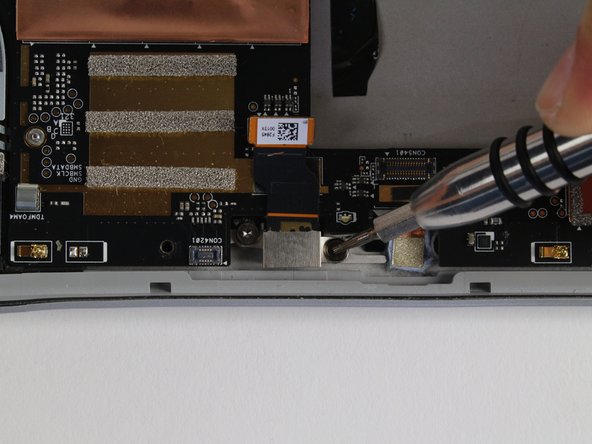
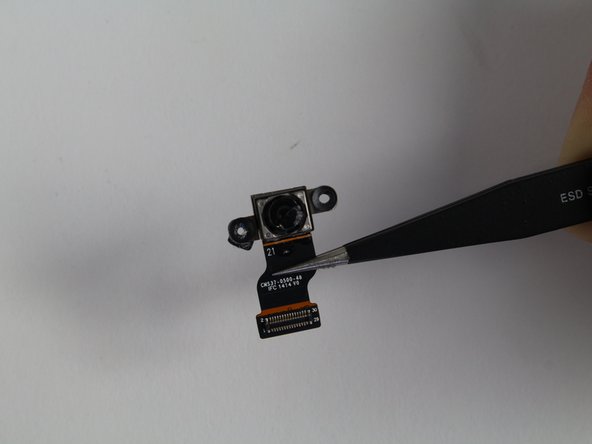
Locate the black piece shown.
-
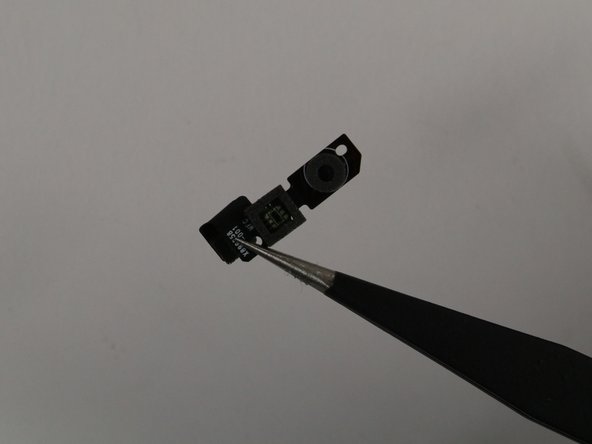
Remove this piece by gently lifting it up with the tweezers until it pops off.
-


다른 2명이 해당 안내서를 완성하였습니다.
팀

Cal Poly, Team 12-18, Maness Fall 2015 Cal Poly, Team 12-18, Maness Fall 2015 회원
CPSU-MANESS-F15S12G18
5 회원들
안내서 31개 작성하였습니다