주요 콘텐츠로 건너뛰기
수리 커뮤니티 가입 - 계정 만들기

Microsoft Surface Pro 7+ Kickstand Replacement

필요한 것

  1. Microsoft Surface Pro 7+ Kickstand Replacement, Before you begin: 1 단계, 이미지 1개 중 1개
    • Before starting your repair, unplug all cables and fully shut down your Surface Pro.

  2. Microsoft Surface Pro 7+ Kickstand Replacement, Open the kickstand: 2 단계, 이미지 2개 중 1개 Microsoft Surface Pro 7+ Kickstand Replacement, Open the kickstand: 2 단계, 이미지 2개 중 2개
    • Open the kickstand to about 90 degrees.

  3. Microsoft Surface Pro 7+ Kickstand Replacement, Remove the kickstand screws: 3 단계, 이미지 3개 중 1개 Microsoft Surface Pro 7+ Kickstand Replacement, Remove the kickstand screws: 3 단계, 이미지 3개 중 2개 Microsoft Surface Pro 7+ Kickstand Replacement, Remove the kickstand screws: 3 단계, 이미지 3개 중 3개
    • While holding the kickstand behind the hinge with your finger, use a Torx Plus 3IP screwdriver to remove the two 2.7 mm‑long screws from each hinge (four total).

    • Make sure the screws don't fall into the hinge cutouts.

  4. Microsoft Surface Pro 7+ Kickstand Replacement, Lay the kickstand down: 4 단계, 이미지 2개 중 1개 Microsoft Surface Pro 7+ Kickstand Replacement, Lay the kickstand down: 4 단계, 이미지 2개 중 2개
    • Lay the kickstand down towards the top of the device so it's lying flat.

  5. Microsoft Surface Pro 7+ Kickstand Replacement, Reposition the hinges: 5 단계, 이미지 3개 중 1개 Microsoft Surface Pro 7+ Kickstand Replacement, Reposition the hinges: 5 단계, 이미지 3개 중 2개 Microsoft Surface Pro 7+ Kickstand Replacement, Reposition the hinges: 5 단계, 이미지 3개 중 3개
    • Wrap your finger in a clean cloth and push both hinges down to about 30 degrees.

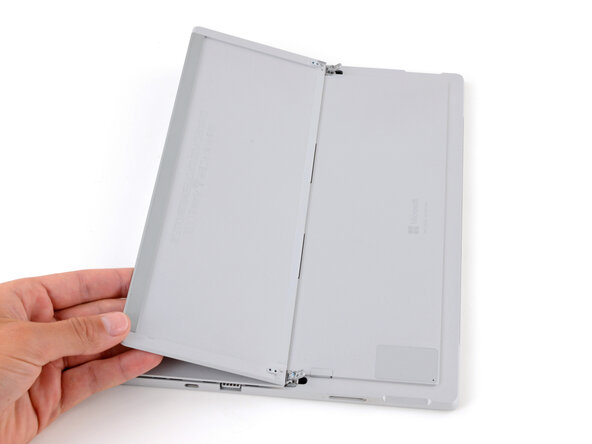
  6. Microsoft Surface Pro 7+ Kickstand Replacement, Flip the kickstand over: 6 단계, 이미지 2개 중 1개 Microsoft Surface Pro 7+ Kickstand Replacement, Flip the kickstand over: 6 단계, 이미지 2개 중 2개
    • Flip the kickstand towards the bottom of the device so it's resting on the hinges.

  7. Microsoft Surface Pro 7+ Kickstand Replacement, Remove the kickstand: 7 단계, 이미지 2개 중 1개 Microsoft Surface Pro 7+ Kickstand Replacement, Remove the kickstand: 7 단계, 이미지 2개 중 2개
    • Firmly secure the device to your work surface with one hand, and use your free hand to pull the kickstand out until both foam tabs slide out.

    • If you're having trouble, make sure the kickstand isn't getting stuck on the hinges—it should slide out fairly easily.

결론

To reassemble your device, follow these instructions in reverse order.

Repair didn’t go as planned? Try some basic troubleshooting, or ask our Answers community for help.

Spencer Day

회원 가입일: 09/14/22

188,078 평판

안내서 1,187개를 작성함

0가이드 댓글

댓글 쓰기

조회 통계:

지난 24시간: 0

지난 7일: 7

지난 30일: 17

전체 시간: 27