주요 콘텐츠로 건너뛰기

Minolta Maxxum QTSI Tripod Mount Replacement

필요한 것

  1. Minolta Maxxum QTSI Tripod Mount Replacement, Tripod Mount: 1 단계, 이미지 1/1
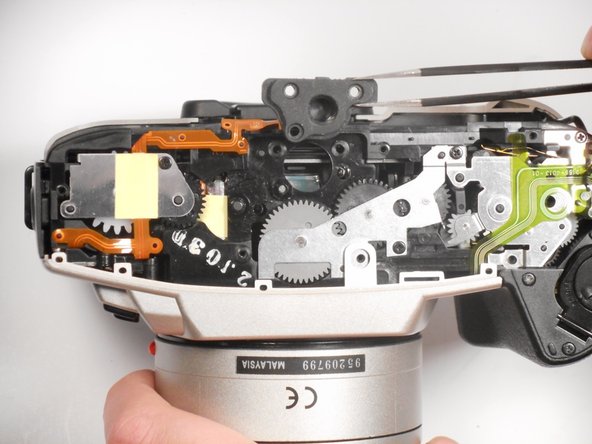
    • With a screwdriver, remove the (7) black Phillips #00 5.0mm screws on the bottom of the camera.

    • The screws are located on the outer edge of the bottom panel.

    • Be careful when removing the screws from the panel because they are easy to lose.

  2. Minolta Maxxum QTSI Tripod Mount Replacement: 2 단계, 이미지 1/2 Minolta Maxxum QTSI Tripod Mount Replacement: 2 단계, 이미지 2/2
    • Once all the screws are removed, the panel should easily come off.

    • Remove the bottom panel of the camera by placing your index finger and thumb on the outer edges of the panel.

    • Pull the bottom panel towards you, it should come off easily.

  3. Minolta Maxxum QTSI Tripod Mount Replacement: 3 단계, 이미지 1/1
    • The tripod socket is visible when the bottom panel is removed.

    • Remove the (3) black Phillips #00 6.25mm screws from the tripod socket.

    • When the screws are removed, the tripod socket is free and can easily be lost.

  4. Minolta Maxxum QTSI Tripod Mount Replacement: 4 단계, 이미지 1/2 Minolta Maxxum QTSI Tripod Mount Replacement: 4 단계, 이미지 2/2
    • Use the tweezers to gently remove the tripod socket, and replace it.

결론

To reassemble your device, follow these instructions in reverse order.

Jordan Ellery

회원 가입일: 10/10/16

388 평판

안내서 3개 작성하였습니다

Sam Houston State, Team 12-4, Blackburne Fall 2016 Sam Houston State, Team 12-4, Blackburne Fall 2016 회원

SHSU-BLACKBURNE-F16S12G4

4 회원들

안내서 5개 작성하였습니다

댓글 0개

댓글 쓰기

조회 통계:

24 시간 전: 1

7일 전: 3

30일 전: 7

전체 시간: 359