소개
This guide will show how to replace the strings and cables on a Mission Hammr archery bow.
Before attempting this make sure you know how everything being used for the repair operates. Incorrect use of the equipment could lead to damage and potential injuries to you as well.
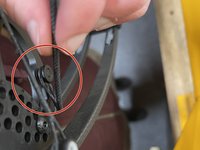
When compressing the bow in the press be sure NOT to compress it anymore than what’s needed. If you do, it could result in damage to the bow and the bow press itself. If compressed enough the bow could shoot out of the press potentially harming you as well. Make sure the arms you are using in your bow press are supported in working on the Mission Hammr. If your press is not capable of holding the Mission Hammr DO NOT attempt to work on this bow in your press, doing so can seriously harm you and the equipment. Keep your fingers out of the cams. This can be tough when trying to replace the strings and cables but remember the bow is compressed and if it was to slip out while you had your fingers in them, they have the ability to break or cut off your fingers.
Warning: Exercise extreme caution when following this guide. Do not attempt to work on this bow in your press. Doing so can cause serious injury.
-
-
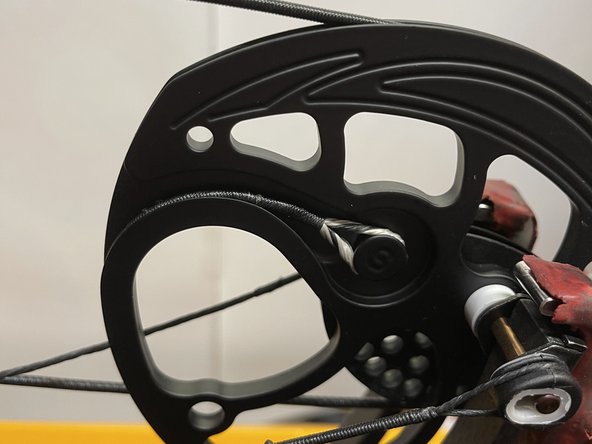
Begin by aligning the small, grey arms of the bow press with the limbs of the bow.
-


To reassemble your device, follow these instructions in reverse order.
다른 2명이 해당 안내서를 완성하였습니다.
팀

UMass Dartmouth, Team S1-G12, O'Connell Spring 2021 UMass Dartmouth, Team S1-G12, O'Connell Spring 2021 회원
UMASSD-O'CONNELL-S21S1G12
1 회원
안내서 2개를 작성함