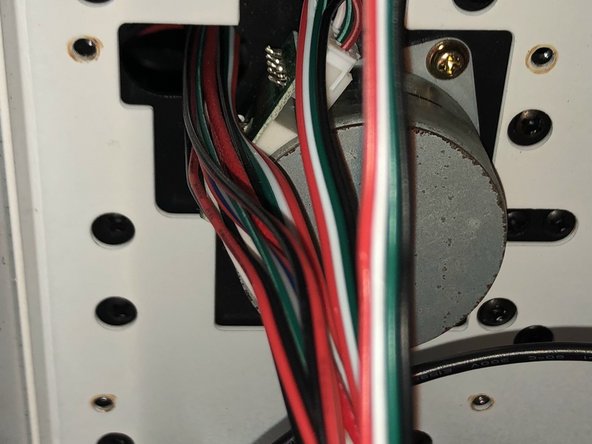
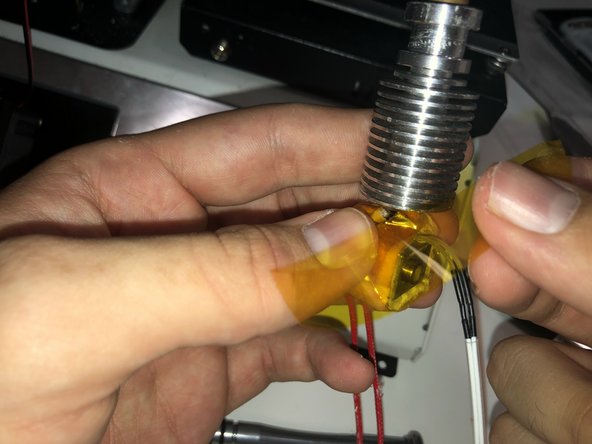
주요 콘텐츠로 건너뛰기

Monoprice Select Mini V2 3D Printer Heating Element and Temperature Sensor Replacement

필요한 것

  1. Monoprice Select Mini V2 3D Printer Heating Element and Temperature Sensor Replacement, Heating Element and Temperature Sensor: 1 단계, 이미지 1/3 Monoprice Select Mini V2 3D Printer Heating Element and Temperature Sensor Replacement, Heating Element and Temperature Sensor: 1 단계, 이미지 2/3 Monoprice Select Mini V2 3D Printer Heating Element and Temperature Sensor Replacement, Heating Element and Temperature Sensor: 1 단계, 이미지 3/3
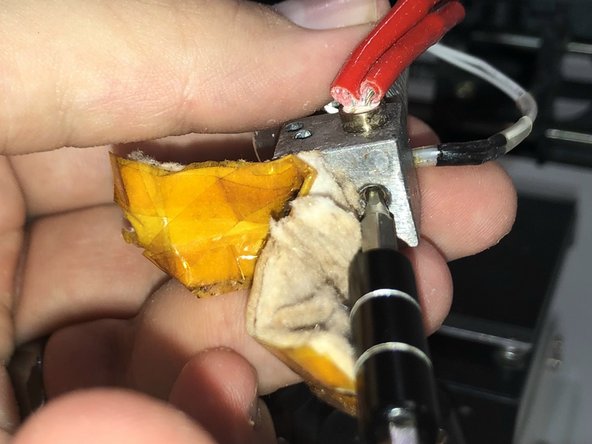
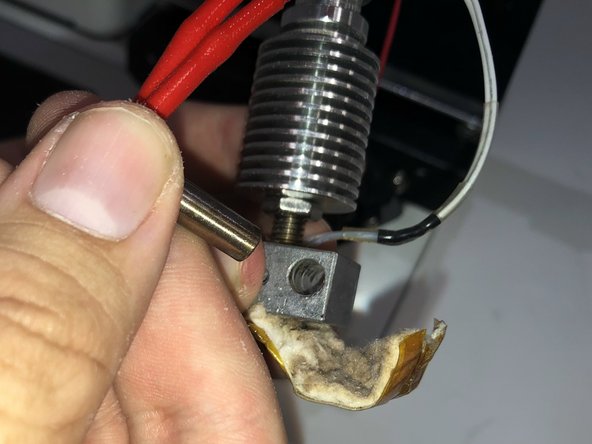
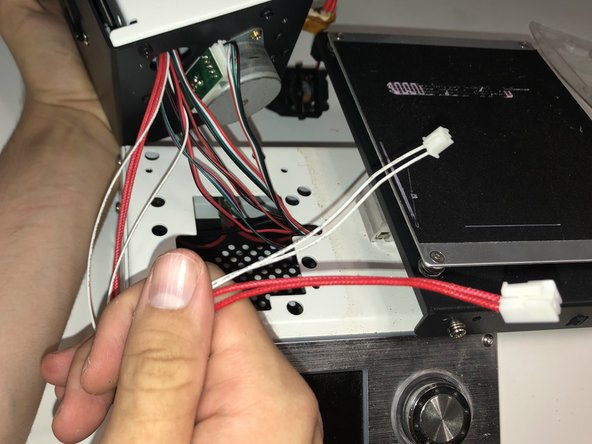
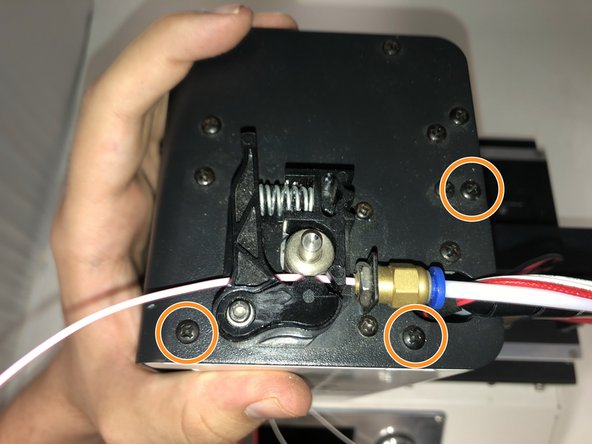
    • Use needle nose pliers to remove the two spring clips on either side of the shroud covering the hotend.

    • Remove the fan with your hand.

  2. Monoprice Select Mini V2 3D Printer Heating Element and Temperature Sensor Replacement: 2 단계, 이미지 1/3 Monoprice Select Mini V2 3D Printer Heating Element and Temperature Sensor Replacement: 2 단계, 이미지 2/3 Monoprice Select Mini V2 3D Printer Heating Element and Temperature Sensor Replacement: 2 단계, 이미지 3/3
    • Remove the two 18 mm Phillips head screws that secure the shroud.

    • Remove the hot end from the shroud.

  3. Monoprice Select Mini V2 3D Printer Heating Element and Temperature Sensor Replacement: 3 단계, 이미지 1/3 Monoprice Select Mini V2 3D Printer Heating Element and Temperature Sensor Replacement: 3 단계, 이미지 2/3 Monoprice Select Mini V2 3D Printer Heating Element and Temperature Sensor Replacement: 3 단계, 이미지 3/3
    • Use a small utility knife to cut the insulation covering the heater block.

    • The intent is to access what is under the insulation, not to fully remove it. Fully removing the insulation will likely damage it.

  4. Monoprice Select Mini V2 3D Printer Heating Element and Temperature Sensor Replacement: 4 단계, 이미지 1/3 Monoprice Select Mini V2 3D Printer Heating Element and Temperature Sensor Replacement: 4 단계, 이미지 2/3 Monoprice Select Mini V2 3D Printer Heating Element and Temperature Sensor Replacement: 4 단계, 이미지 3/3
    • Pull back the insulation until you have access to the grub screw at the bottom of the heater block.

    • Use the hex driver to loosen the grub screw.

    • Remove the heating element from the heater block.

  5. Monoprice Select Mini V2 3D Printer Heating Element and Temperature Sensor Replacement: 5 단계, 이미지 1/2 Monoprice Select Mini V2 3D Printer Heating Element and Temperature Sensor Replacement: 5 단계, 이미지 2/2
    • Use the dull side of a utility blade to scrape away excess thermal compound holding the temperature sensor in place.

    • Remove the temperature sensor.

    • The thermal compound is simply the dried paste surrounding the hole where the temperature sensor is located.

  6. Monoprice Select Mini V2 3D Printer Heating Element and Temperature Sensor Replacement: 6 단계, 이미지 1/2 Monoprice Select Mini V2 3D Printer Heating Element and Temperature Sensor Replacement: 6 단계, 이미지 2/2
    • Unwind the spiral wrap from the wires leading from the hotend to the printer body.

  7. Monoprice Select Mini V2 3D Printer Heating Element and Temperature Sensor Replacement: 7 단계, 이미지 1/2 Monoprice Select Mini V2 3D Printer Heating Element and Temperature Sensor Replacement: 7 단계, 이미지 2/2
    • Lay the printer in its back to access the bottom panel.

    • Remove the six 8 mm Phillips head screws, and carefully remove the bottom panel.

    • Do not disconnect any wires in this step.

  8. Monoprice Select Mini V2 3D Printer Heating Element and Temperature Sensor Replacement: 8 단계, 이미지 1/3 Monoprice Select Mini V2 3D Printer Heating Element and Temperature Sensor Replacement: 8 단계, 이미지 2/3 Monoprice Select Mini V2 3D Printer Heating Element and Temperature Sensor Replacement: 8 단계, 이미지 3/3
    • Clip the zip ties holding the wire bundle together.

  9. Monoprice Select Mini V2 3D Printer Heating Element and Temperature Sensor Replacement: 9 단계, 이미지 1/3 Monoprice Select Mini V2 3D Printer Heating Element and Temperature Sensor Replacement: 9 단계, 이미지 2/3 Monoprice Select Mini V2 3D Printer Heating Element and Temperature Sensor Replacement: 9 단계, 이미지 3/3
    • Locate the pair of thick red wires for the heating element and the pair of thin white wires for the temperature sensor.

    • Find where each pair of wires connects to the main board and disconnect them with a pair of needle nose pliers.

    • The large connector for the heating element has a clip that will need to be depressed to disconnect the wires.

  10. Monoprice Select Mini V2 3D Printer Heating Element and Temperature Sensor Replacement: 10 단계, 이미지 1/2 Monoprice Select Mini V2 3D Printer Heating Element and Temperature Sensor Replacement: 10 단계, 이미지 2/2
    • Remove the four Phillips head screws holding the vertical section of the printer to the base.

    • These screws are screwed in tightly, be careful not to strip them while removing them.

    • These screws, though also 8 mm, have a slightly smaller diameter than the ones holding on the bottom panel. Keep them separate to avoid mixing them up.

  11. Monoprice Select Mini V2 3D Printer Heating Element and Temperature Sensor Replacement: 11 단계, 이미지 1/2 Monoprice Select Mini V2 3D Printer Heating Element and Temperature Sensor Replacement: 11 단계, 이미지 2/2
    • Remove the vertical portion of the printer from the base.

    • Feed the wires for the heating element and the temperature sensor through the hole in the base.

  12. Monoprice Select Mini V2 3D Printer Heating Element and Temperature Sensor Replacement: 12 단계, 이미지 1/3 Monoprice Select Mini V2 3D Printer Heating Element and Temperature Sensor Replacement: 12 단계, 이미지 2/3 Monoprice Select Mini V2 3D Printer Heating Element and Temperature Sensor Replacement: 12 단계, 이미지 3/3
    • Remove the three Phillips head screws from the bottom of the vertical assembly that hold the front panel in place.

    • Remove the three Phillips head screws from the top of the vertical assembly that hold the front panel.

    • Remove the front panel from the vertical assembly.

  13. Monoprice Select Mini V2 3D Printer Heating Element and Temperature Sensor Replacement: 13 단계, 이미지 1/3 Monoprice Select Mini V2 3D Printer Heating Element and Temperature Sensor Replacement: 13 단계, 이미지 2/3 Monoprice Select Mini V2 3D Printer Heating Element and Temperature Sensor Replacement: 13 단계, 이미지 3/3
    • Push the wires for the heating element and the temperature sensor through the hole in the top of the vertical assembly.

  14. Monoprice Select Mini V2 3D Printer Heating Element and Temperature Sensor Replacement: 14 단계, 이미지 1/2 Monoprice Select Mini V2 3D Printer Heating Element and Temperature Sensor Replacement: 14 단계, 이미지 2/2
    • Cut the remaining zip ties holding the wires together.

  15. Monoprice Select Mini V2 3D Printer Heating Element and Temperature Sensor Replacement: 15 단계, 이미지 1/3 Monoprice Select Mini V2 3D Printer Heating Element and Temperature Sensor Replacement: 15 단계, 이미지 2/3 Monoprice Select Mini V2 3D Printer Heating Element and Temperature Sensor Replacement: 15 단계, 이미지 3/3
    • Unwind the remaining wire wrap from the bundle of wires.

    • Remove the old heating element and temperature sensor.

  16. Monoprice Select Mini V2 3D Printer Heating Element and Temperature Sensor Replacement: 16 단계, 이미지 1/3 Monoprice Select Mini V2 3D Printer Heating Element and Temperature Sensor Replacement: 16 단계, 이미지 2/3 Monoprice Select Mini V2 3D Printer Heating Element and Temperature Sensor Replacement: 16 단계, 이미지 3/3
    • Insert the new heating element into the heater block.

    • Tighten the grub screw to secure the heating element.

  17. Monoprice Select Mini V2 3D Printer Heating Element and Temperature Sensor Replacement: 17 단계, 이미지 1/3 Monoprice Select Mini V2 3D Printer Heating Element and Temperature Sensor Replacement: 17 단계, 이미지 2/3 Monoprice Select Mini V2 3D Printer Heating Element and Temperature Sensor Replacement: 17 단계, 이미지 3/3
    • Insert the new temperature sensor into the heater block.

    • If the sensor doesn't stay in place, it may be necessary to apply a small amount of thermal cement to secure it.

  18. Monoprice Select Mini V2 3D Printer Heating Element and Temperature Sensor Replacement: 18 단계, 이미지 1/3 Monoprice Select Mini V2 3D Printer Heating Element and Temperature Sensor Replacement: 18 단계, 이미지 2/3 Monoprice Select Mini V2 3D Printer Heating Element and Temperature Sensor Replacement: 18 단계, 이미지 3/3
    • Use kapton tape to secure the insulation around the heater block.

  19. Monoprice Select Mini V2 3D Printer Heating Element and Temperature Sensor Replacement: 19 단계, 이미지 1/2 Monoprice Select Mini V2 3D Printer Heating Element and Temperature Sensor Replacement: 19 단계, 이미지 2/2
    • Feed the wires from the new components through the hole at the top of the vertical assembly.

    • From this point, use steps 15-1 as a guide to reassemble the device, ignoring steps 4 and 5.

    • Remember to replace the zip ties for wire managment.

    • the 4 screws that held the vertical assembly on the base are different than the other screws that held panels on. Tighten them well.

결론

To reassemble your device, follow these instructions in reverse order.

Noah Wargo

회원 가입일: 06/08/22

296 평판

안내서 1개 작성함

University of Memphis, Team 1-1, Lane Summer 2022 University of Memphis, Team 1-1, Lane Summer 2022 회원

UM-LANE-SU22S1G1

2 회원들

안내서 1개 작성하였습니다

댓글 2개

Very good. It would be simpler, for those who can contemplate it, to just cut the wires to the heating element and thermistor a couple of inches away from them. and splice the new ones in, paying attention to heat-shrinking the joints. Then you don't have to rewire all the way back to the PCB. You need soldering and heatshrinking facilities for this procedure.

The 'you need' list should also include zip ties.

Esmond Pitt - 답글

Where did you get the new heating element? Would this fix the issue of the printer not printing anything, even after preheating it? That's why mine has been collecting dust for years.

Arthur Lemus - 답글

댓글 쓰기

조회 통계:

24 시간 전: 1

7일 전: 12

30일 전: 69

전체 시간: 1,936