주요 콘텐츠로 건너뛰기

Motorola C261 Front Speaker Replacement

필요한 것

  1. Motorola C261 Front Speaker Replacement, Place Phone: 1 단계, 이미지 1/1
    • Place the phone with the screen facedown on a flat surface.

  2. Motorola C261 Front Speaker Replacement, Latch and Back Cover: 2 단계, 이미지 1/2 Motorola C261 Front Speaker Replacement, Latch and Back Cover: 2 단계, 이미지 2/2
    • Pinch the latch upwards towards the top of the phone.

    • Lift the back cover of the phone.

    • There are tabs on the bottom end of the battery cover that the cover pivots about.

  3. Motorola C261 Front Speaker Replacement, Remove Battery: 3 단계, 이미지 1/2 Motorola C261 Front Speaker Replacement, Remove Battery: 3 단계, 이미지 2/2
    • Remove the battery by pressing on the edge of the battery from the top of the phone towards the bottom and lifting up.

  4. Motorola C261 Front Speaker Replacement, Clips: 4 단계, 이미지 1/2 Motorola C261 Front Speaker Replacement, Clips: 4 단계, 이미지 2/2
    • Remove the 2 clips from the sides of the phone, just below the screen with the pry tool.

  5. Motorola C261 Front Speaker Replacement, Button Circuit Board: 5 단계, 이미지 1/2 Motorola C261 Front Speaker Replacement, Button Circuit Board: 5 단계, 이미지 2/2
    • The circuit board for the buttons is now free to be removed and replaced.

  6. Motorola C261 Front Speaker Replacement, Front Speaker: 6 단계, 이미지 1/2 Motorola C261 Front Speaker Replacement, Front Speaker: 6 단계, 이미지 2/2
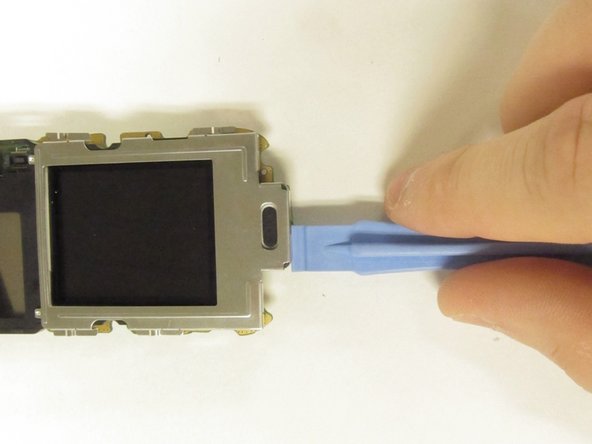
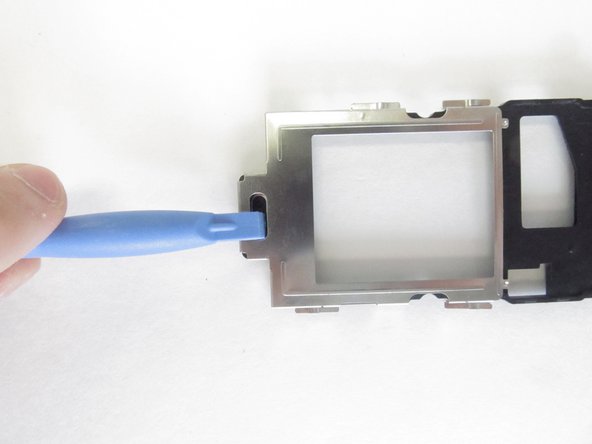
    • Pry under the display screen, around each edge until it comes loose from the circuit board.

    • You are removing the black plastic piece that holds the button circuit board. The piece has an aluminum frame around it. The two pieces will be removed together and don't need to be separated.

  7. Motorola C261 Front Speaker Replacement, Lifting Framework: 7 단계, 이미지 1/1
    • Gently remove the plastic and metal framework of the phone by picking it up.

  8. Motorola C261 Front Speaker Replacement: 8 단계, 이미지 1/2 Motorola C261 Front Speaker Replacement: 8 단계, 이미지 2/2
    • The front speaker should be contained in the framework that you just removed. Remove the speaker by lifting it out.

    • Use a tool that isn't sharp to poke it out should the first method prove too difficult.

결론

To reassemble your device, follow these instructions in reverse order.

Jason

회원 가입일: 10/23/14

305 평판

안내서 3개 작성하였습니다

Michigan Tech, Team 1-6, Lauer Fall 2014 Michigan Tech, Team 1-6, Lauer Fall 2014 회원

MTU-LAUER-F14S1G6

3 회원들

안내서 6개 작성하였습니다

댓글 0개

댓글 쓰기

조회 통계:

24 시간 전: 0

7일 전: 0

30일 전: 1

전체 시간: 107