주요 콘텐츠로 건너뛰기

Motorola C290 Speaker Replacement

필요한 것

  1. Motorola C290 Speaker Replacement, Outside Case removal: 1 단계, 이미지 1/3 Motorola C290 Speaker Replacement, Outside Case removal: 1 단계, 이미지 2/3 Motorola C290 Speaker Replacement, Outside Case removal: 1 단계, 이미지 3/3
    • Flip open your Motorola C290.

    • Remove rubber stoppers located around main screen using a push pin.

    • This reveals four screws.

    • Use a Torx T6 Screwdriver to unscrew the four screws.

  2. Motorola C290 Speaker Replacement, Removing the front casing: 2 단계, 이미지 1/2 Motorola C290 Speaker Replacement, Removing the front casing: 2 단계, 이미지 2/2
    • Use a plastic opening tool to pry open a gap between the top cover and the face of the phone.

    • Slide the plastic opening tool along gap and pry open case.

    • Remove top cover.

  3. Motorola C290 Speaker Replacement, Disconnect the motherboard: 3 단계, 이미지 1/2 Motorola C290 Speaker Replacement, Disconnect the motherboard: 3 단계, 이미지 2/2
    • Unclip circuit attachments located on back of screen circuit board using a Spudger.

  4. Motorola C290 Speaker Replacement, Removing the motherboard/screen: 4 단계, 이미지 1/3 Motorola C290 Speaker Replacement, Removing the motherboard/screen: 4 단계, 이미지 2/3 Motorola C290 Speaker Replacement, Removing the motherboard/screen: 4 단계, 이미지 3/3
    • Insert the plastic opening tool between the metal screen components and the plastic frame at the corners.

    • Firmly pry the screen components from the frame with a twisting motion

    • You will need to apply a good amount of force as you pry, twisting in a right-to-left motion.

    • Completely remove screen components from frame.

  5. Motorola C290 Speaker Replacement, Speaker Removal: 5 단계, 이미지 1/3 Motorola C290 Speaker Replacement, Speaker Removal: 5 단계, 이미지 2/3 Motorola C290 Speaker Replacement, Speaker Removal: 5 단계, 이미지 3/3
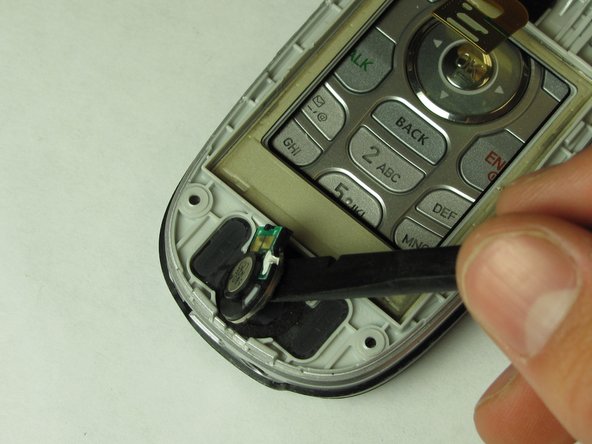
    • Insert spudger underneath the speaker.

    • Gently break the sticky seal between the phone case and speaker.

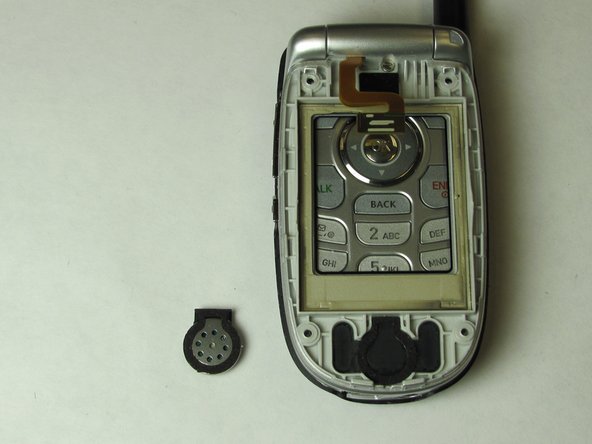
    • Lift the speaker off the phone case.

    • Note: It will be necessary to destroy the seal to remove the speaker.

결론

To reassemble your device, follow these instructions in reverse order.

Philip Ybarra

회원 가입일: 04/15/10

27 평판

안내서 1개 작성함

Cal Poly, Team 24-28, Regan Spring 2010 Cal Poly, Team 24-28, Regan Spring 2010 회원

CPSU-REGAN-S10S24G28

4 회원들

안내서 6개 작성하였습니다

댓글 0개

댓글 쓰기

조회 통계:

24 시간 전: 0

7일 전: 0

30일 전: 2

전체 시간: 1,166