주요 콘텐츠로 건너뛰기

Motorola Droid Turbo Display Assembly Replacement

필요한 것

  1. Motorola Droid Turbo Display Assembly Replacement, Rear Case: 1 단계, 이미지 1/1
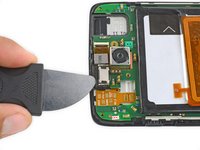
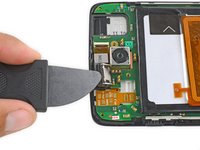
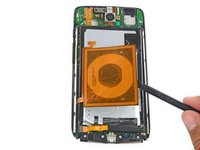
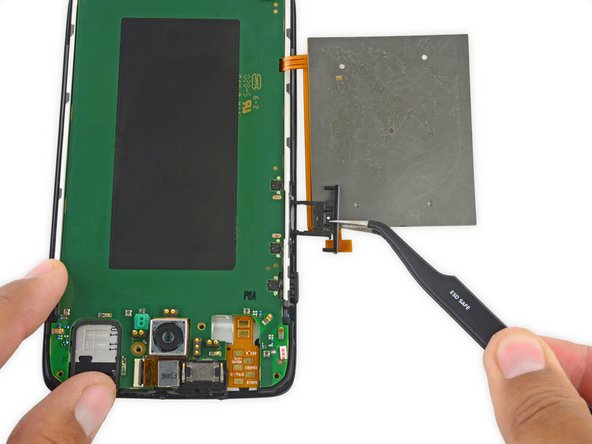
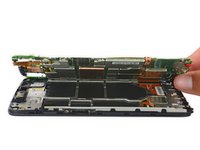
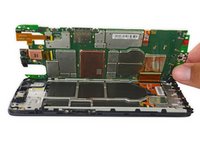
    • Prepare an iOpener and lay it over the rear case to soften the adhesive on securing the rear case to the phone.

  2. Motorola Droid Turbo Display Assembly Replacement: 2 단계, 이미지 1/2 Motorola Droid Turbo Display Assembly Replacement: 2 단계, 이미지 2/2
    • Use a plastic opening tool to pry the rear case off of the rest of the device.

    • Remove the rear case.

    • The wireless charging coil may try to stick to the rear case, so make sure to remove it from the case before fully separating the rear case from the rest of the device.

  3. Motorola Droid Turbo Display Assembly Replacement, Midframe: 3 단계, 이미지 1/1
    • Remove the midframe bezel.

  4. Motorola Droid Turbo Display Assembly Replacement: 4 단계, 이미지 1/1
    • Remove the four Torx T5 screws securing the midframe plate.

  5. Motorola Droid Turbo Display Assembly Replacement: 5 단계, 이미지 1/1
    • Remove the midframe.

  6. Motorola Droid Turbo Display Assembly Replacement, Earpiece Speaker: 6 단계, 이미지 1/2 Motorola Droid Turbo Display Assembly Replacement, Earpiece Speaker: 6 단계, 이미지 2/2
    • Use a Jimmy to pry under the speaker and lift to remove it.

    • Be sure to place your tool under the entire speaker assembly, against the plastic frame, and pry there.

    • These photos show an incorrect tool position—prying this high up on the speaker assembly may damage it. Place your tool underneath the speaker assembly, not on the edge as shown here.

    • The speaker is secured with some light adhesive, so some force may be required.

  7. Motorola Droid Turbo Display Assembly Replacement, Battery: 7 단계, 이미지 1/2 Motorola Droid Turbo Display Assembly Replacement, Battery: 7 단계, 이미지 2/2
    • Use the point of a spudger to pop up the battery connector.

  8. Motorola Droid Turbo Display Assembly Replacement: 8 단계, 이미지 1/2 Motorola Droid Turbo Display Assembly Replacement: 8 단계, 이미지 2/2
    • Fold the wireless charging coil away from the battery.

  9. Motorola Droid Turbo Display Assembly Replacement: 9 단계, 이미지 1/2 Motorola Droid Turbo Display Assembly Replacement: 9 단계, 이미지 2/2
    • Use a spudger to gently pry the battery up from the rest of the device.

    • The battery is secured with some moderate adhesive, so some force may be necessary.

  10. Motorola Droid Turbo Display Assembly Replacement, Display Assembly: 10 단계, 이미지 1/1
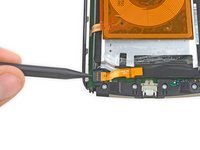
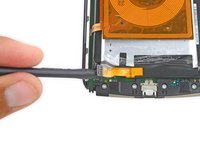
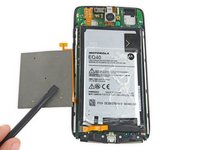
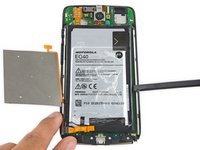
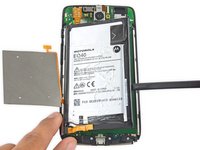
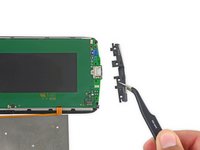
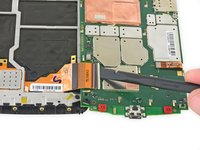
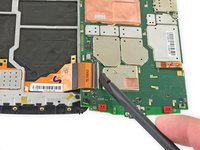
    • Remove the four Torx T5 screws securing the lower antenna board to the motherboard.

  11. Motorola Droid Turbo Display Assembly Replacement: 11 단계, 이미지 1/2 Motorola Droid Turbo Display Assembly Replacement: 11 단계, 이미지 2/2
    • Remove the lower antenna board.

  12. Motorola Droid Turbo Display Assembly Replacement: 12 단계, 이미지 1/2 Motorola Droid Turbo Display Assembly Replacement: 12 단계, 이미지 2/2
    • Remove the SIM card holder/volume button rocker.

  13. Motorola Droid Turbo Display Assembly Replacement: 13 단계, 이미지 1/2 Motorola Droid Turbo Display Assembly Replacement: 13 단계, 이미지 2/2
    • Carefully lift up the motherboard to expose the display connector.

  14. Motorola Droid Turbo Display Assembly Replacement: 14 단계, 이미지 1/2 Motorola Droid Turbo Display Assembly Replacement: 14 단계, 이미지 2/2
    • Use the flat end of a spudger to flip up the retaining flap on the display ZIF connector.

    • Pull the display ribbon cable free of the connector.

결론

To reassemble your device, follow these instructions in reverse order.

다른 16명이 해당 안내서를 완성하였습니다.

Geoff Wacker

회원 가입일: 09/30/13

89,898 평판

안내서 89개 작성하였습니다

댓글 8개

This has a bunch of unecessary steps and is missing so,e just kinda bricked my phone thanks to this

fake name - 답글

Yep. It repeats a bunch of steps, and seems to switch from replacing the display to replacing the motherboard. :(

Richard Klein -

has anyone ever had the buttons break on this phone? i know on my old droid maxx one little mistake when putting the board in the metal frame was enough to break the volume buttons.

Dudefoxlive - 답글

You don’t need to remove the battery from the board…the whole thing comes up as one.

Jason Stewart - 답글

What if your screen is glitchy after the install?

Help me J - 답글

댓글 쓰기

조회 통계:

24 시간 전: 0

7일 전: 1

30일 전: 3

전체 시간: 16,715