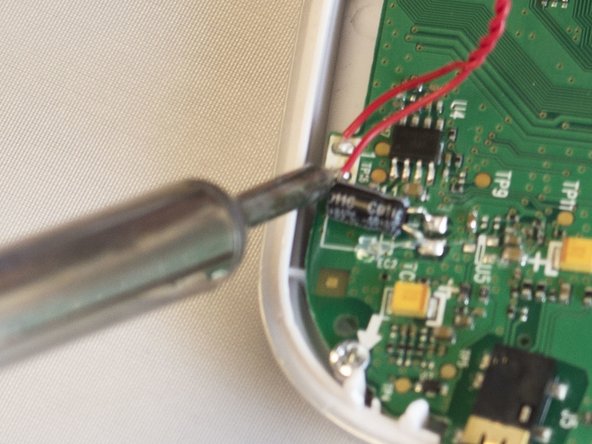
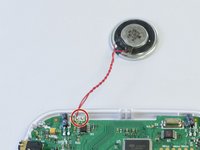
주요 콘텐츠로 건너뛰기

Motorola MBP33SBU Parent Unit Speaker Replacement

필요한 것

  1. Motorola MBP33SBU Parent Unit Speaker Replacement, Battery: 1 단계, 이미지 1/2 Motorola MBP33SBU Parent Unit Speaker Replacement, Battery: 1 단계, 이미지 2/2
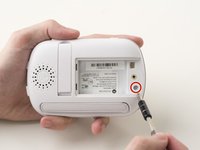
    • Using the Phillips #1 screwdriver, remove the battery cover screw.

    • Remove the battery cover from its hinges and set aside.

  2. Motorola MBP33SBU Parent Unit Speaker Replacement: 2 단계, 이미지 1/3 Motorola MBP33SBU Parent Unit Speaker Replacement: 2 단계, 이미지 2/3 Motorola MBP33SBU Parent Unit Speaker Replacement: 2 단계, 이미지 3/3
    • Lift the battery from its slot.

    • Using precision tweezers, grip the connector plug.

    • Wiggle the connector plug and pull up to remove the connecting wires.

    • Remove the battery from the unit and set it aside.

  3. Motorola MBP33SBU Parent Unit Speaker Replacement, Parent Unit Speaker: 3 단계, 이미지 1/3 Motorola MBP33SBU Parent Unit Speaker Replacement, Parent Unit Speaker: 3 단계, 이미지 2/3 Motorola MBP33SBU Parent Unit Speaker Replacement, Parent Unit Speaker: 3 단계, 이미지 3/3
    • Using the Phillips #1 screwdriver, remove the 7mm screw under the battery cover.

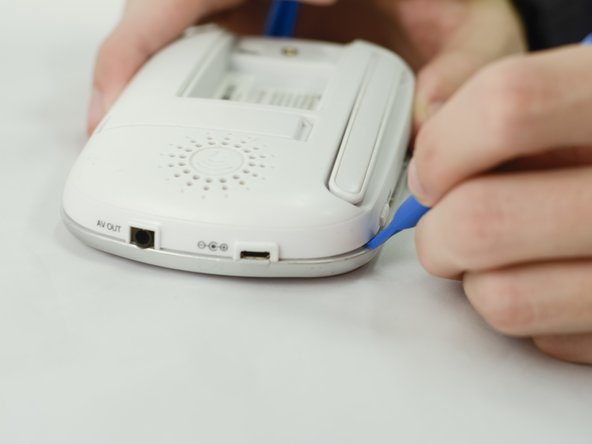
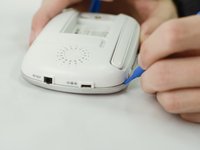
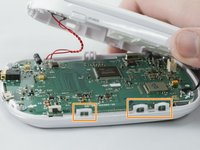
    • Using the blue plastic opening tools, begin prying open the corners and disconnecting the seven clasps around the edges of the parent unit.

    • There should be seven plastic clasps that hook the top portion of the plastic shell to the bottom. These clasps may become damaged while disassembling.

  4. Motorola MBP33SBU Parent Unit Speaker Replacement: 4 단계, 이미지 1/2 Motorola MBP33SBU Parent Unit Speaker Replacement: 4 단계, 이미지 2/2
    • Grip the speaker's metal clasp with tweezers and then pull on the clasp to remove.

    • If pulling on the clasp is not working, try gripping the clasp with the tweezers again. Then tilt the tweezers towards the speaker. This should press the metal of the tweezers against the plastic holding the speaker in place and create enough leverage to pop the clasp out of place.

  5. Motorola MBP33SBU Parent Unit Speaker Replacement: 5 단계, 이미지 1/2 Motorola MBP33SBU Parent Unit Speaker Replacement: 5 단계, 이미지 2/2
    • Desolder the wires connecting the speaker to the circuit board.

    • Beware of overheating, the soldering kit is capable of damaging the circuit board.

    • Beware of the potential for personal injury from heated metals.

    • For soldering procedures please refer to iFixit's guide to Soldering Skills

결론

To reassemble your device, follow these instructions in reverse order.

Ely Tilley

회원 가입일: 09/28/17

714 평판

안내서 5개 작성하였습니다

댓글 0개

댓글 쓰기

조회 통계:

24 시간 전: 3

7일 전: 6

30일 전: 13

전체 시간: 2,146