소개
Use this guide to remove or replace the Moto E4 charging port.
Before you begin, download the Rescue and Smart Assistant app to backup your device and diagnose whether your problem is software or hardware related.
필요한 것
-
-
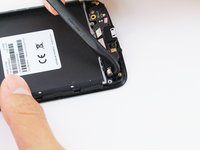
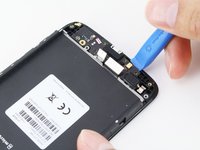
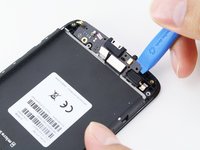
Remove the plastic cover by gently prying it up from the notch at the bottom right corner of the phone.
-
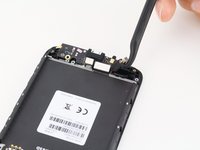
With the phone face down, lift the battery up by the labeled tab and remove it from the device.
-
-
-
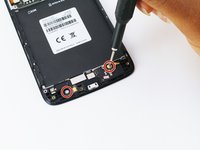
Remove the six 4mm screws from the bottom plastic cover with a Phillips driver bit.
-
-
-
이 단계에 사용된 도구:Halberd Spudger$2.99
-
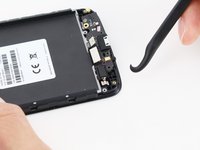
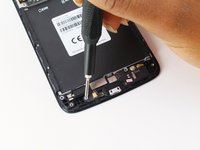
Lift the vibrator out of its slot using the Halberd Spudger hook.
-


To reassemble your device, follow these instructions in reverse order.
다른 12명이 해당 안내서를 완성하였습니다.
팀

Cal Poly, Team S2-G4, White Winter 2019 Cal Poly, Team S2-G4, White Winter 2019 회원
CPSU-WHITE-W19S2G4
4 회원들
안내서 22개를 작성함
8가이드 댓글
These directions don't seem very clear. In some pictures you have the parts in question circled. Why is this not done in every picture? Also, where you say to remove some parts, you're just holding tools to the places where they are. It would be more helpful if you included pictures where the part you're talking about is clearly removed.
It looks like only one person that has read these directions has actually completed the task using them. I'm not bad at this type of thing at all, but I feel that if I attempted to replace the charging port on my e4 using this guide there's a good chance I'd end up breaking it. And I love that phone!
When my charging port broke, I ended up financing a new phone from my carrier for three times what I paid for my e4, and the new phone sucks in comparison with it.
Thank you for thinking of people that have this dilemma and want to handle it themselves, but could you make your directions more specific?
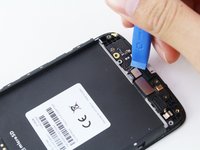
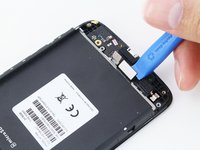
You should probably tell people to remove the ribbon connectors so they don’t break them trying to remove the charging board…
Other than that good guide.
Fails to include removing the vibration motor from the original board, a necessary (if easily worked out) step. It’s also kind of a useless guide given that the parts required are very difficult to find the correct version of, not helped by iFixit not stocking any despite it being a very commonly needed part.
(why motorola felt the need to make at least a dozen different versions of the super-tiny PCB that contains the common-failure point USB port I have *no* idea.)
To the 3 comments above .
Get a life ! ever heard of common sense ?
Not even a thank you to the author. Sad !
To the author well done and thank you. :)
Great article. Thanks. A couple of notes where my phone differed. My phone is a Motorola E4 (XT1761):
1 - one of the screws in step 2 had a sticker over it; presumably to void warranty if you remove it. I just scraped it away
2 - The aerial was on the other side from the picture.
3 - The vibrator was part of the unit; not a separate bit as in the instructions so didn’t need removal.