주요 콘텐츠로 건너뛰기

Motorola Moto E6 Plus Motherboard Cover Replacement

필요한 것

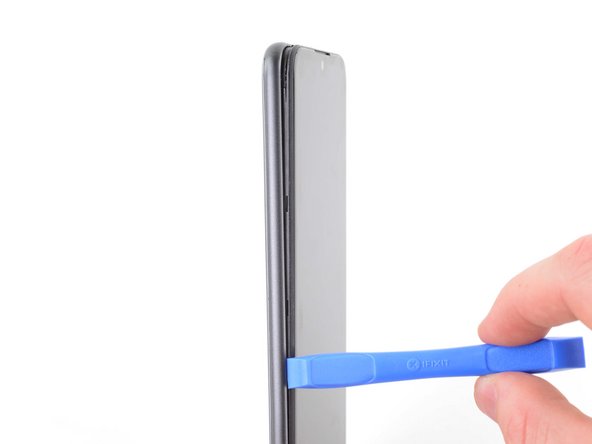
  1. Motorola Moto E6 Plus Motherboard Cover Replacement, Unclip the back cover: 1 단계, 이미지 1/2 Motorola Moto E6 Plus Motherboard Cover Replacement, Unclip the back cover: 1 단계, 이미지 2/2
    • Use an opening tool or your fingernail to pry the back cover away from the frame using the notch at the bottom right corner.

  2. Motorola Moto E6 Plus Motherboard Cover Replacement, Unclip the right edge: 2 단계, 이미지 1/3 Motorola Moto E6 Plus Motherboard Cover Replacement, Unclip the right edge: 2 단계, 이미지 2/3 Motorola Moto E6 Plus Motherboard Cover Replacement, Unclip the right edge: 2 단계, 이미지 3/3
    • Use an opening tool or your fingernail to release the clips on the right edge by sliding up and around the top right corner.

  3. Motorola Moto E6 Plus Motherboard Cover Replacement, Unclip the top edge: 3 단계, 이미지 1/2 Motorola Moto E6 Plus Motherboard Cover Replacement, Unclip the top edge: 3 단계, 이미지 2/2
    • Continue to slide the opening tool or your fingernail across the top edge to release the clips securing the back cover to the frame.

  4. Motorola Moto E6 Plus Motherboard Cover Replacement, Unclip the left edge: 4 단계, 이미지 1/2 Motorola Moto E6 Plus Motherboard Cover Replacement, Unclip the left edge: 4 단계, 이미지 2/2
    • Continue to slide the opening tool or your fingernail down the left edge to release the clips.

  5. Motorola Moto E6 Plus Motherboard Cover Replacement, Remove the back cover: 5 단계, 이미지 1/3 Motorola Moto E6 Plus Motherboard Cover Replacement, Remove the back cover: 5 단계, 이미지 2/3 Motorola Moto E6 Plus Motherboard Cover Replacement, Remove the back cover: 5 단계, 이미지 3/3
    • Remove the back cover.

  6. Motorola Moto E6 Plus Motherboard Cover Replacement, Remove the SIM and SD cards: 6 단계, 이미지 1/3 Motorola Moto E6 Plus Motherboard Cover Replacement, Remove the SIM and SD cards: 6 단계, 이미지 2/3 Motorola Moto E6 Plus Motherboard Cover Replacement, Remove the SIM and SD cards: 6 단계, 이미지 3/3
    • Use a spudger or your fingernail to remove the Micro SD card, the Micro SIM card, and the Nano SIM card.

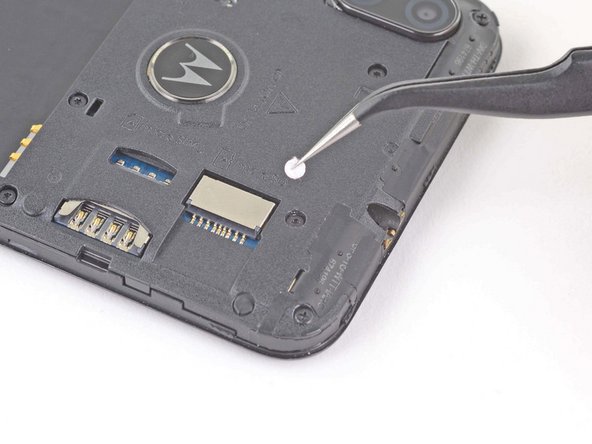
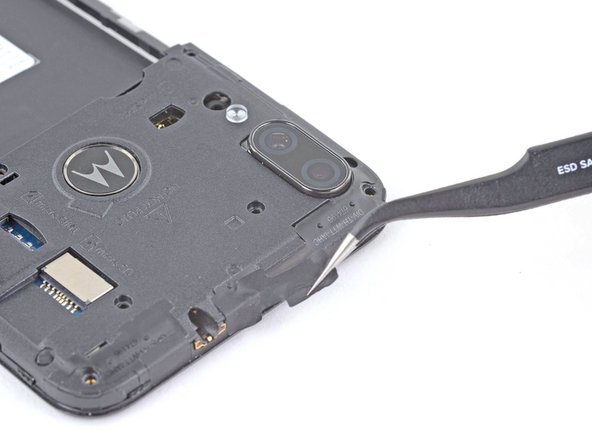
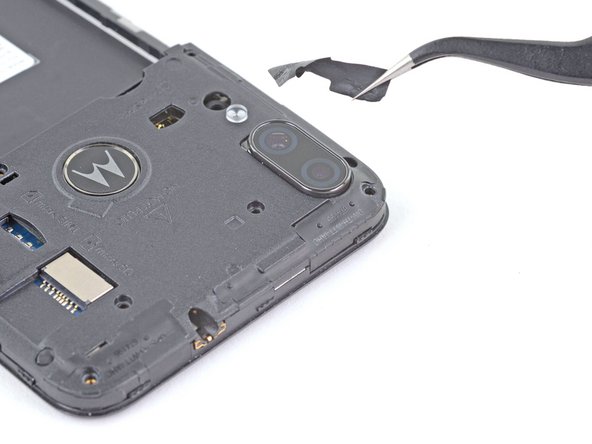
  7. Motorola Moto E6 Plus Motherboard Cover Replacement, Remove the white sticker: 7 단계, 이미지 1/2 Motorola Moto E6 Plus Motherboard Cover Replacement, Remove the white sticker: 7 단계, 이미지 2/2
    이 단계에 사용된 도구:
    Tweezers
    $4.99
    구매
    • Use a pair of tweezers to remove the sticker covering the screw below the audio jack port.

  8. Motorola Moto E6 Plus Motherboard Cover Replacement, Remove the screws: 8 단계, 이미지 1/1
    • Use a Torx T3 driver to remove the five 3.6 mm-long screws securing the motherboard cover to the frame.

    • Use a Phillips screwdriver to remove the two 3.1 mm-long screws.

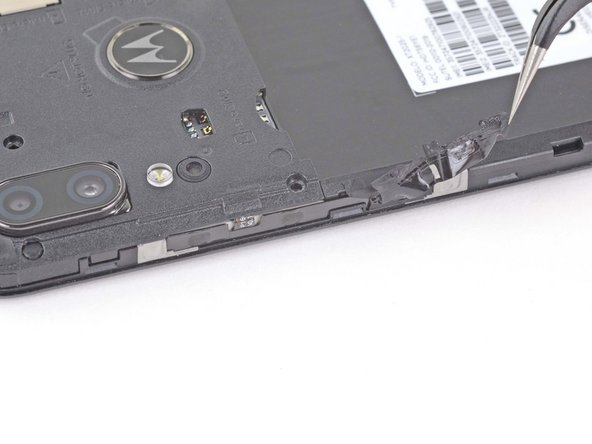
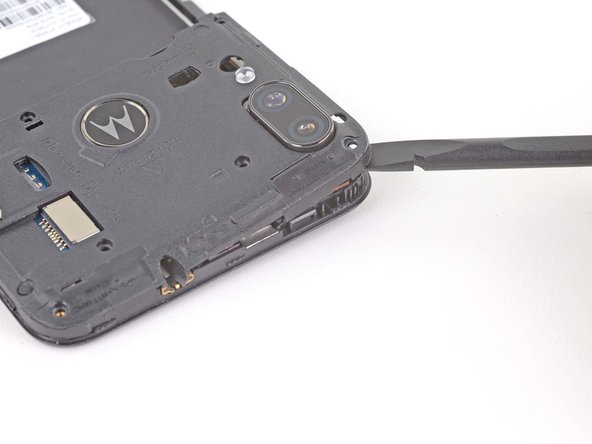
  9. Motorola Moto E6 Plus Motherboard Cover Replacement, Peel back the button sticker: 9 단계, 이미지 1/2 Motorola Moto E6 Plus Motherboard Cover Replacement, Peel back the button sticker: 9 단계, 이미지 2/2
    • Use a pair of tweezers to peel back the sticker covering the volume buttons.

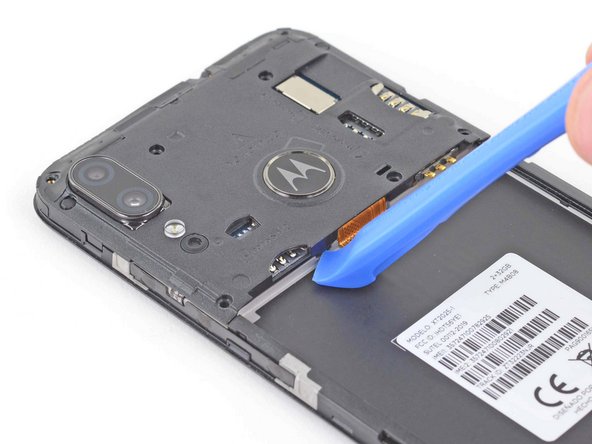
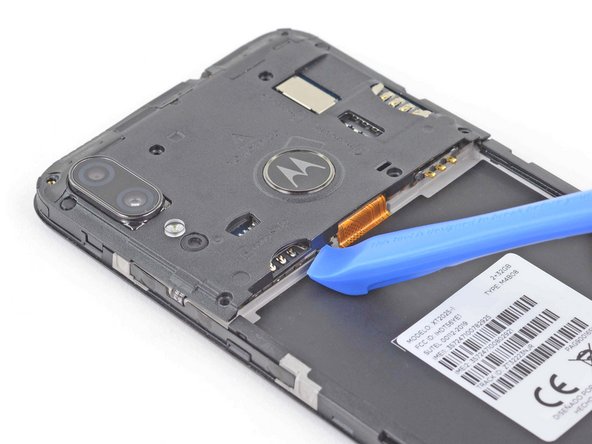
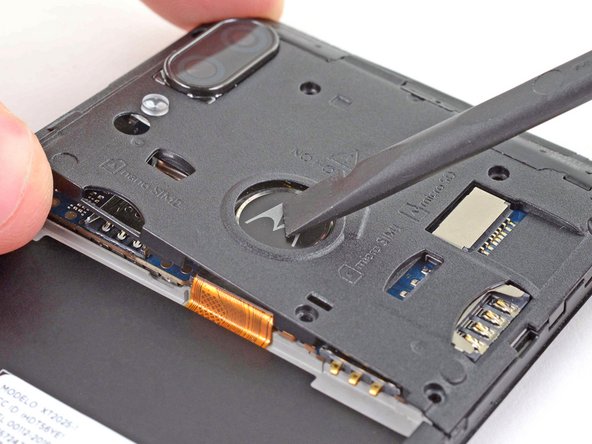
  10. Motorola Moto E6 Plus Motherboard Cover Replacement, Pry up the motherboard cover: 10 단계, 이미지 1/3 Motorola Moto E6 Plus Motherboard Cover Replacement, Pry up the motherboard cover: 10 단계, 이미지 2/3 Motorola Moto E6 Plus Motherboard Cover Replacement, Pry up the motherboard cover: 10 단계, 이미지 3/3
    • Use an opening tool to release the clip to the left of the motherboard flex cable.

  11. Motorola Moto E6 Plus Motherboard Cover Replacement: 11 단계, 이미지 1/2 Motorola Moto E6 Plus Motherboard Cover Replacement: 11 단계, 이미지 2/2
    • Insert a spudger along the left edge of the motherboard cover to loosen the clips.

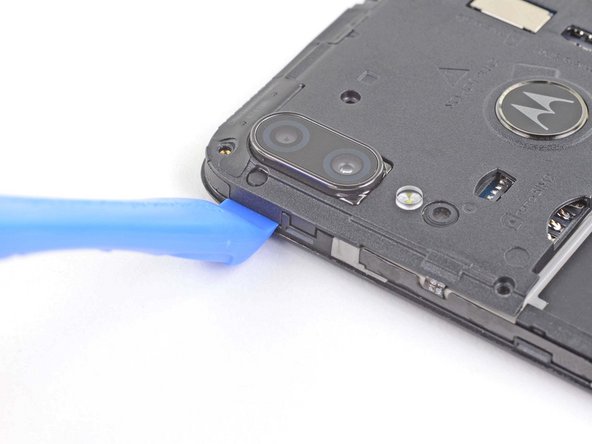
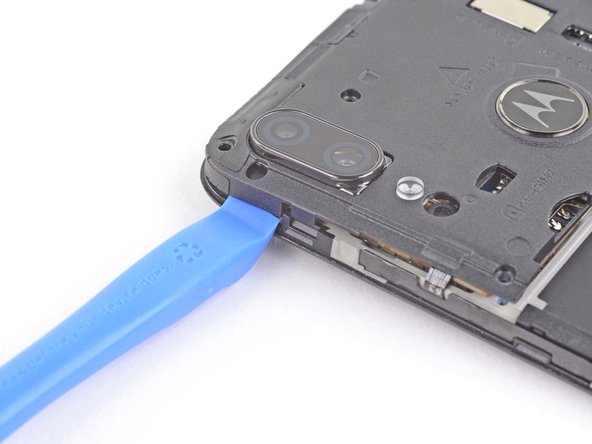
  12. Motorola Moto E6 Plus Motherboard Cover Replacement, Pry up the motherboard cover: 12 단계, 이미지 1/3 Motorola Moto E6 Plus Motherboard Cover Replacement, Pry up the motherboard cover: 12 단계, 이미지 2/3 Motorola Moto E6 Plus Motherboard Cover Replacement, Pry up the motherboard cover: 12 단계, 이미지 3/3
    • Use an opening tool to release the clip next to the rear cameras.

  13. Motorola Moto E6 Plus Motherboard Cover Replacement: 13 단계, 이미지 1/3 Motorola Moto E6 Plus Motherboard Cover Replacement: 13 단계, 이미지 2/3 Motorola Moto E6 Plus Motherboard Cover Replacement: 13 단계, 이미지 3/3
    • Use a pair of tweezers to peel off the sticker on the top edge of the motherboard cover.

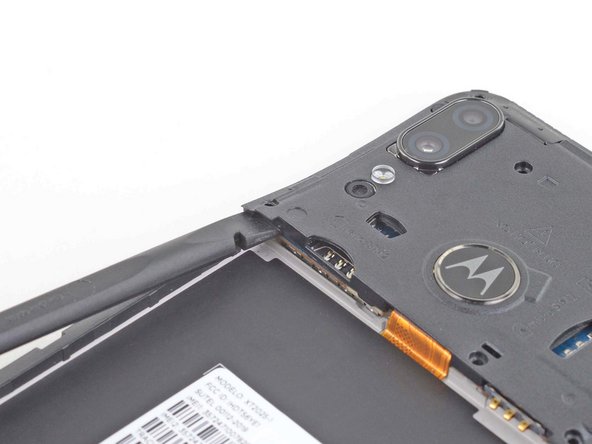
  14. Motorola Moto E6 Plus Motherboard Cover Replacement, Pry up the motherboard cover: 14 단계, 이미지 1/2 Motorola Moto E6 Plus Motherboard Cover Replacement, Pry up the motherboard cover: 14 단계, 이미지 2/2
    • Use a spudger to lift up the left edge of the motherboard cover to loosen the clips.

  15. Motorola Moto E6 Plus Motherboard Cover Replacement, Dislodge the fingerprint sensor: 15 단계, 이미지 1/2 Motorola Moto E6 Plus Motherboard Cover Replacement, Dislodge the fingerprint sensor: 15 단계, 이미지 2/2
    • Use a spudger to push and dislodge the fingerprint sensor off of the motherboard cover.

    • The fingerprint sensor is secured to the underside of the motherboard cover with some light adhesive.

  16. Motorola Moto E6 Plus Motherboard Cover Replacement, Remove the motherboard cover: 16 단계, 이미지 1/3 Motorola Moto E6 Plus Motherboard Cover Replacement, Remove the motherboard cover: 16 단계, 이미지 2/3 Motorola Moto E6 Plus Motherboard Cover Replacement, Remove the motherboard cover: 16 단계, 이미지 3/3
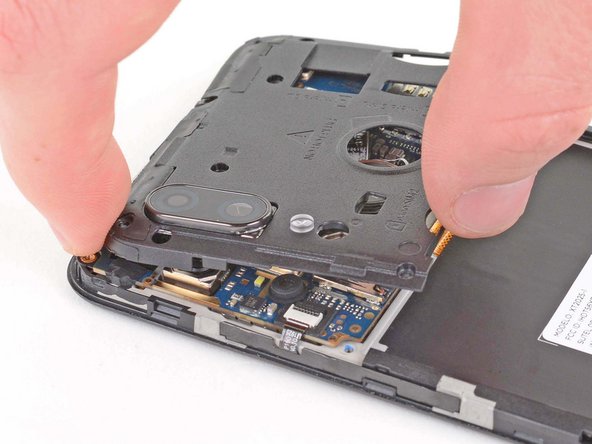
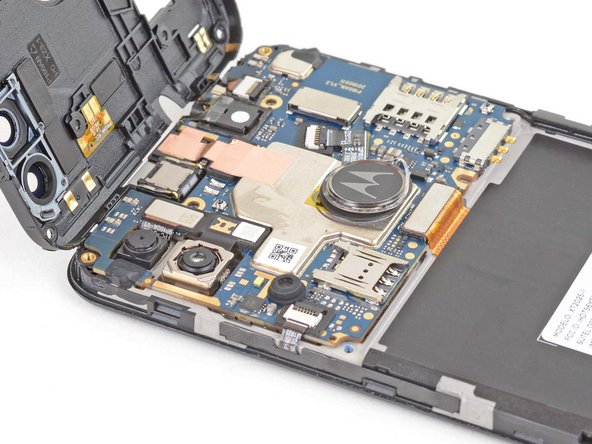
    • Use your fingers to twist the motherboard cover counterclockwise to release the clips securing the motherboard cover.

  17. Motorola Moto E6 Plus Motherboard Cover Replacement: 17 단계, 이미지 1/2 Motorola Moto E6 Plus Motherboard Cover Replacement: 17 단계, 이미지 2/2
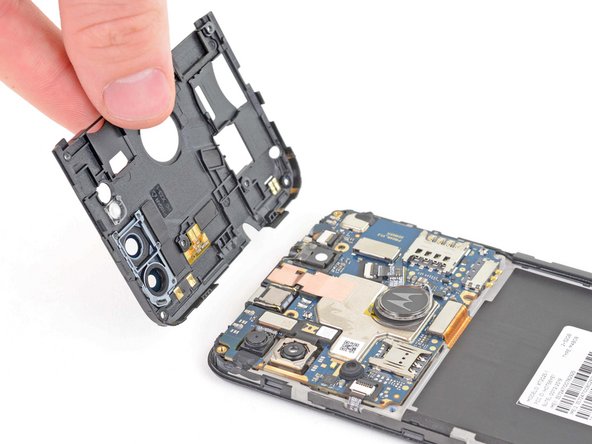
    • Remove the motherboard cover.

결론

To reassemble your device, follow these instructions in reverse order.

Take your e-waste to an R2 or e-Stewards certified recycler.

Repair didn’t go as planned? Try some basic troubleshooting, or ask our Motorola Moto E6 Plus Answers community for help.

Robert Boyd

회원 가입일: 02/01/21

26,668 평판

안내서 94개 작성하였습니다

댓글 0개

댓글 쓰기

조회 통계:

24 시간 전: 0

7일 전: 3

30일 전: 9

전체 시간: 388