소개
This guide will show you how to properly remove the motherboard and replace it with a new one.
Before you begin, download the Rescue and Smart Assistant app to backup your device and diagnose whether your problem is software or hardware related.
필요한 것
-
-
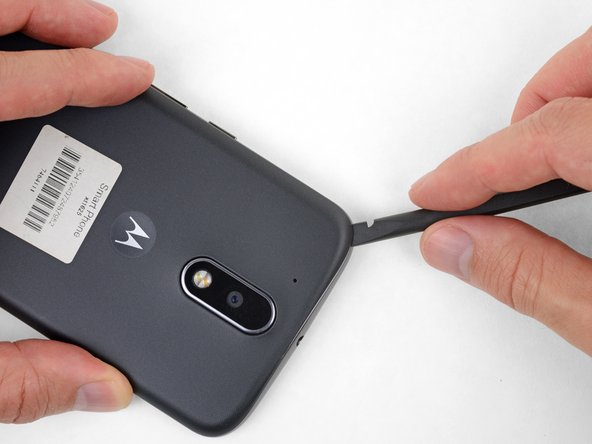
Insert a fingernail or a spudger into the notch on the bottom edge of the phone, near the charge port.
-
Gently twist or pry to open a small gap between the back cover and the body of the phone.
-
While keeping your tool (or fingernail) inserted into the gap between the back cover and the body of the phone, slide it around the corner to begin loosening the plastic clips holding the cover in place.
-
-
-
-
Use a T3 Torx driver to remove the nineteen identical 3.1 mm screws securing the midframe.
In my kit, the T3 Torx bit came in the ‘repair part’ box, while a T5 Torx bit was in the ‘repair tools’ box.
my phone had t4, not t3
unable to remove 8 of the screws. any suggestions?
My T4 is the tool that fit. I can see why people strip these. They were dam tight for such little screws.
I also had a tough time getting them out of the socket once loose. Magnet in the tool was not very strong. I used my tweezers, and scratch the screw heads. That means they are real soft steel, and strip easy.
-
-
-
Insert a spudger under the midframe at the top left corner, and gently twist to separate it from the body of the phone.
-
-
-
Remove the midframe.
During the midframe removal, be careful and do not put too much torsional stress on the loudspeaker pickup wires (to the right of the main camera). It’s not that difficult to crush or shear the pickups there. Doing so will render your phone silent.
Kevin Kwan - 답글
Exactly what happened to me. Both contacts broke off and if just loosely put where they were, they can't make proper contact anymore.
There should be a warning about this in the guide itself!
-
-
-
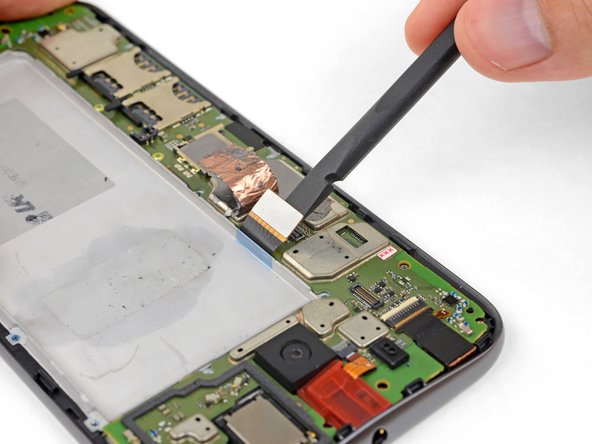
Insert a thin tool (such as one of your tweezer tips) under the red and black battery wires, and slide it underneath the battery connector.
-
Gently pry straight up to disconnect the battery.
-
-
-
Peel off any tape securing the battery wires, and then push the battery wires towards the battery to de-route them from the black bracket on the motherboard.
-
-
-
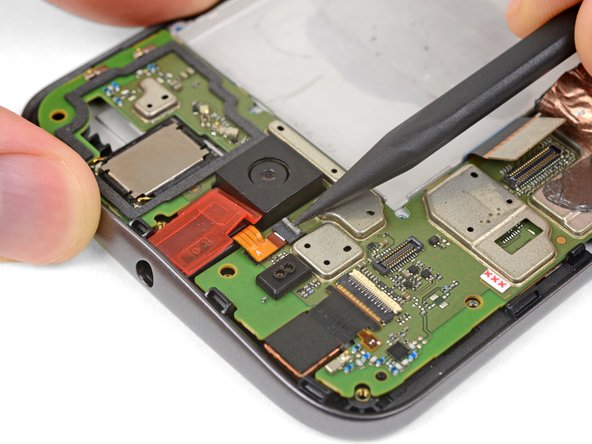
Pry up with your spudger to flip open the locking flap on the headphone jack's ZIF connector.
-
-
-
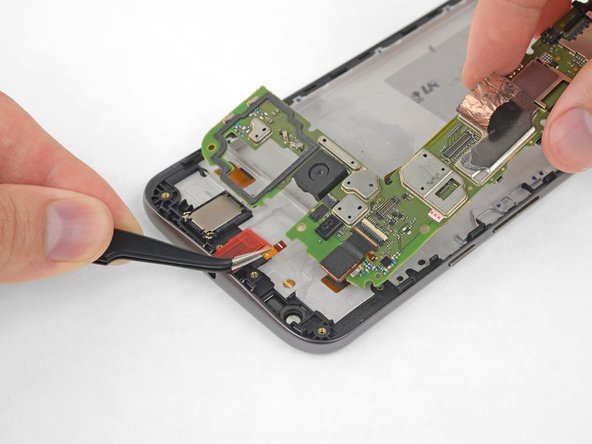
Grasping the motherboard by its edges, left the bottom end up at an angle, while keeping the top edge close to the phone.
-
Use your spudger to pry up the front-facing camera and make sure it separates safely from the frame. The camera can remain attached to the motherboard.
-
Using your tweezers, grasp the headphone jack flex cable and carefully pull it out of its socket as you remove the motherboard.
-
Remove the motherboard.
-


To reassemble your device, follow these instructions in reverse order.
To reassemble your device, follow these instructions in reverse order.
다른 8명이 해당 안내서를 완성하였습니다.
팀

USF Tampa, Team S11-G2, Passmore Fall 2017 USF Tampa, Team S11-G2, Passmore Fall 2017 회원
USFT-PASSMORE-F17S11G2
3 회원들
안내서 13개 작성하였습니다