주요 콘텐츠로 건너뛰기

이 버전에는 잘못된 편집 사항이 있을 수 있습니다. 최신 확인된 스냅샷으로 전환하십시오.

필요한 것

  1. 이 단계는 번역되지 않았습니다. 번역을 도와주십시오

    : 1 단계, 이미지 1/1
    • Turn the phone face down.

    • Press and hold the release button in the middle of the back panel.

    • Slide the bottom panel down to remove.

  2. 이 단계는 번역되지 않았습니다. 번역을 도와주십시오

    : 2 단계, 이미지 1/2 : 2 단계, 이미지 2/2
    • Remove the battery pack by prying it out with a fingernail, screw driver or other opening tool at the tab shown.

    • When reinserting the battery, make sure the contacts in the battery are lined up with the contacts in the phone.

  3. 이 단계는 번역되지 않았습니다. 번역을 도와주십시오

    : 3 단계, 이미지 1/1
    • Press inward on the upper casing.

  4. 이 단계는 번역되지 않았습니다. 번역을 도와주십시오

    : 4 단계, 이미지 1/1
    • Slide the upper case to the right and lift up.

    • Lift the camera sticker so that it doesn't get damaged.

  5. 이 단계는 번역되지 않았습니다. 번역을 도와주십시오

    : 5 단계, 이미지 1/2 : 5 단계, 이미지 2/2
    • Remove the six labeled screws with a T5 Torx Screwdriver.

  6. 이 단계는 번역되지 않았습니다. 번역을 도와주십시오

    : 6 단계, 이미지 1/1
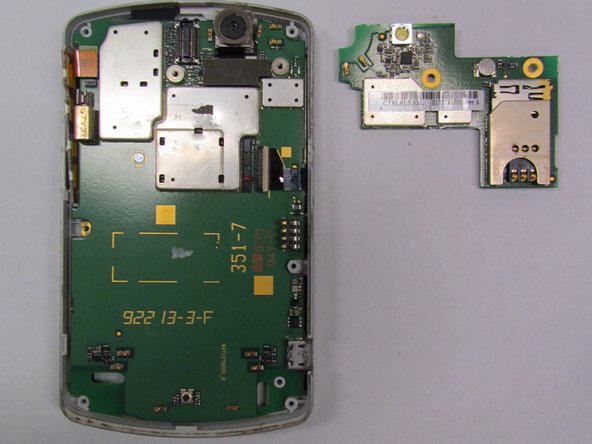
    • Once the screws are removed, use the plastic opening tool to remove the black casing.

  7. 이 단계는 번역되지 않았습니다. 번역을 도와주십시오

    : 7 단계, 이미지 1/2 : 7 단계, 이미지 2/2
    • Remove both screws on the mounted surface with a T5 screwdriver.

  8. 이 단계는 번역되지 않았습니다. 번역을 도와주십시오

    : 8 단계, 이미지 1/2 : 8 단계, 이미지 2/2
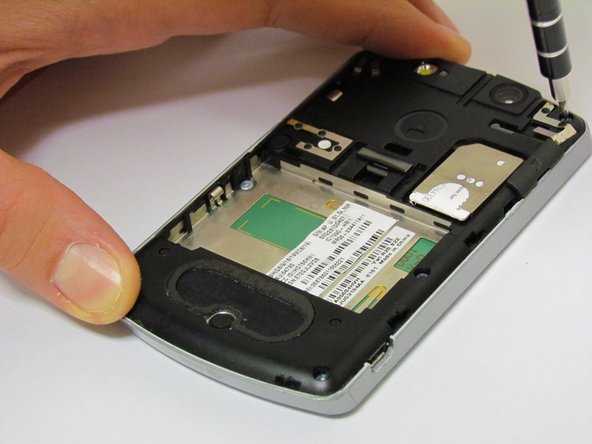
    • Remove the glued, mounted surface by lifting it from underneath the SIM card slot by using the plastic opening tool.

  9. 이 단계는 번역되지 않았습니다. 번역을 도와주십시오

    : 9 단계, 이미지 1/1
    • Use the plastic opening tool to lift the camera from the phone.

  10. 이 단계는 번역되지 않았습니다. 번역을 도와주십시오

    : 10 단계, 이미지 1/1
    • The new camera can now be attached to the motherboard.

결승점

Jorge Vanegas Moran

회원 가입일: 10/03/12

8 평판

안내서 1개 작성함

Cal Poly, Team 6-31, Regan Fall 2012 Cal Poly, Team 6-31, Regan Fall 2012 회원

CPSU-REGAN-F12S6G31

5 회원들

안내서 9개 작성하였습니다

댓글 0개

댓글 쓰기

조회 통계:

24 시간 전: 0

7일 전: 4

30일 전: 6

전체 시간: 656