주요 콘텐츠로 건너뛰기

Motorola RAZR2 v9m Camera Replacement

필요한 것

  1. Motorola RAZR2 v9m Camera Replacement, Battery: 1 단계, 이미지 1/2 Motorola RAZR2 v9m Camera Replacement, Battery: 1 단계, 이미지 2/2
    • Push the rear cover toward the hinge of the RAZR2. The panel will slide about 3 mm.

  2. Motorola RAZR2 v9m Camera Replacement: 2 단계, 이미지 1/3 Motorola RAZR2 v9m Camera Replacement: 2 단계, 이미지 2/3 Motorola RAZR2 v9m Camera Replacement: 2 단계, 이미지 3/3
    • Pinch the top and bottom edges of the panel and pull it away from the RAZR2.

    • The rear panel uses four small hooks to hold it in place. If the panel will not easily pull away, slide the panel more toward the hinge.

  3. Motorola RAZR2 v9m Camera Replacement: 3 단계, 이미지 1/2 Motorola RAZR2 v9m Camera Replacement: 3 단계, 이미지 2/2
    • Gently pull the white plastic tab to lift the battery away from the RAZR2.

    • The white plastic tab is attached to the phone. Only pull it enough to expose the edges of the battery.

  4. Motorola RAZR2 v9m Camera Replacement: 4 단계, 이미지 1/2 Motorola RAZR2 v9m Camera Replacement: 4 단계, 이미지 2/2
    • To remove the battery, grasp its edges pull away from the phone.

    • When installing a new battery, be sure the metal contacts on the phone line up with the ones on the battery.

  5. Motorola RAZR2 v9m Camera Replacement, Camera: 5 단계, 이미지 1/3 Motorola RAZR2 v9m Camera Replacement, Camera: 5 단계, 이미지 2/3 Motorola RAZR2 v9m Camera Replacement, Camera: 5 단계, 이미지 3/3
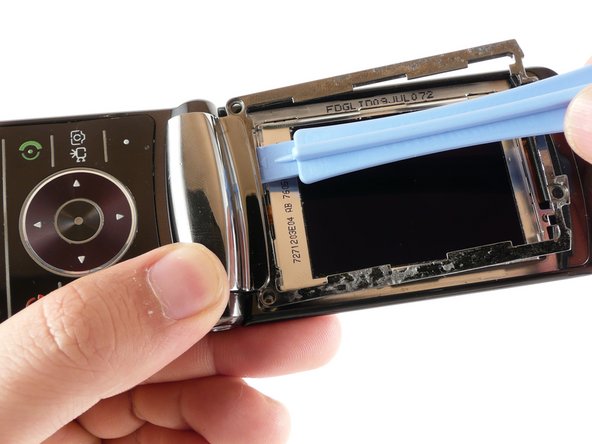
    • Flip open the RAZR2 with the keypad and main LCD facing you.

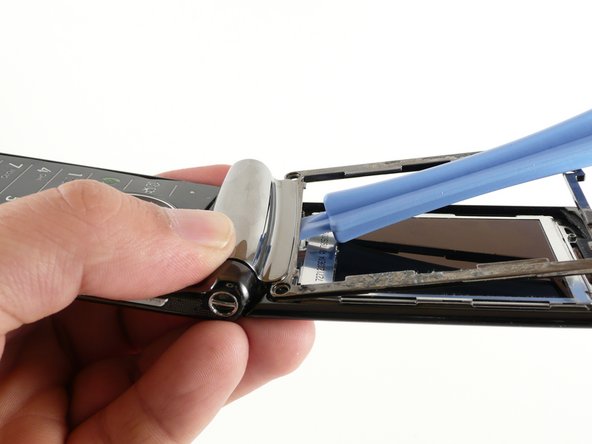
    • Insert a spudger into the small gap above the plastic screen.

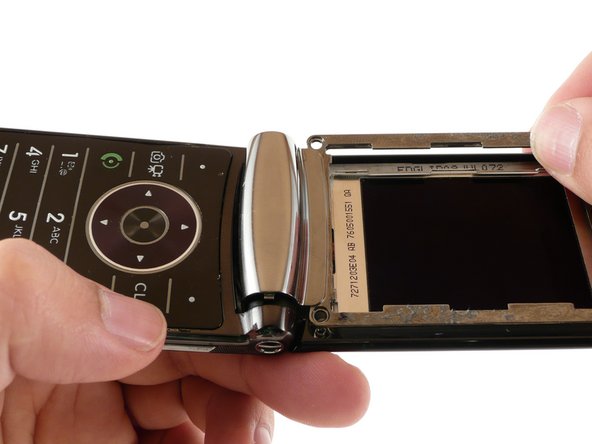
    • Gently pry the screen away from the phone.

  6. Motorola RAZR2 v9m Camera Replacement: 6 단계, 이미지 1/3 Motorola RAZR2 v9m Camera Replacement: 6 단계, 이미지 2/3 Motorola RAZR2 v9m Camera Replacement: 6 단계, 이미지 3/3
    • The plastic screen is held in place by adhesive. Run the spudger along both sides of the screen to separate it from the RAZR2.

    • Lift the screen away from the phone.

  7. Motorola RAZR2 v9m Camera Replacement: 7 단계, 이미지 1/2 Motorola RAZR2 v9m Camera Replacement: 7 단계, 이미지 2/2
    • Remove the four 2-mm T5 Torx screws

  8. Motorola RAZR2 v9m Camera Replacement: 8 단계, 이미지 1/2 Motorola RAZR2 v9m Camera Replacement: 8 단계, 이미지 2/2
    • Use a plastic opening tool to pry the top end of the metal frame away from the RAZR2.

  9. Motorola RAZR2 v9m Camera Replacement: 9 단계, 이미지 1/3 Motorola RAZR2 v9m Camera Replacement: 9 단계, 이미지 2/3 Motorola RAZR2 v9m Camera Replacement: 9 단계, 이미지 3/3
    • Insert a plastic opening tool under the metal frame at the hinge of the RAZR2.

    • Gently pry the hinge portion of the metal frame away from the phone.

    • The metal frame is latched to the phone on the corner closest to the clear and end call buttons. Pry this part of the frame away last.

  10. Motorola RAZR2 v9m Camera Replacement: 10 단계, 이미지 1/3 Motorola RAZR2 v9m Camera Replacement: 10 단계, 이미지 2/3 Motorola RAZR2 v9m Camera Replacement: 10 단계, 이미지 3/3
    • Lift the frame away from the phone.

    • When reassembling, insert the latch on the metal frame into the phone before inserting any other part of the frame.

  11. Motorola RAZR2 v9m Camera Replacement: 11 단계, 이미지 1/3 Motorola RAZR2 v9m Camera Replacement: 11 단계, 이미지 2/3 Motorola RAZR2 v9m Camera Replacement: 11 단계, 이미지 3/3
    • Use the plastic opening tool to gently pry the motherboard cable out of its socket.

  12. Motorola RAZR2 v9m Camera Replacement: 12 단계, 이미지 1/3 Motorola RAZR2 v9m Camera Replacement: 12 단계, 이미지 2/3 Motorola RAZR2 v9m Camera Replacement: 12 단계, 이미지 3/3
    • Use the plastic opening tool to gently pry the LCD cable out of its socket.

  13. Motorola RAZR2 v9m Camera Replacement: 13 단계, 이미지 1/3 Motorola RAZR2 v9m Camera Replacement: 13 단계, 이미지 2/3 Motorola RAZR2 v9m Camera Replacement: 13 단계, 이미지 3/3
    • Use the plastic opening tool to gently pry the camera cable out of its socket.

  14. Motorola RAZR2 v9m Camera Replacement: 14 단계, 이미지 1/3 Motorola RAZR2 v9m Camera Replacement: 14 단계, 이미지 2/3 Motorola RAZR2 v9m Camera Replacement: 14 단계, 이미지 3/3
    • Use a plastic opening tool to gently pry the camera assembly away from the RAZR2.

결론

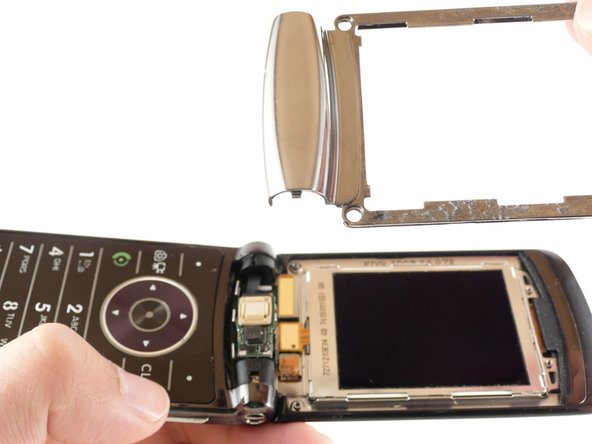
To reassemble your device, follow these instructions in reverse order.

다른 2명이 해당 안내서를 완성하였습니다.

John T Roller

회원 가입일: 06/04/13

800 평판

안내서 6개 작성하였습니다

댓글 0개

댓글 쓰기

조회 통계:

24 시간 전: 0

7일 전: 0

30일 전: 2

전체 시간: 1,008