소개
Use this guide to replace the keypad.
필요한 것
-
-
Turn off your phone before beginning disassembly.
-
Remove the phone back cover by firmly pushing down on the black tab located at the top center of the Motorola Slvr L7.
-
-
-
Using a T6 Torx Screwdriver, remove the four (4) T6 2 mm Torx screws that are securing the rear metal plate.
-
Apply moderate pressure with the screwdriver and rotate it counterclockwise to loosen the screw.
-
Ensure that you keep track of the screws and return them to their original positions once the repair is finished.
-
-
-
-
At the bottom of the phone near the speaker, use the iFixit Opening Tool to remove the black plastic screw cover.
-
Some force is required as the cover is attached by several clips. The first clips will be the hardest to dislodge.
-
Under the cover are round plastic pieces that cover the microphone. Be careful not to lose them.
-
-
-
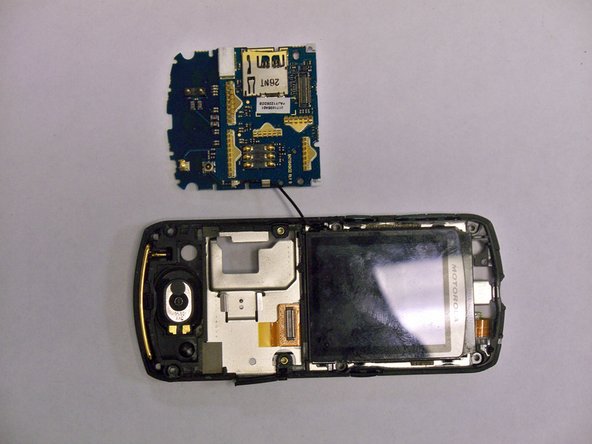
Now turn the phone over. Insert the iFixit Opening Tool between the frame and the outer case on the side of the phone.
-
Apply pressure using the iFixit Opening Tool to pry the case apart. Some force is required as the frame is attached by several clips. The first clip will be the hardest to dislodge.
-
As soon as the first clip is dislodged, work the tool around the entire edge of the phone to carefully remove the remaining clips. This will avoid breaking the frame.
-
Once the frame is completely separated from the outer case, remove the top numerical layer of the keypad by lifting it up.
-


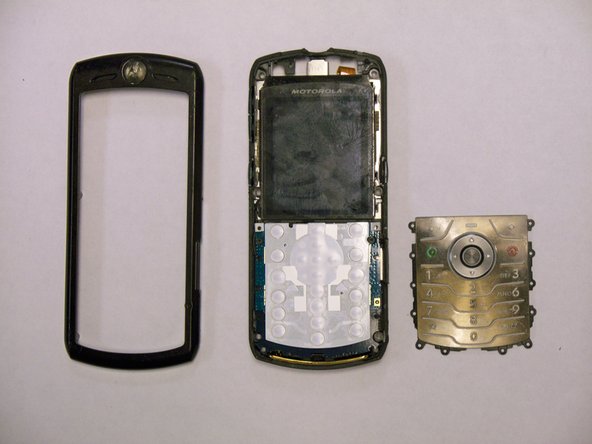

To reassemble your device, follow these instructions in reverse order.
To reassemble your device, follow these instructions in reverse order.
다른 2명이 해당 안내서를 완성하였습니다.
팀

CSU Los Angeles, Team 1-1, Nelson Spring 2011 CSU Los Angeles, Team 1-1, Nelson Spring 2011 회원
CSULA-NELSON-S11S1G1
2 회원들
안내서 4개 작성하였습니다