주요 콘텐츠로 건너뛰기

Motorola W385 Logic Board Replacement

필요한 것

  1. Motorola W385 Logic Board Replacement, Battery: 1 단계, 이미지 1개 중 1개
    • Using your finger, press down on the clip holding the back cover on.

  2. Motorola W385 Logic Board Replacement: 2 단계, 이미지 1개 중 1개
    • Using the spudger or your finger, gently pull the battery out from the top.

  3. Motorola W385 Logic Board Replacement, Bottom Casing: 3 단계, 이미지 1개 중 1개
    • Hold the phone as shown in the photo.

  4. Motorola W385 Logic Board Replacement: 4 단계, 이미지 2개 중 1개 Motorola W385 Logic Board Replacement: 4 단계, 이미지 2개 중 2개
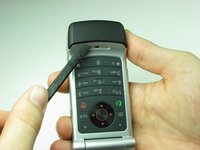
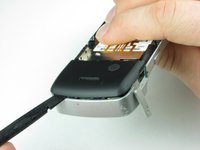
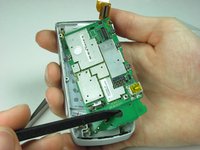
    • Using the flat side of the spudger and a little pressure, insert it under the bottom plastic piece at about center.

    • This might require a little persistence due how the beveled plastic rests on the phone body.

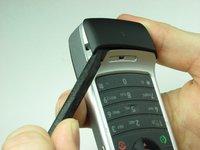
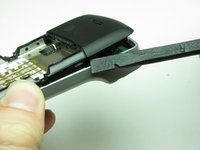
    • After the spudger is under the plastic piece, move counter clockwise using a gentle twisting motion until the piece is free from the phone body.

  5. Motorola W385 Logic Board Replacement: 5 단계, 이미지 1개 중 1개
    • Remove the two Torx-6 screws under the removed plastic.

  6. Motorola W385 Logic Board Replacement: 6 단계, 이미지 1개 중 1개
    • Keeping the phone open, turn it over allowing the battery compartment to be visible.

    • Remove the four Torx-6 screws from the back plastic.

  7. Motorola W385 Logic Board Replacement: 7 단계, 이미지 3개 중 1개 Motorola W385 Logic Board Replacement: 7 단계, 이미지 3개 중 2개 Motorola W385 Logic Board Replacement: 7 단계, 이미지 3개 중 3개
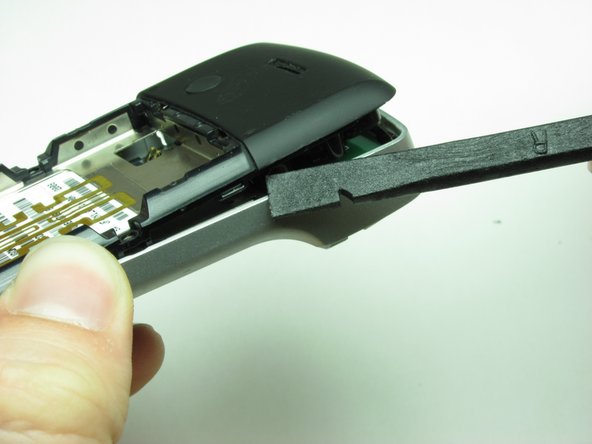
    • Hold the phone with the keys facing down and the mini USB charging port visible.

    • Open the rubber flap covering the charging port.

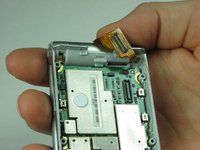
    • Insert the flat end of the spudger just above the charging port.

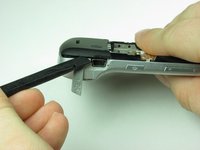
    • Using the same gentle twisting motion, work around the bottom of the phone and up the opposite side. The back casing should separate from the body of the phone.

    • When working on the thinner pieces of the plastic casing, use caution insuring the plastic does not crack.

  8. Motorola W385 Logic Board Replacement: 8 단계, 이미지 1개 중 1개
    • The casing can be easily removed exposing the bottom logic board.

  9. Motorola W385 Logic Board Replacement, Main Logic Board: 9 단계, 이미지 2개 중 1개 Motorola W385 Logic Board Replacement, Main Logic Board: 9 단계, 이미지 2개 중 2개
    • Use spudger to gently separate the ribbon cable from the logic board.

  10. Motorola W385 Logic Board Replacement: 10 단계, 이미지 2개 중 1개 Motorola W385 Logic Board Replacement: 10 단계, 이미지 2개 중 2개
    • Place the sharp end of the spudger in the hole at the bottom of the logic board.

    • Gently remove the logic board from the phone casing.

    • Make sure not to damage any other components of the logic board.

결론

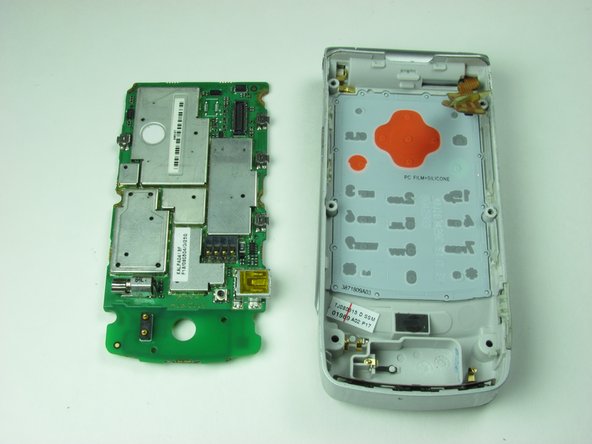
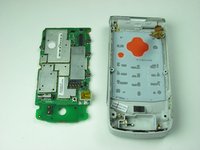
To reassemble your device, follow these instructions in reverse order.

다른 2명이 해당 안내서를 완성하였습니다.

작성자

3다른 기여자 명과 함께

Javier Mendez

회원 가입일: 01/21/10

13 평판

안내서 2개를 작성함

Cal Poly, Team 8-50, Regan Winter 2010 Cal Poly, Team 8-50, Regan Winter 2010 회원

CPSU-REGAN-W10S8G50

3 회원들

안내서 14개를 작성함

0가이드 댓글

댓글 쓰기

조회 통계:

지난 24시간: 1

지난 7일: 1

지난 30일: 6

전체 시간: 3,342