주요 콘텐츠로 건너뛰기

NEC LCD1770NX Fuse Replacement

필요한 것

  1. NEC LCD1770NX Fuse Replacement, Stand: 1 단계, 이미지 1/2 NEC LCD1770NX Fuse Replacement, Stand: 1 단계, 이미지 2/2
    • Place the monitor face down on a clean, flat surface.

  2. NEC LCD1770NX Fuse Replacement: 2 단계, 이미지 1/2 NEC LCD1770NX Fuse Replacement: 2 단계, 이미지 2/2
    • Firmly remove the back panel of the stand by pulling it up and away from the monitor.

  3. NEC LCD1770NX Fuse Replacement: 3 단계, 이미지 1/2 NEC LCD1770NX Fuse Replacement: 3 단계, 이미지 2/2
    • Unscrew the two 6mm Phillips PH2 screws to detach the stand enclosure from the stand.

  4. NEC LCD1770NX Fuse Replacement: 4 단계, 이미지 1/2 NEC LCD1770NX Fuse Replacement: 4 단계, 이미지 2/2
    • Firmly grasp the stand enclosure with your hand and slide it to base of stand.

  5. NEC LCD1770NX Fuse Replacement: 5 단계, 이미지 1/1
    • Unscrew the two 14.5mm Phillips PH2 screws holding the stand to the monitor.

  6. NEC LCD1770NX Fuse Replacement: 6 단계, 이미지 1/2 NEC LCD1770NX Fuse Replacement: 6 단계, 이미지 2/2
    • Lift the the stand straight up to remove it.

  7. NEC LCD1770NX Fuse Replacement, Monitor Enclosure: 7 단계, 이미지 1/3 NEC LCD1770NX Fuse Replacement, Monitor Enclosure: 7 단계, 이미지 2/3 NEC LCD1770NX Fuse Replacement, Monitor Enclosure: 7 단계, 이미지 3/3
    • Place the monitor screen face up.

    • Pull the frame off by placing your fingers on the inside of the frame and pulling out and up, the frame should snap off.

    • Continue your way around the screen.

  8. NEC LCD1770NX Fuse Replacement: 8 단계, 이미지 1/3 NEC LCD1770NX Fuse Replacement: 8 단계, 이미지 2/3 NEC LCD1770NX Fuse Replacement: 8 단계, 이미지 3/3
    • Unscrew the two 7mm screws from the bottom of the button assembly.

    • Do not pull the button assembly out too quickly or with too much force! Damage to the wires can occur.

    • Pull the button assembly out a few inches and unplug the colored cables.

  9. NEC LCD1770NX Fuse Replacement: 9 단계, 이미지 1/2 NEC LCD1770NX Fuse Replacement: 9 단계, 이미지 2/2
    • Unscrew the gold colored 7mm Phillips PH000 screw holding the button assembly to the monitor.

    • Remove the button assembly from the monitor.

  10. NEC LCD1770NX Fuse Replacement: 10 단계, 이미지 1/1
    • With the monitor face-down, unscrew the 5 7mm Phillips PH2 screws around the outside of the enclosure.

  11. NEC LCD1770NX Fuse Replacement: 11 단계, 이미지 1/3 NEC LCD1770NX Fuse Replacement: 11 단계, 이미지 2/3 NEC LCD1770NX Fuse Replacement: 11 단계, 이미지 3/3
    • Unscrew the 2 14.5mm Phillips PH2 screws located on the raised center of the enclosure.

    • Carefully pull the enclosure off the monitor.

  12. NEC LCD1770NX Fuse Replacement: 12 단계, 이미지 1/2 NEC LCD1770NX Fuse Replacement: 12 단계, 이미지 2/2
    • Unscrew the 10 5mm Philips PH2 screws holding the metal casing to the monitor.

  13. NEC LCD1770NX Fuse Replacement: 13 단계, 이미지 1/2 NEC LCD1770NX Fuse Replacement: 13 단계, 이미지 2/2
    • Pull the the metal casing off of the monitor to reveal the motherboards.

  14. NEC LCD1770NX Fuse Replacement, Fuse: 14 단계, 이미지 1/2 NEC LCD1770NX Fuse Replacement, Fuse: 14 단계, 이미지 2/2
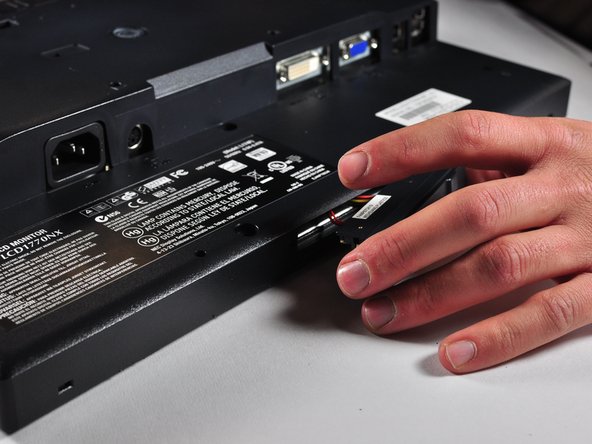
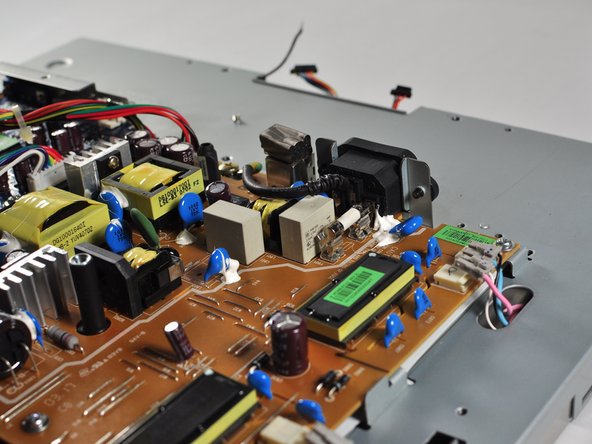
    • Carefully insert the prying tool underneath the power supply fuse.

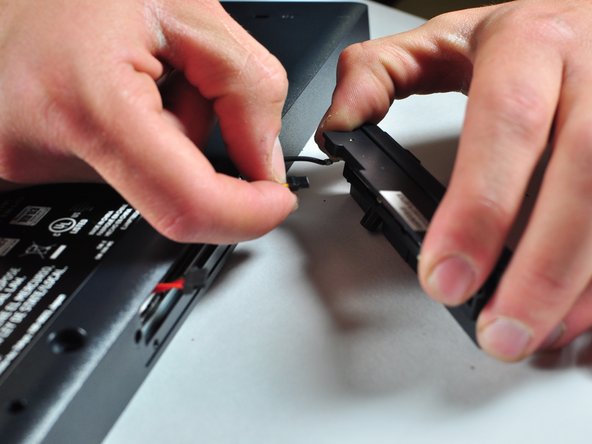
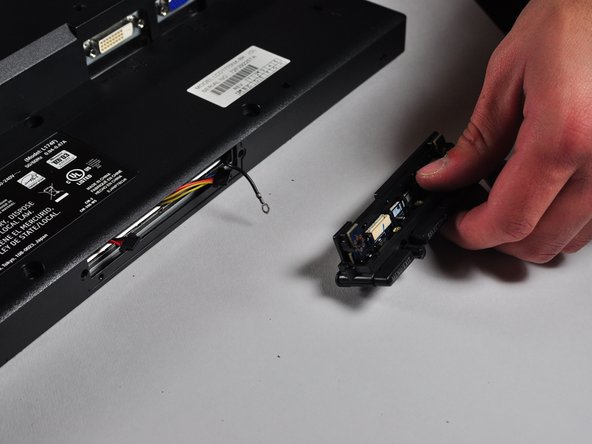
    • Using the prying tool, lift the power supply fuse out of its emplacement until it is resting on its clamps.

  15. NEC LCD1770NX Fuse Replacement: 15 단계, 이미지 1/1
    • Carefully remove the power supply fuse by hand.

  16. NEC LCD1770NX Fuse Replacement: 16 단계, 이미지 1/3 NEC LCD1770NX Fuse Replacement: 16 단계, 이미지 2/3 NEC LCD1770NX Fuse Replacement: 16 단계, 이미지 3/3
    • Place the replacement power supply fuse on the fuse clips.

    • With a finger, press down on the ends of the replacement fuse until it is properly seated in the fuse clips.

결론

To reassemble your device, follow these instructions in reverse order.

Drew Troxell

회원 가입일: 10/18/13

113 평판

안내서 1개 작성함

Cal Poly, Team 11-36, Amido Fall 2013 Cal Poly, Team 11-36, Amido Fall 2013 회원

CPSU-AMIDO-F13S11G36

5 회원들

안내서 7개 작성하였습니다

댓글 한 개

Thanks for sharing the step by step procedure. It will be helpful to provide the model/type of the replacement fuse so that we can order it in advance and have it ready to replace the bad one while the monitor is open.

Ja Hui - 답글

댓글 쓰기

조회 통계:

24 시간 전: 0

7일 전: 2

30일 전: 5

전체 시간: 923