주요 콘텐츠로 건너뛰기

NEC Turbo Express Disassembly

필요한 것

  1. NEC Turbo Express Disassembly, Separate front/rear shells: 1 단계, 이미지 3개 중 1개 NEC Turbo Express Disassembly, Separate front/rear shells: 1 단계, 이미지 3개 중 2개 NEC Turbo Express Disassembly, Separate front/rear shells: 1 단계, 이미지 3개 중 3개
    • Remove battery cover

    • Remove 6 PH0 screws

    • Do not attempt to separate the two halves

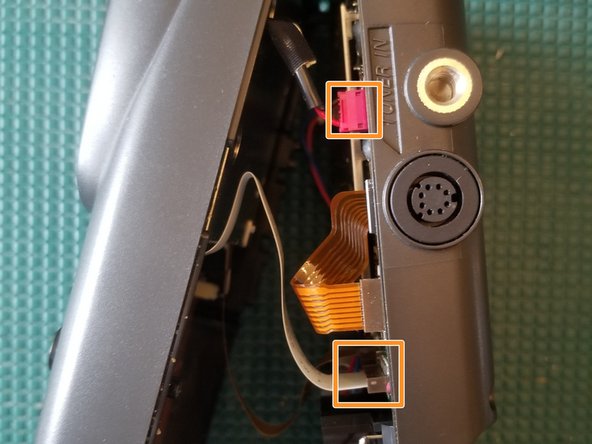
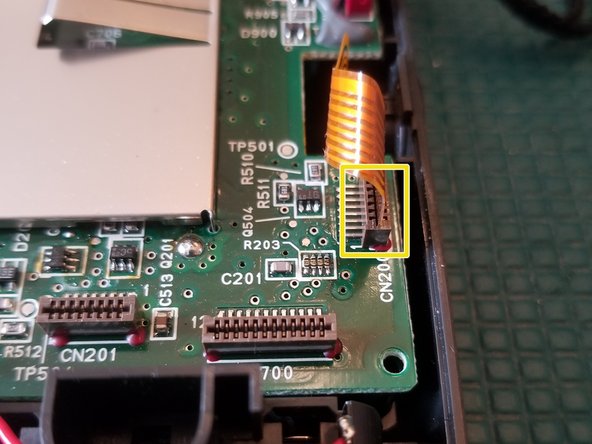
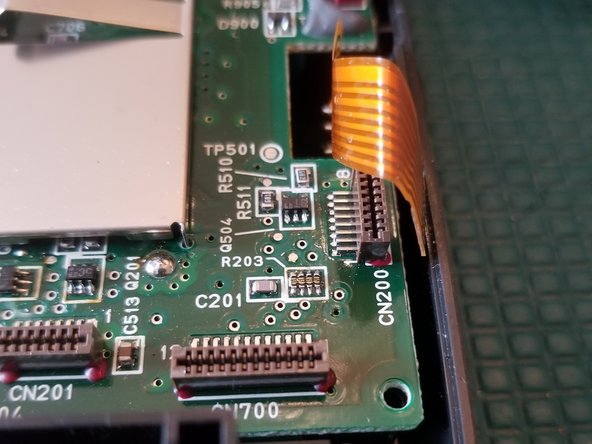
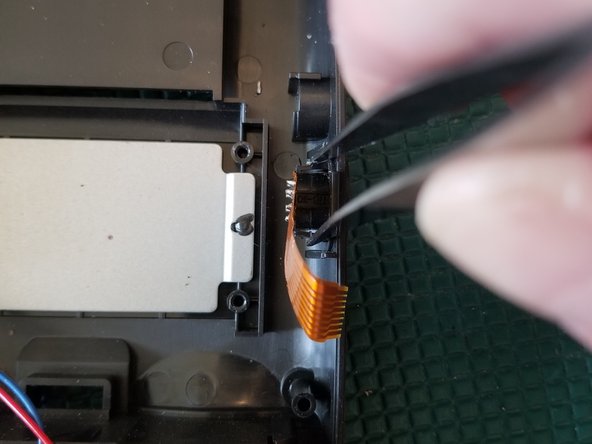
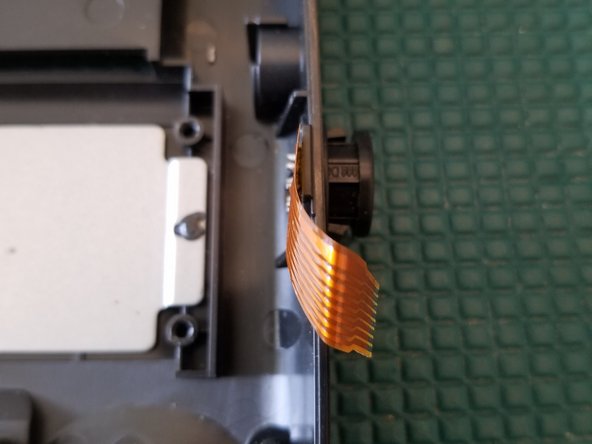
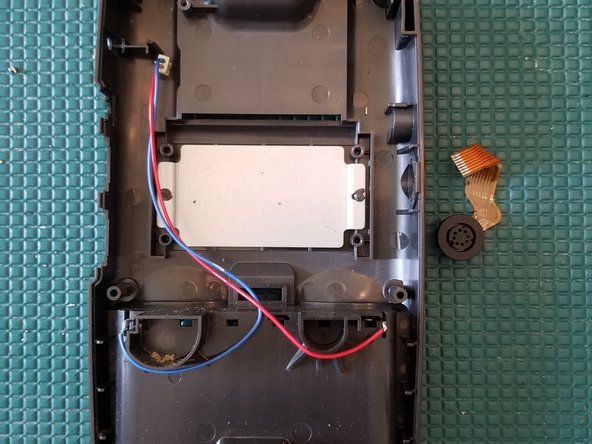
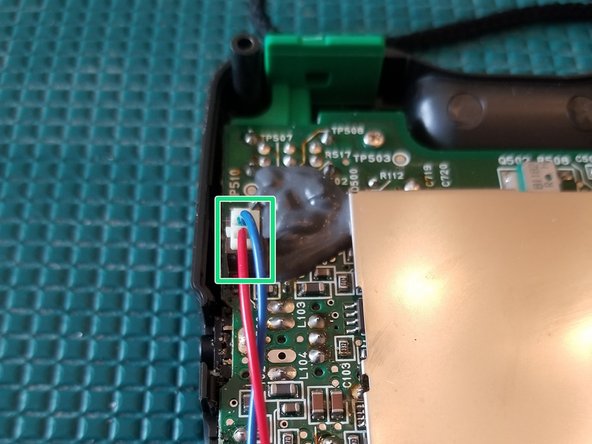
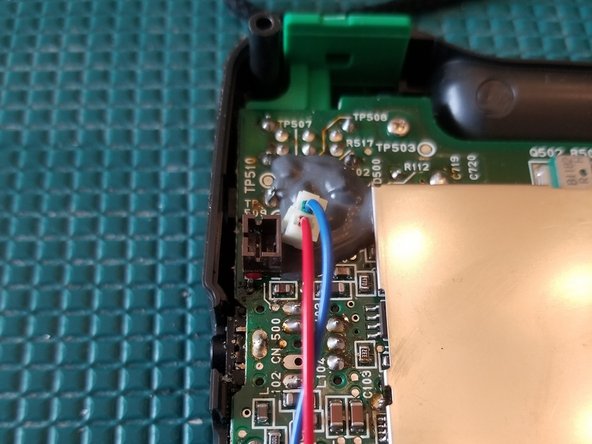
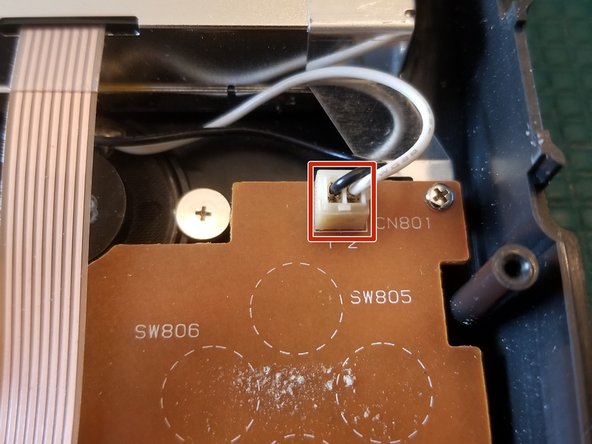
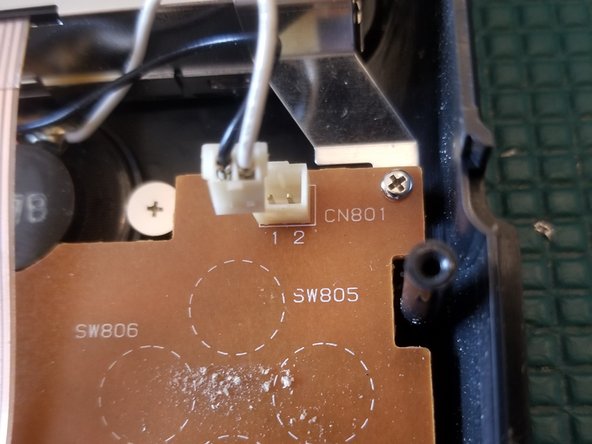
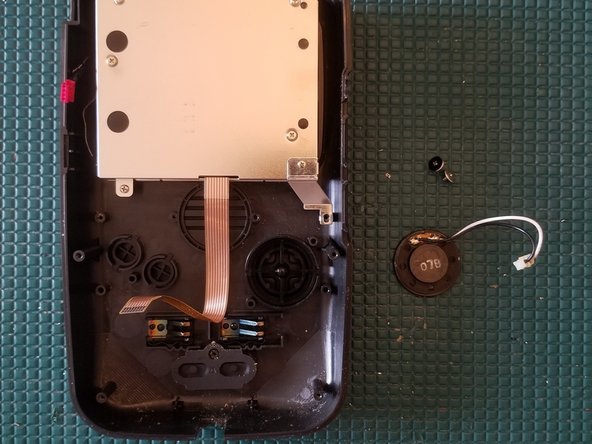
    • Disconnect the 2 FFC ribbon cables and wire connector

    • There's another ribbon cable, not shown in photo, next to the white one

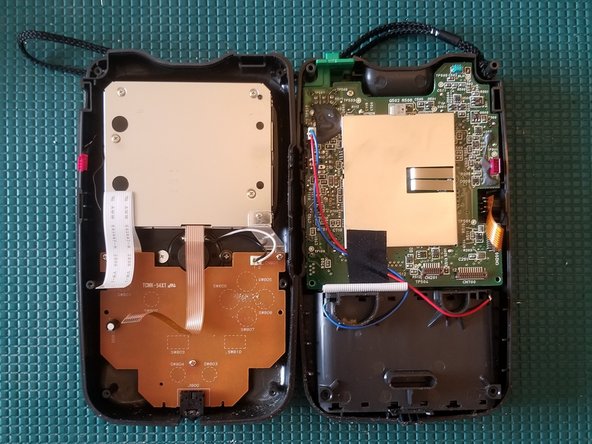
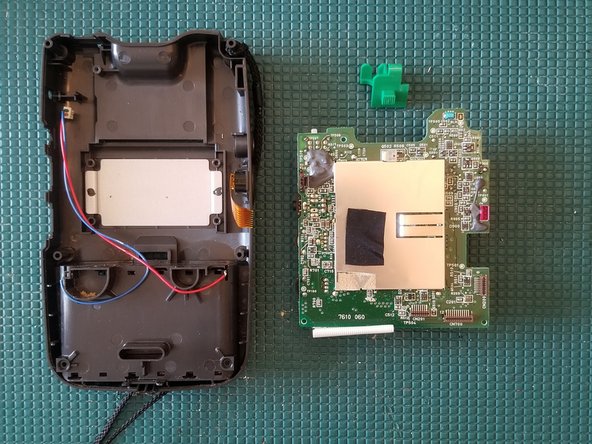
    • You can now separate the two halves

  2. NEC Turbo Express Disassembly, Disconnect TV tuner FFC cable: 2 단계, 이미지 3개 중 1개 NEC Turbo Express Disassembly, Disconnect TV tuner FFC cable: 2 단계, 이미지 3개 중 2개 NEC Turbo Express Disassembly, Disconnect TV tuner FFC cable: 2 단계, 이미지 3개 중 3개
    • Disconnect FFC ribbon cable

  3. NEC Turbo Express Disassembly, Remove TV Tuner Port: 3 단계, 이미지 3개 중 1개 NEC Turbo Express Disassembly, Remove TV Tuner Port: 3 단계, 이미지 3개 중 2개 NEC Turbo Express Disassembly, Remove TV Tuner Port: 3 단계, 이미지 3개 중 3개
    이 단계에 사용된 도구:
    Tweezers
    $4.99
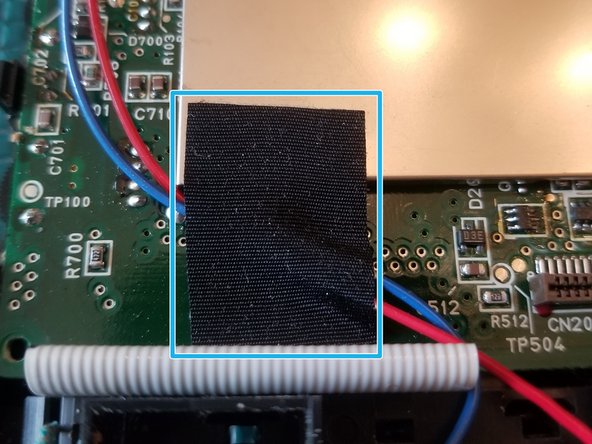
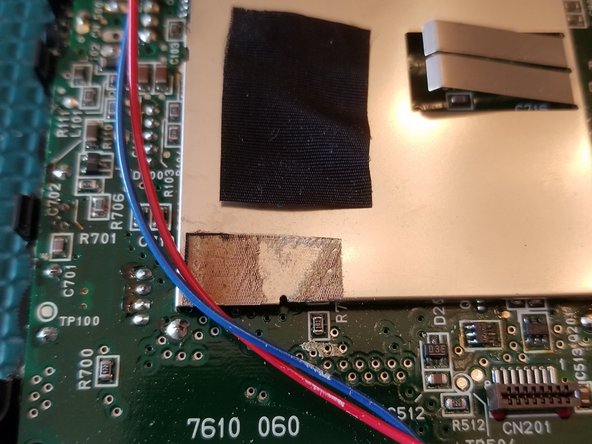
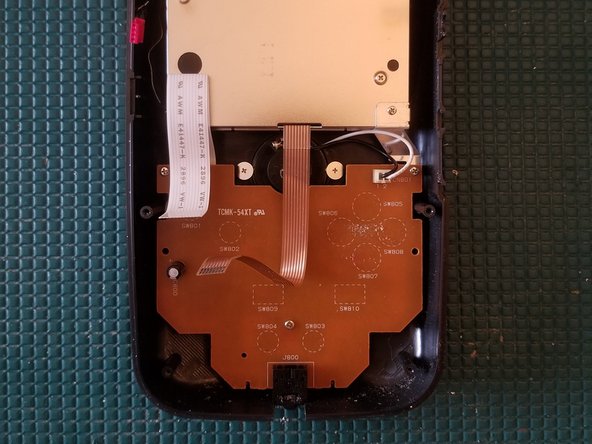
    • With a pair of tweezers, pinch the retaining tabs inward and push through the shell
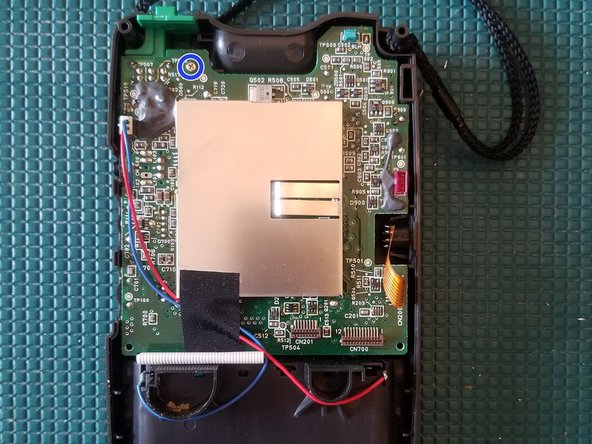
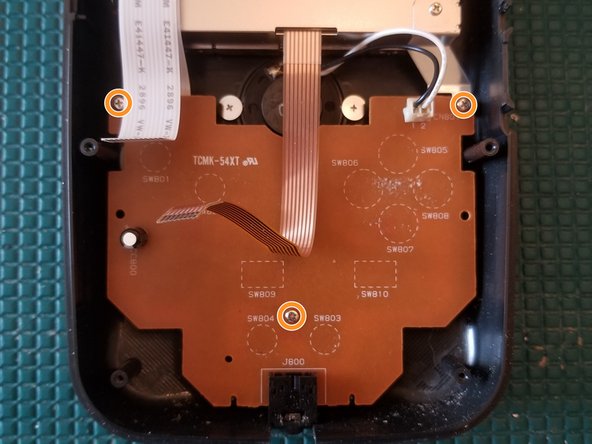
    • This can be done with the rear motherboard still in place.

  4. NEC Turbo Express Disassembly, Disconnect battery cable: 4 단계, 이미지 2개 중 1개 NEC Turbo Express Disassembly, Disconnect battery cable: 4 단계, 이미지 2개 중 2개
    • Disconnect cable

  5. NEC Turbo Express Disassembly, Disconnect battery cable: 5 단계, 이미지 2개 중 1개 NEC Turbo Express Disassembly, Disconnect battery cable: 5 단계, 이미지 2개 중 2개
    • Remove tape

    • Keep it close to reuse during reassembly

  6. NEC Turbo Express Disassembly, Remove rear PCB: 6 단계, 이미지 3개 중 1개 NEC Turbo Express Disassembly, Remove rear PCB: 6 단계, 이미지 3개 중 2개 NEC Turbo Express Disassembly, Remove rear PCB: 6 단계, 이미지 3개 중 3개
    • Remove PH0 screw

    • Gently lift the PCB up
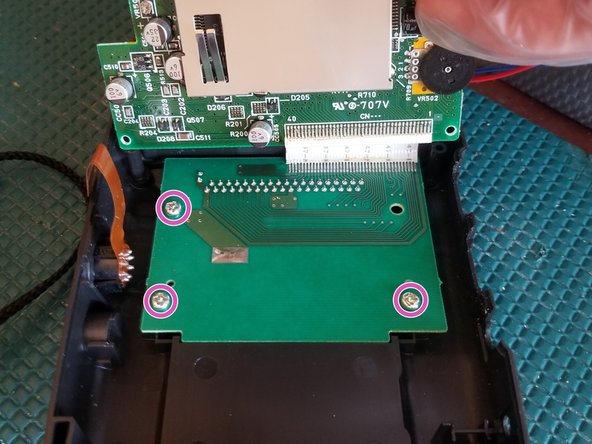
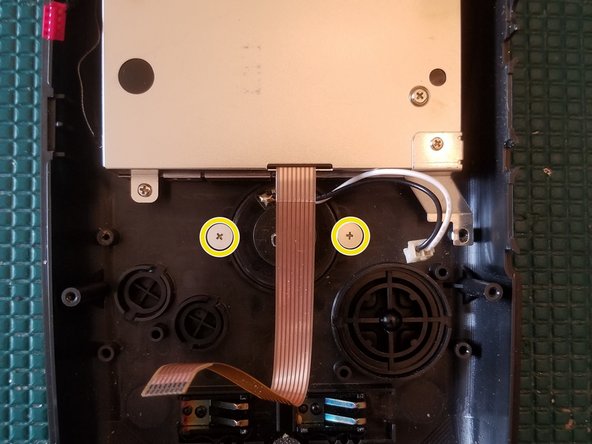
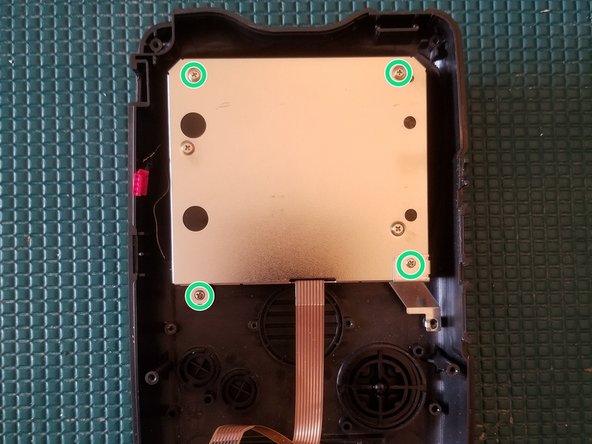
    • Remove 3 PH2 screws

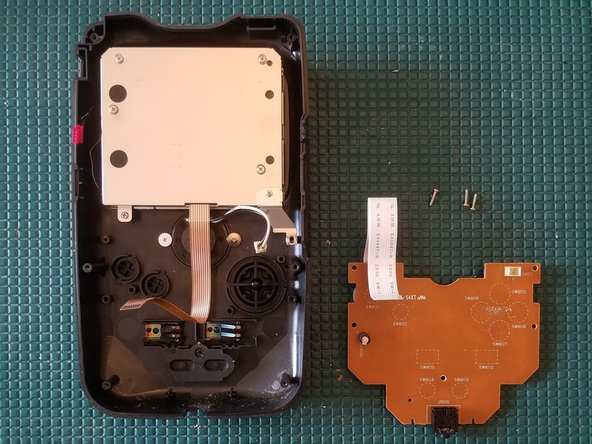
    • You can now remove the entire rear PCB

  7. NEC Turbo Express Disassembly, Disconnect speaker: 7 단계, 이미지 3개 중 1개 NEC Turbo Express Disassembly, Disconnect speaker: 7 단계, 이미지 3개 중 2개 NEC Turbo Express Disassembly, Disconnect speaker: 7 단계, 이미지 3개 중 3개
    • Disconnect wire plug

  8. NEC Turbo Express Disassembly, Remove front PCB: 8 단계, 이미지 2개 중 1개 NEC Turbo Express Disassembly, Remove front PCB: 8 단계, 이미지 2개 중 2개
    • Remove 3 PH0 screws

    • You can now remove the front PCB

  9. NEC Turbo Express Disassembly, Remove speaker: 9 단계, 이미지 2개 중 1개 NEC Turbo Express Disassembly, Remove speaker: 9 단계, 이미지 2개 중 2개
    • Remove 2 PH0 screws

    • You can now remove the speaker

  10. NEC Turbo Express Disassembly, Remove screen: 10 단계, 이미지 1개 중 1개
    • Remove 4 PH0 screws

    • You can now remove the screen

결론

To reassemble your device, follow these instructions in reverse order.

다른 한 분이 해당 안내서를 완성하였습니다.

작성자

2다른 기여자 명과 함께

Navy Vet 2015

회원 가입일: 06/25/15

7,876 평판

안내서 15개를 작성함

1가이드 댓글

Could you tell me the size of the 6 exterior screws? I lost mine. Thanks.

The Machine Shed - 답글

댓글 쓰기

조회 통계:

지난 24시간: 0

지난 7일: 4

지난 30일: 34

전체 시간: 1,612