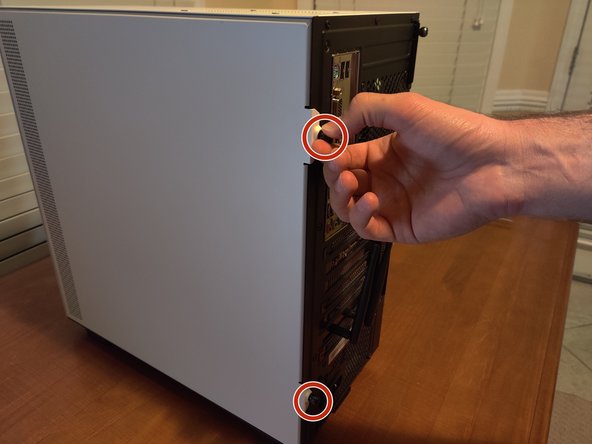
주요 콘텐츠로 건너뛰기

NZXT H510i ATX Mid Tower Power Supply Replacement

필요한 것

  1. NZXT H510i ATX Mid Tower Power Supply Replacement, Power Supply: 1 단계, 이미지 1/2 NZXT H510i ATX Mid Tower Power Supply Replacement, Power Supply: 1 단계, 이미지 2/2
    • Shut down the computer.

  2. NZXT H510i ATX Mid Tower Power Supply Replacement: 2 단계, 이미지 1/2 NZXT H510i ATX Mid Tower Power Supply Replacement: 2 단계, 이미지 2/2
    • Turn off the computer using the switch on the power supply. Unplug the power cable from the power supply.

    • This step is very important. Otherwise the computer will still be powered and it could damage its components or get you an electrical shock.

  3. NZXT H510i ATX Mid Tower Power Supply Replacement: 3 단계, 이미지 1/1
    이 단계에 사용된 도구:
    Anti-Static Wrist Strap
    $7.95
    구매
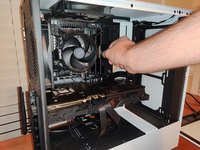
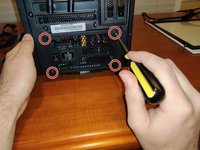
    • Drain the capacitors by pressing the power switch.

    • Wait several minutes after doing this to ensure that the capacitors are drained of all residual power.

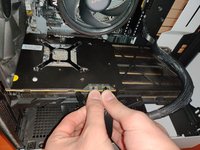
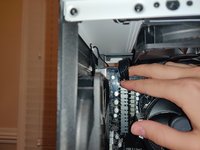
    • Put on the anti-static wrist strap.

    • Caution: This step is crucial in order to avoid personal injury and damage to the computer from electrical discharge.

  4. NZXT H510i ATX Mid Tower Power Supply Replacement: 4 단계, 이미지 1/1
    • Remove the side panel by unscrewing the captive thumb screws keeping it in place. There will be one towards the top of the panel and another towards the bottom.

  5. NZXT H510i ATX Mid Tower Power Supply Replacement: 5 단계, 이미지 1/1
    • Identify the old power supply that will be replaced. As shown, it should be towards the bottom of the case, and towards the back of the computer.

    • Take a picture of how the cables are arranged so that this can be replicated later.

  6. NZXT H510i ATX Mid Tower Power Supply Replacement: 6 단계, 이미지 1/3 NZXT H510i ATX Mid Tower Power Supply Replacement: 6 단계, 이미지 2/3 NZXT H510i ATX Mid Tower Power Supply Replacement: 6 단계, 이미지 3/3
    • Unplug the various power cables. These include the Mainbords big 24 pin cable, the processor's power cable, the graphics card power cable, the SATA cables for the fan control, and the motherboard's power cable

  7. NZXT H510i ATX Mid Tower Power Supply Replacement: 7 단계, 이미지 1/3 NZXT H510i ATX Mid Tower Power Supply Replacement: 7 단계, 이미지 2/3 NZXT H510i ATX Mid Tower Power Supply Replacement: 7 단계, 이미지 3/3
    • Using a Phillips #0 screwdriver, remove the four 6-32 x 6mm screws attached to the power supply.

    • Remove the old power supply from the case.

결론

To reassemble your device, follow these instructions in reverse order.

다른 6명이 해당 안내서를 완성하였습니다.

Graeme McCord

회원 가입일: 10/08/20

307 평판

안내서 1개 작성함

University of Memphis, Team S3-G16, Willis Fall 2020 University of Memphis, Team S3-G16, Willis Fall 2020 회원

UM-WILLIS-F20S3G16

1 회원

안내서 4개 작성하였습니다

댓글 0개

댓글 쓰기

조회 통계:

24 시간 전: 1

7일 전: 25

30일 전: 82

전체 시간: 4,053