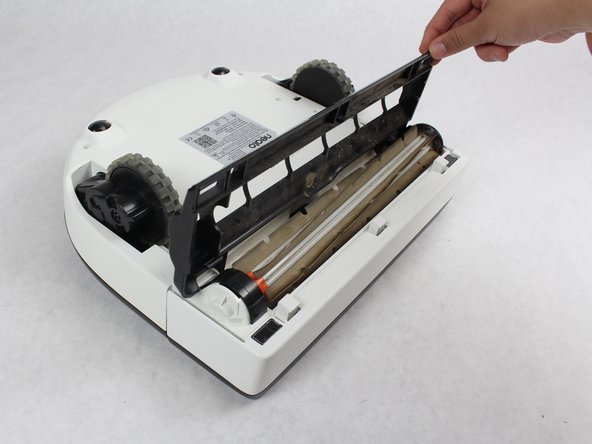
주요 콘텐츠로 건너뛰기

Neato Botvac D8000 Wheel Replacement

필요한 것

  1. Neato Botvac D8000 Wheel Replacement, Brushes: 1 단계, 이미지 1/1
    • Place the vacuum on its back so the brushes are visible.

  2. Neato Botvac D8000 Wheel Replacement: 2 단계, 이미지 1/3 Neato Botvac D8000 Wheel Replacement: 2 단계, 이미지 2/3 Neato Botvac D8000 Wheel Replacement: 2 단계, 이미지 3/3
    • Remove the four 10 mm screws with a Torx T10 screwdriver.

  3. Neato Botvac D8000 Wheel Replacement: 3 단계, 이미지 1/2 Neato Botvac D8000 Wheel Replacement: 3 단계, 이미지 2/2
    • Remove the rotary brush simply by grabbing it firmly and pulling it off.

    • Once you have removed your rotary brush and 4 bolts, you can easy remove the brush guard.

  4. Neato Botvac D8000 Wheel Replacement: 4 단계, 이미지 1/2 Neato Botvac D8000 Wheel Replacement: 4 단계, 이미지 2/2
    • Remove the brush by simply pulling it out.

    • From there you can clean it or replace the brush with a new one.

  5. Neato Botvac D8000 Wheel Replacement, Top Face Panel: 5 단계, 이미지 1/1
    • Grab the rear bumper with both hands on either side.

  6. Neato Botvac D8000 Wheel Replacement: 6 단계, 이미지 1/2 Neato Botvac D8000 Wheel Replacement: 6 단계, 이미지 2/2
    • Firmly pull the bumper forward at a steady pace.

    • When pulling the bumper forward avoid being too rough because the bumper might break.

  7. Neato Botvac D8000 Wheel Replacement: 7 단계, 이미지 1/2 Neato Botvac D8000 Wheel Replacement: 7 단계, 이미지 2/2
    • Looking from above, remove the two 11mm screws with a Torx T10 screwdriver.

  8. Neato Botvac D8000 Wheel Replacement: 8 단계, 이미지 1/3 Neato Botvac D8000 Wheel Replacement: 8 단계, 이미지 2/3 Neato Botvac D8000 Wheel Replacement: 8 단계, 이미지 3/3
    • Place the robot on its back and remove the six 11mm screws using a Torx T10 screwdriver.

  9. Neato Botvac D8000 Wheel Replacement: 9 단계, 이미지 1/3 Neato Botvac D8000 Wheel Replacement: 9 단계, 이미지 2/3 Neato Botvac D8000 Wheel Replacement: 9 단계, 이미지 3/3
    • Push the clips, located in the back side, inward.

    • Gently lift up the top cover until you can see the wires. Then gently un-clip all the wires.

    • When you lift the top cover be careful because the wires are thin and fragile.

  10. Neato Botvac D8000 Wheel Replacement: 10 단계, 이미지 1/1
    • Once you have carefully removed the wire clip; you can fully remove the top cover.

  11. Neato Botvac D8000 Wheel Replacement, Wheel: 11 단계, 이미지 1/3 Neato Botvac D8000 Wheel Replacement, Wheel: 11 단계, 이미지 2/3 Neato Botvac D8000 Wheel Replacement, Wheel: 11 단계, 이미지 3/3
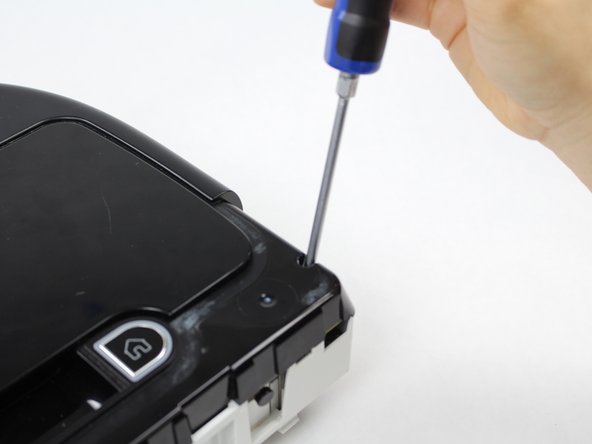
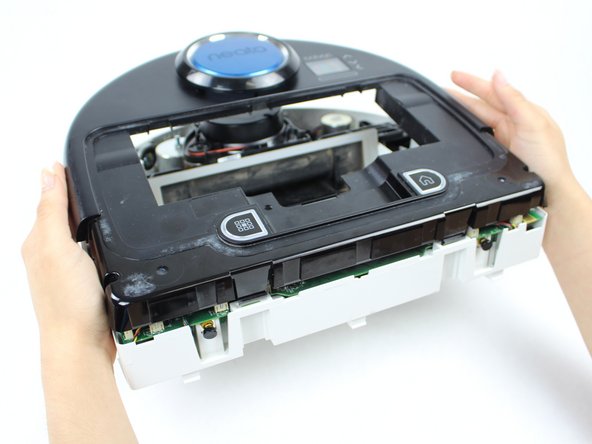
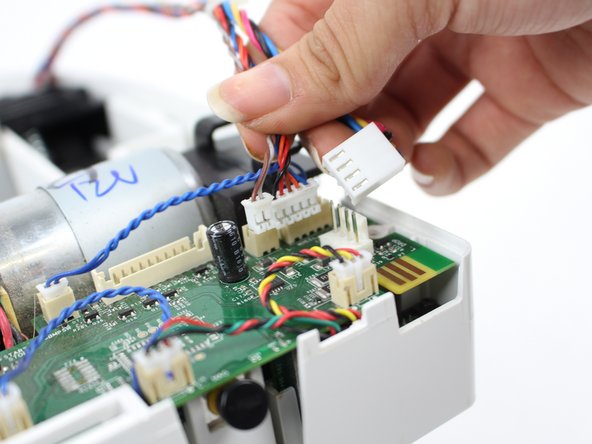
    • Locate the screws that mount the wheel extension to the Robot.

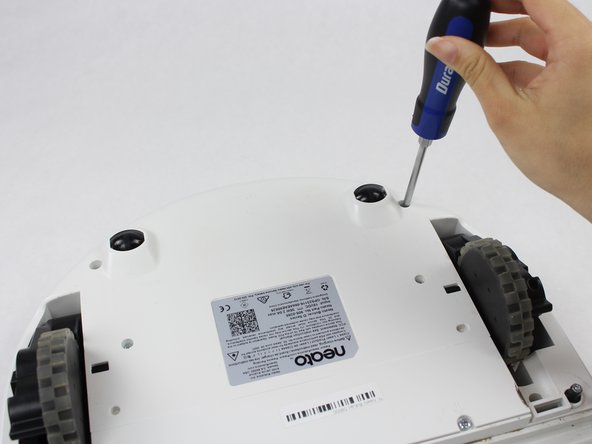
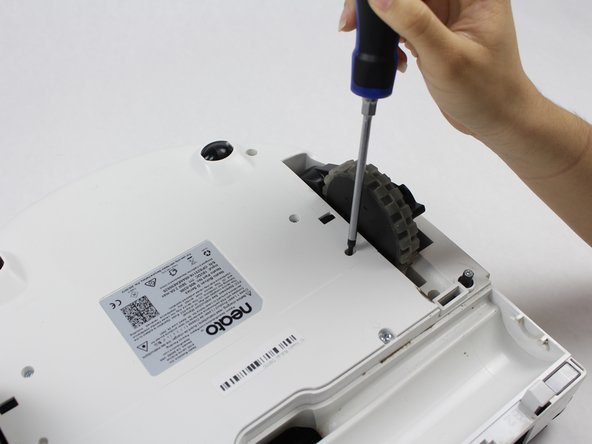
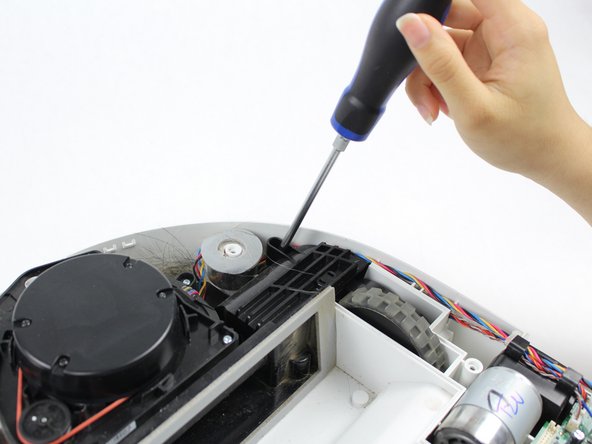
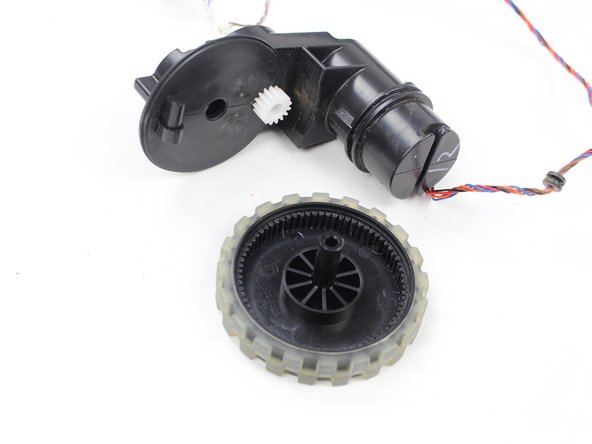
    • Unscrew the four 11mm screws indicated with a Torx T10 screwdriver to remove the frame.

    • Make sure to remove the metallic weight. However, this does not require the removal of any screws.

  12. Neato Botvac D8000 Wheel Replacement: 12 단계, 이미지 1/3 Neato Botvac D8000 Wheel Replacement: 12 단계, 이미지 2/3 Neato Botvac D8000 Wheel Replacement: 12 단계, 이미지 3/3
    • Delicately lift up the frame holding the laser. This will access the wheels.

    • Detach the wheel wires that are connected to the motherboard.

    • Once the wires are detached, the wheel are free from their casing.

  13. Neato Botvac D8000 Wheel Replacement: 13 단계, 이미지 1/2 Neato Botvac D8000 Wheel Replacement: 13 단계, 이미지 2/2
    • Use a Torx T15 screwdriver to remove the 32.5mm screw.

    • Finally, just hold and separate the wheel from its axle.

결론

To reassemble your device, follow these instructions in reverse order.

다른 한 분이 해당 안내서를 완성하였습니다.

Ruth Lopez

회원 가입일: 03/22/18

280 평판

안내서 2개 작성하였습니다

Sam Houston State, Team S17-G6, Blackburne Spring 2018 Sam Houston State, Team S17-G6, Blackburne Spring 2018 회원

SHSU-BLACKBURNE-S18S17G6

4 회원들

안내서 10개 작성하였습니다

댓글 0개

댓글 쓰기

조회 통계:

24 시간 전: 1

7일 전: 5

30일 전: 23

전체 시간: 3,516