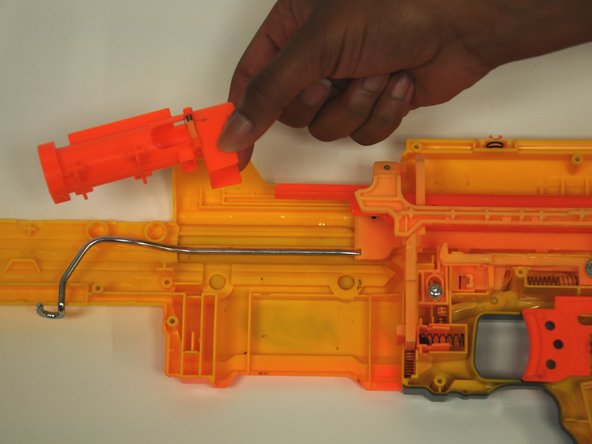
주요 콘텐츠로 건너뛰기

Nerf Alpha Trooper CS-18 Hammer Rod Replacement

필요한 것

  1. Nerf Alpha Trooper CS-18 Hammer Rod Replacement, Plunger: 1 단계, 이미지 1/1
    • It is important to group screws together by length to ensure proper reassembly.

    • Be sure that the device has been discharged and is unloaded before beginning the repair process.

  2. Nerf Alpha Trooper CS-18 Hammer Rod Replacement: 2 단계, 이미지 1/3 Nerf Alpha Trooper CS-18 Hammer Rod Replacement: 2 단계, 이미지 2/3 Nerf Alpha Trooper CS-18 Hammer Rod Replacement: 2 단계, 이미지 3/3
    • Look at the rear of the rifle. Remove the two 10 mm Phillips head screws that hold the black cap to the rear of the rifle.

    • Gently remove the black cap.

  3. Nerf Alpha Trooper CS-18 Hammer Rod Replacement: 3 단계, 이미지 1/2 Nerf Alpha Trooper CS-18 Hammer Rod Replacement: 3 단계, 이미지 2/2
    • Point the barrel of the device to the left, screw side up. Remove the two 8 mm Phillips head screws (the top two) holding the device slide together.

    • Keep the device in the same position, remove the three 10 mm Phillips head screws from the bottom of the device slide.

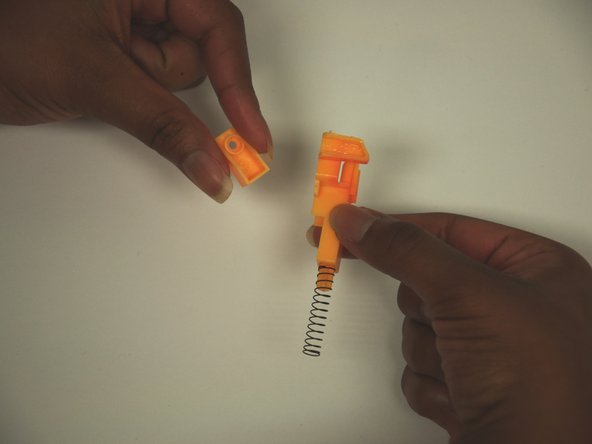
    • Once all screws are removed, carefully separate the two halves of the device slide and put them aside.

    • Be sure to keep track of which screws correspond to the correct holes.

  4. Nerf Alpha Trooper CS-18 Hammer Rod Replacement: 4 단계, 이미지 1/3 Nerf Alpha Trooper CS-18 Hammer Rod Replacement: 4 단계, 이미지 2/3 Nerf Alpha Trooper CS-18 Hammer Rod Replacement: 4 단계, 이미지 3/3
    • Keeping the barrel in the same position as step 3, remove the fourteen 10 mm Phillips head screws from the body of the device.

    • With the device in the same position, remove the 4 remaining 5 mm Phillips head screws from the body of the device.

    • Screws vary in lengths. Be sure to keep track of which screws correspond to the correct holes.

  5. Nerf Alpha Trooper CS-18 Hammer Rod Replacement: 5 단계, 이미지 1/3 Nerf Alpha Trooper CS-18 Hammer Rod Replacement: 5 단계, 이미지 2/3 Nerf Alpha Trooper CS-18 Hammer Rod Replacement: 5 단계, 이미지 3/3
    • Grip the cartridge insert, and pull the two halves of the device apart.

    • Warning! The firing spring is not fastened to the device. It and other small parts may fall out of the device when separating it.

    • If you are having difficulty separating the two halves of the device, use a spudger to pry the two halves apart.

    • Remove the access gate and barrel cover.

  6. Nerf Alpha Trooper CS-18 Hammer Rod Replacement: 6 단계, 이미지 1/1
    • Now remove the main firing spring from the rear of the device by gently pulling it.

  7. Nerf Alpha Trooper CS-18 Hammer Rod Replacement: 7 단계, 이미지 1/2 Nerf Alpha Trooper CS-18 Hammer Rod Replacement: 7 단계, 이미지 2/2
    • Slide the plunger lock back away from the device, then lift out towards yourself to remove.

    • Be careful not to lose the small spring on the top of the plunger lock.

  8. Nerf Alpha Trooper CS-18 Hammer Rod Replacement: 8 단계, 이미지 1/1
    • Pull plunger away in the same motion as in step 7 with the plunger lock.

  9. Nerf Alpha Trooper CS-18 Hammer Rod Replacement, Hammer Rod: 9 단계, 이미지 1/1
    • Remove the two 5 mm Phillips #0 screws holding the muzzle in place.

  10. Nerf Alpha Trooper CS-18 Hammer Rod Replacement: 10 단계, 이미지 1/1
    • Remove the barrel and muzzle assembly from the gun body.

  11. Nerf Alpha Trooper CS-18 Hammer Rod Replacement: 11 단계, 이미지 1/1
    • Remove the 5 mm Phillips #0 screw holding in the chamber lock mechanism.

  12. Nerf Alpha Trooper CS-18 Hammer Rod Replacement: 12 단계, 이미지 1/3 Nerf Alpha Trooper CS-18 Hammer Rod Replacement: 12 단계, 이미지 2/3 Nerf Alpha Trooper CS-18 Hammer Rod Replacement: 12 단계, 이미지 3/3
    • Pull the front chamber lock spring out of its seat.

    • Pull the front chamber lock down and out of the rifle barrel.

    • There are two pieces to this mechanism.

  13. Nerf Alpha Trooper CS-18 Hammer Rod Replacement: 13 단계, 이미지 1/2 Nerf Alpha Trooper CS-18 Hammer Rod Replacement: 13 단계, 이미지 2/2
    • Hold down the spring that locks the chamber to the forward position, then slide the chamber to the rear of the rifle.

    • Remove front barrel guide.

  14. Nerf Alpha Trooper CS-18 Hammer Rod Replacement: 14 단계, 이미지 1/2 Nerf Alpha Trooper CS-18 Hammer Rod Replacement: 14 단계, 이미지 2/2
    • Push the barrel forward and remove the square piece that holds the back of the barrel in place.

  15. Nerf Alpha Trooper CS-18 Hammer Rod Replacement: 15 단계, 이미지 1/1
    • Pull the air cylinder and plunger assembly out of the rifle.

  16. Nerf Alpha Trooper CS-18 Hammer Rod Replacement: 16 단계, 이미지 1/2 Nerf Alpha Trooper CS-18 Hammer Rod Replacement: 16 단계, 이미지 2/2
    • Hold the slide lock down and pull the bullet chamber assembly up and out of the rifle.

    • Part of the magazine lock mechanism should come along with it.

    • The hammer rod mechanism is flipped over in the second picture. The rod should face the front of the gun with the screw facing down.

    • Remove the screw and replace the hammer rod.

결론

To reassemble your device, follow these instructions in reverse order.

다른 한 분이 해당 안내서를 완성하였습니다.

Christian Getsinger

회원 가입일: 02/03/16

131 평판

안내서 1개 작성함

University of Alabama, Team 1-1, Sydow campbell Spring 2016 University of Alabama, Team 1-1, Sydow campbell Spring 2016 회원

UA-SYDOW CAMPBELL-S16S1G1

4 회원들

안내서 3개 작성하였습니다

댓글 0개

댓글 쓰기

조회 통계:

24 시간 전: 0

7일 전: 6

30일 전: 15

전체 시간: 935