주요 콘텐츠로 건너뛰기

이 버전에는 잘못된 편집 사항이 있을 수 있습니다. 최신 확인된 스냅샷으로 전환하십시오.

필요한 것

  1. 이 단계는 번역되지 않았습니다. 번역을 도와주십시오

    : 1 단계, 이미지 1/2 : 1 단계, 이미지 2/2
    • Power off the device by holding the power button until the "Power Off" popup appears. Tap the popup and wait for the device to turn off.

    • Insert a SIM card eject tool or a paper clip into the hole next to the SIM card slot, which is located just under the power button. Do not force the paper clip if it is too thick; instead use the head of a sewing needle.

    • Push the tool into the hole until you see the card pop out.

  2. 이 단계는 번역되지 않았습니다. 번역을 도와주십시오

    : 2 단계, 이미지 1/1
    • Gently remove the SIM card with your fingers, or a pair of tweezers if the SIM holder does not fully eject.

    • Make sure the chip is facing the rear of the phone when reinserting the SIM card.

  3. 이 단계는 번역되지 않았습니다. 번역을 도와주십시오

    : 3 단계, 이미지 1/3 : 3 단계, 이미지 2/3 : 3 단계, 이미지 3/3
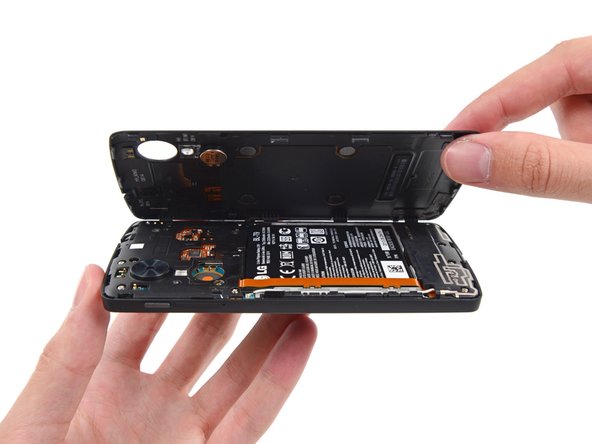
    • Use a plastic opening tool to free the clips on the top and each side of the back cover.

    • The bottom is secured with some adhesive foam. You should be able to finally free the back cover using an opening pick. The "snaps" at the bottom edge are more like hinges, so release all others then swing the back cover off outward from the top, and these fasteners will release without breaking.

    • It's best to avoid prying around the SIM card slot and volume controls, as the plastic in these areas is very thin and likely to break from prying.

    • When you replace the cover, there is a snap about even with the flash window that must also be attached (one of three that secure the back cover to the midframe). Qi (wireless) charging may not work if this isn't secure. Apply gentle but firm pressure over the "S" in "Nexus" and slide your thumb up towards the top, and the snap will engage.

  4. 이 단계는 번역되지 않았습니다. 번역을 도와주십시오

    : 4 단계, 이미지 1/1
    • Remove the six 4.0 mm Phillips #00 screws that secure the midframe to the phone.

    • Ensure you retain all six of the 4.0mm screws! These hold the midframe securely and closely to the motherboard. The three small snaps on the back cover that attach to the midframe ensure the NFC antenna and wireless charging coil connectors contact securely with the motherboard, and work reliably.

    • To replace the LCD screen and digitizer, remove the additional four 4.0mm daughterboard cover screws with the same screwdriver. You may have to pierce through clear adhesive material to remove them.

  5. 이 단계는 번역되지 않았습니다. 번역을 도와주십시오

    : 5 단계, 이미지 1/2 : 5 단계, 이미지 2/2
    • Remove the midframe from the phone.

    • Examine the midframe and the back cover and you'll find three very small snap attachment points for the back to the midframe. These ensure that the NFC and wireless charging antenna contacts connect with the corresponding spring connectors on the motherboard. Ensure the snaps are in good condition.

  6. 이 단계는 번역되지 않았습니다. 번역을 도와주십시오

    : 6 단계, 이미지 1/2 : 6 단계, 이미지 2/2
    이 단계에 사용된 도구:
    Spudger
    $2.99
    구매
    • Use the flat end of a nylon spudger to disconnect the battery connector.

  7. 이 단계는 번역되지 않았습니다. 번역을 도와주십시오

    : 7 단계, 이미지 1/2 : 7 단계, 이미지 2/2
    • Use the flat end of a spudger to disconnect the daughterboard ribbon cable and pull it away from the battery.

  8. 이 단계는 번역되지 않았습니다. 번역을 도와주십시오

    : 8 단계, 이미지 1/3 : 8 단계, 이미지 2/3 : 8 단계, 이미지 3/3
    • Use a plastic opening tool to pry the battery out of its housing.

    • You may need to use a heat gun to apply a small amount of heat to soften the adhesive below the battery.

    • Do not puncture or bend the battery.

    • If replacing the battery, bag the old battery up and recycle responsibly at a suitable location.

  9. 이 단계는 번역되지 않았습니다. 번역을 도와주십시오

    : 9 단계, 이미지 1/2 : 9 단계, 이미지 2/2
    • Use the flat end of a spudger to disconnect the left antenna cable.

  10. 이 단계는 번역되지 않았습니다. 번역을 도와주십시오

    : 10 단계, 이미지 1/2 : 10 단계, 이미지 2/2
    • Use the flat end of a spudger to disconnect the right antenna cable.

    • These must be firmly secured during reassembly. Failure to secure the antenna connections will affect your reception and call quality.

  11. 이 단계는 번역되지 않았습니다. 번역을 도와주십시오

    : 11 단계, 이미지 1/2 : 11 단계, 이미지 2/2
    • Use the flat end of a spudger to disconnect the ribbon cable that connects rear-facing camera to the motherboard.

  12. 이 단계는 번역되지 않았습니다. 번역을 도와주십시오

    : 12 단계, 이미지 1/2 : 12 단계, 이미지 2/2
    • Use the flat end of a spudger to disconnect the front camera ribbon cable.

  13. 이 단계는 번역되지 않았습니다. 번역을 도와주십시오

    : 13 단계, 이미지 1/2 : 13 단계, 이미지 2/2
    • Gently lift the motherboard up and out of the device.

  14. 이 단계는 번역되지 않았습니다. 번역을 도와주십시오

    : 14 단계, 이미지 1/3 : 14 단계, 이미지 2/3 : 14 단계, 이미지 3/3
    • Insert a spudger into an opening between the daughterboard and plastic housing.

    • Lift the daughterboard cover up and off the frame.

    • If Jeff, Max, Cole, Corey, Guy, Leslie, Harry, or Matt were already here, consider searching your device for surveillance bugs.

  15. 이 단계는 번역되지 않았습니다. 번역을 도와주십시오

    : 15 단계, 이미지 1/3 : 15 단계, 이미지 2/3 : 15 단계, 이미지 3/3
    • Use the flat end of a nylon spudger to pry the white and black antenna connectors up off the daughterboard.

    • These must be firmly secured during reassembly. Failure to secure the antenna connections will affect your reception and call quality.

  16. 이 단계는 번역되지 않았습니다. 번역을 도와주십시오

    : 16 단계, 이미지 1/2 : 16 단계, 이미지 2/2
    • Use the flat end of a nylon spudger to pry the digitizer ZIF connector up off the daughterboard.

  17. 이 단계는 번역되지 않았습니다. 번역을 도와주십시오

    : 17 단계, 이미지 1/3 : 17 단계, 이미지 2/3 : 17 단계, 이미지 3/3
    • Insert a nylon spudger into an opening beneath the daughterboard and pry it up to free it from the frame.

    • The frame around the micro-USB port is very fragile—take care not to break this small plastic bridge.

    • Do not disconnect the daughterboard entirely. Gently fold it to the side of the phone.

  18. 이 단계는 번역되지 않았습니다. 번역을 도와주십시오

    : 18 단계, 이미지 1/1
    • Use an iOpener or heat gun and carefully apply heat to the digitizer panel to soften the adhesive that secures it to the frame.

    • Hold the heat gun approximately 8-10 inches from the device and apply heat in a gentle back-and-forth motion.

  19. 이 단계는 번역되지 않았습니다. 번역을 도와주십시오

    : 19 단계, 이미지 1/2 : 19 단계, 이미지 2/2
    • Work the flat end of a nylon spudger under the digitizer panel. Gently pry the panel up to free it from the adhesive.

    • The phone may be too hot to touch from the heat gun. Allow a moment for it to cool to avoid burning your fingers.

  20. 이 단계는 번역되지 않았습니다. 번역을 도와주십시오

    : 20 단계, 이미지 1/2 : 20 단계, 이미지 2/2
    • Use a heat gun or an iOpener to soften the adhesive along the edges of the screen.

  21. 이 단계는 번역되지 않았습니다. 번역을 도와주십시오

    : 21 단계, 이미지 1/2 : 21 단계, 이미지 2/2
    • Use a suction cup to firmly pull the screen away from the frame.

    • The Nexus 5 has a very thin layer of adhesive. This should not require excessive force. Apply additional heat as needed to soften the screen adhesive.

  22. 이 단계는 번역되지 않았습니다. 번역을 도와주십시오

    : 22 단계, 이미지 1/2 : 22 단계, 이미지 2/2
    • Insert an opening pick in the gap between the screen and the frame.

    • Work the opening pick along the edges of the screen to break any remaining adhesive and free the screen assembly.

  23. 이 단계는 번역되지 않았습니다. 번역을 도와주십시오

    : 23 단계, 이미지 1/3 : 23 단계, 이미지 2/3 : 23 단계, 이미지 3/3
    • Gently remove the LCD screen and digitizer assembly.

    • Carefully feed the digitizer ribbon cable through the frame.

결승점

다른 44명이 해당 안내서를 완성하였습니다.

Richard

회원 가입일: 02/07/17

29,925 평판

안내서 11개 작성하였습니다

iFixit iFixit 회원

Staff

135 회원들

안내서 16,757개 작성하였습니다

댓글 10개

This is a nice guide to understand how to disassemble and assemble your Nexus 5. 95% can be done with this guide.

Tip: read the comments!

My own tips are:

1) Search for instructions how to use glue or double sided adhesive tape. It's a must if you want succesfully put everything back together

2) You need to transfer the speaker protection from the inside of the glass to the new glass

3) The same needs to be done with with a white rectangle. It has something to do with your LED-light at the bottom.

Saw these tips in this YouTube video https://youtu.be/jQS618ayL5w

Jeroen Meyer - 답글

Thanks for the extra tips, Jeroen! These two steps can be found at 2:50 of the video for those who want to skip right to it. ;)

We do supply the tape as well: Tesa 61395 Tape

By the way, does the guy in this video remind anyone else of Thrawn from Star Wars Rebels (aka Lars Mikkelsen?)

Richard -

Hey, what size do I need for the tape? Is the mm size referring to width or thickness?

I assume it’s width and I need 1mm or 2mm to repair my Nexus 5, but which one?

Carsten Pfeifer -

I need a little help with this tutorial. I’ve bought a second hand N5 where someone replaced the screen, now the display lifts off slightly in the bottom left corner of the device. Pushing it back will only hold it in for a few minutes. Should I slide a tiny piece of double-sided adhesive tape underneath, or rather some modelmaking glue?

Ste Se - 답글

The new screen is not adhered as the old one was.. not sure what I would use for that. Not terribly important for me since it sits 99% flush, and lives in an enclosed case, but the guide should probably mention this.

Kristen McWilliam - 답글

댓글 쓰기

조회 통계:

24 시간 전: 1

7일 전: 7

30일 전: 59

전체 시간: 34,907