주요 콘텐츠로 건너뛰기

Nexus 5 NFC Board Replacement

필요한 것

  1. Nexus 5 NFC Board Replacement, Back Cover: 1 단계, 이미지 1/3 Nexus 5 NFC Board Replacement, Back Cover: 1 단계, 이미지 2/3 Nexus 5 NFC Board Replacement, Back Cover: 1 단계, 이미지 3/3
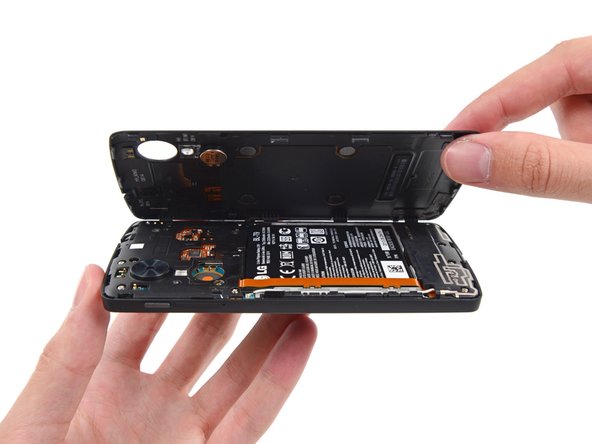
    • Use a plastic opening tool to free the clips on the top and each side of the back cover.

    • The bottom is secured with some adhesive foam. You should be able to finally free the back cover using an opening pick. The "snaps" at the bottom edge are more like hinges, so release all others then swing the back cover off outward from the top, and these fasteners will release without breaking.

    • It's best to avoid prying around the SIM card slot and volume controls, as the plastic in these areas is very thin and likely to break from prying.

    • When you replace the cover, there is a snap about even with the flash window that must also be attached (one of three that secure the back cover to the midframe). Qi (wireless) charging may not work if this isn't secure. Apply gentle but firm pressure over the "S" in "Nexus" and slide your thumb up towards the top, and the snap will engage.

  2. Nexus 5 NFC Board Replacement, Midframe: 2 단계, 이미지 1/1
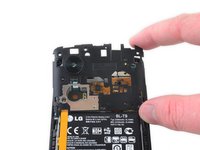
    • Remove the six 4.0 mm Phillips #00 screws that secure the midframe to the phone.

    • Ensure you retain all six of the 4.0mm screws! These hold the midframe securely and closely to the motherboard. The three small snaps on the back cover that attach to the midframe ensure the NFC antenna and wireless charging coil connectors contact securely with the motherboard, and work reliably.

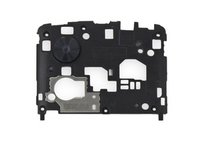
    • To replace the LCD screen and digitizer, remove the additional four 4.0mm daughterboard cover screws with the same screwdriver. You may have to pierce through clear adhesive material to remove them.

  3. Nexus 5 NFC Board Replacement: 3 단계, 이미지 1/2 Nexus 5 NFC Board Replacement: 3 단계, 이미지 2/2
    • Remove the midframe from the phone.

    • Examine the midframe and the back cover and you'll find three very small snap attachment points for the back to the midframe. These ensure that the NFC and wireless charging antenna contacts connect with the corresponding spring connectors on the motherboard. Ensure the snaps are in good condition.

  4. Nexus 5 NFC Board Replacement, Battery: 4 단계, 이미지 1/2 Nexus 5 NFC Board Replacement, Battery: 4 단계, 이미지 2/2
    • Use the flat end of a spudger to disconnect the battery connector.

  5. Nexus 5 NFC Board Replacement, NFC Board: 5 단계, 이미지 1/1
    • Use a plastic opening tool to disconnect the NFC board ribbon cable.

    • Although the battery is not disconnected in the photos of this step and the next, it's a good idea to disconnect it to prevent any possible damage to the motherboard and NFC board.

  6. Nexus 5 NFC Board Replacement: 6 단계, 이미지 1/1
    • Gently lift the NFC board up and away from the device.

결론

To reassemble your device, follow these instructions in reverse order.

다른 13명이 해당 안내서를 완성하였습니다.

Chris Willis

회원 가입일: 10/03/14

1,371 평판

안내서 3개 작성하였습니다

USF Tampa, Team 13-4, Staggers Fall 2014 USF Tampa, Team 13-4, Staggers Fall 2014 회원

USFT-STAGGERS-F14S13G4

3 회원들

안내서 13개 작성하였습니다

댓글 2개

There seems to be a few revisions of the NFC board

My original has the part number EAX65371601_1.1

The replacement parts I received were EAX65371601_E and EAX65371601_1.1. Neither of which work. The NFC slider will not stay in the ON position. Looking at the logcat show some cryptic errors.

Has anyone had any success in replacing the NFC board, if so what version was the original and the replacement?

Paul H - 답글

My NFC slider under Settings, Wireless & networks, More… also won’t stay. The phone has taken some abuse, so not surprised if something’s awry. BUT wireless (Qi) charging does work … I wonder if the NFC Board connector carries both of these, so if NFC is bad, but Qi charging is good, it’s not the board…? Anyone troubleshot and fixed these same symptoms?

David Spalding - 답글

댓글 쓰기

조회 통계:

24 시간 전: 0

7일 전: 0

30일 전: 10

전체 시간: 14,438