주요 콘텐츠로 건너뛰기

이 안내서에는 최근 변경 사항이 더 있습니다. 최신 비검증 버전으로 전환하십시오.

Nexus S Rear Inner Frame Replacement

필요한 것

  1. Nexus S Rear Inner Frame Replacement, Rear Panel: 1 단계, 이미지 1/1
    • Gently insert a plastic opening tool between the rear panel and the inner rear frame near the rear-facing camera.

    • Use your plastic opening tool to pry up the rear case around the perimeter of the Nexus S.

  2. Nexus S Rear Inner Frame Replacement: 2 단계, 이미지 1/1
    • Remove the rear panel from the Nexus S.

  3. Nexus S Rear Inner Frame Replacement, Battery: 3 단계, 이미지 1/1
    • Using the edge of a plastic opening tool, lift the battery from the end closest to the headphone jack.

    • Remove the battery from the Nexus S.

  4. Nexus S Rear Inner Frame Replacement, SIM Card: 4 단계, 이미지 1/2 Nexus S Rear Inner Frame Replacement, SIM Card: 4 단계, 이미지 2/2
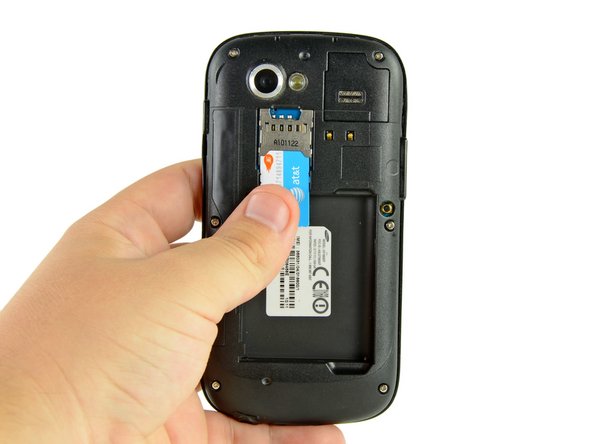
    • Use your thumb to slide the SIM card downwards from the SIM card slot.

    • Remove the SIM card.

  5. Nexus S Rear Inner Frame Replacement, Rear Inner Frame: 5 단계, 이미지 1/1
    • Remove the six Phillips screws securing the rear inner frame to the inner case.

  6. Nexus S Rear Inner Frame Replacement: 6 단계, 이미지 1/1
    • Insert the flat edge of a plastic opening tool in between the rear inner frame and the top left corner of the Nexus S.

    • Pry the opening tool upwards to pop the top right corner from the clips securing it to the inner assembly.

  7. Nexus S Rear Inner Frame Replacement: 7 단계, 이미지 1/2 Nexus S Rear Inner Frame Replacement: 7 단계, 이미지 2/2
    • Insert the plastic opening tool to the right of the power button.

    • Slide the plastic opening tool downwards along the perimeter of the Nexus S to release the clips on the right side.

  8. Nexus S Rear Inner Frame Replacement: 8 단계, 이미지 1/2 Nexus S Rear Inner Frame Replacement: 8 단계, 이미지 2/2
    • In the same manner as previously described, release the bottom clips located near the bottom of the Nexus S.

  9. Nexus S Rear Inner Frame Replacement: 9 단계, 이미지 1/1
    • Insert and pry the plastic opening tool to release the final clip securing the rear inner frame to the inner assembly.

  10. Nexus S Rear Inner Frame Replacement: 10 단계, 이미지 1/1
    • Lift and remove the rear inner frame from the Nexus S.

  11. Nexus S Rear Inner Frame Replacement, Rear Inner Frame: 11 단계, 이미지 1/1
    • Rear inner frame remains.

결론

To reassemble your device, follow these instructions in reverse order.

다른 4명이 해당 안내서를 완성하였습니다.

Walter Galan

694,561 평판

안내서 1,203개 작성하였습니다

댓글 0개

댓글 쓰기

조회 통계:

24 시간 전: 0

7일 전: 0

30일 전: 0

전체 시간: 3,013